Manual:Creating renderings/pl: Difference between revisions
(Created page with "Na tym ekranie preferencji możemy również ustawić żądany rozmiar obrazu, który chcemy wygenerować.") |
(Created page with "===Renderowanie przy użyciu PovRay===") |
||
| Line 29: | Line 29: | ||
Na tym ekranie preferencji możemy również ustawić żądany rozmiar obrazu, który chcemy wygenerować. |
Na tym ekranie preferencji możemy również ustawić żądany rozmiar obrazu, który chcemy wygenerować. |
||
<span id="Rendering_with_PovRay"></span> |
|||
=== Rendering with PovRay === |
|||
===Renderowanie przy użyciu PovRay=== |
|||
We will use the table we have been modelling in the [[Manual:Traditional modeling, the CSG way|traditional modeling]] chapter to produce renderings with PovRay and Luxrender. |
We will use the table we have been modelling in the [[Manual:Traditional modeling, the CSG way|traditional modeling]] chapter to produce renderings with PovRay and Luxrender. |
||
Revision as of 12:13, 6 March 2024
- Słowo wstępne
- Odkrywamy FreeCAD
- Praca z FreeCAD
- Skrypty środowiska Python
- Społeczność
W słownictwie komputerowym słowo rendering jest używane do opisania ładnego obrazu stworzonego z modelu 3D. Oczywiście możemy powiedzieć, że to, co widzimy w widoku FreeCAD 3D, jest już przyjemne do oglądania. Jednak każdy, kto widział ostatni hollywoodzki film, wie, że możliwe jest tworzenie obrazów za pomocą komputera, które są prawie nie do odróżnienia od fotografii.
Oczywiście tworzenie fotorealistycznych obrazów wymaga dużo pracy, a także aplikacji 3D, która oferuje specjalne narzędzia do tego celu, takie jak precyzyjne sterowanie materiałami i oświetleniem. Ponieważ FreeCAD jest aplikacją ukierunkowaną bardziej na modelowanie techniczne, nie zawiera żadnych zaawansowanych narzędzi do renderowania.
+ Na szczęście świat open source oferuje wiele aplikacji do tworzenia realistycznych obrazów. Najbardziej znanym z nich jest prawdopodobnie Blender, który jest bardzo popularny i szeroko stosowany w branży filmowej i gier. Modele 3D można bardzo łatwo i wiernie wyeksportować z FreeCAD i zaimportować do Blendera, gdzie można dodać realistyczne materiały i oświetlenie, a następnie stworzyć ostateczne obrazy, a nawet animacje.
Niektóre inne narzędzia renderujące typu open source są przeznaczone do użytku w innych aplikacjach i zajmują się wykonywaniem złożonych obliczeń w celu uzyskania realistycznych obrazów. Poprzez środowisko pracy Raytracing, FreeCAD może korzystać z dwóch z tych narzędzi renderujących: POV-Ray i Luxrender. POV-Ray jest bardzo starym projektem i jest uważany za klasyczny silnik raytracingu, podczas gdy Luxrender jest znacznie nowszy i jest klasyfikowany jako unbiased renderer. Oba mają swoje mocne i słabe strony, w zależności od rodzaju obrazu, który chcemy renderować. Najlepszym sposobem, aby się o tym przekonać, jest zapoznanie się z przykładami na stronie internetowej każdego z silników.
Instalacja
Aby móc korzystać ze środowiska Raytracing w FreeCAD, jedna z tych dwóch aplikacji do renderowania musi być zainstalowana w systemie. Zazwyczaj jest to bardzo proste. Obie dostarczają instalatory dla wielu platform lub są zwykle zawarte w repozytoriach oprogramowania większości dystrybucji Linuksa.
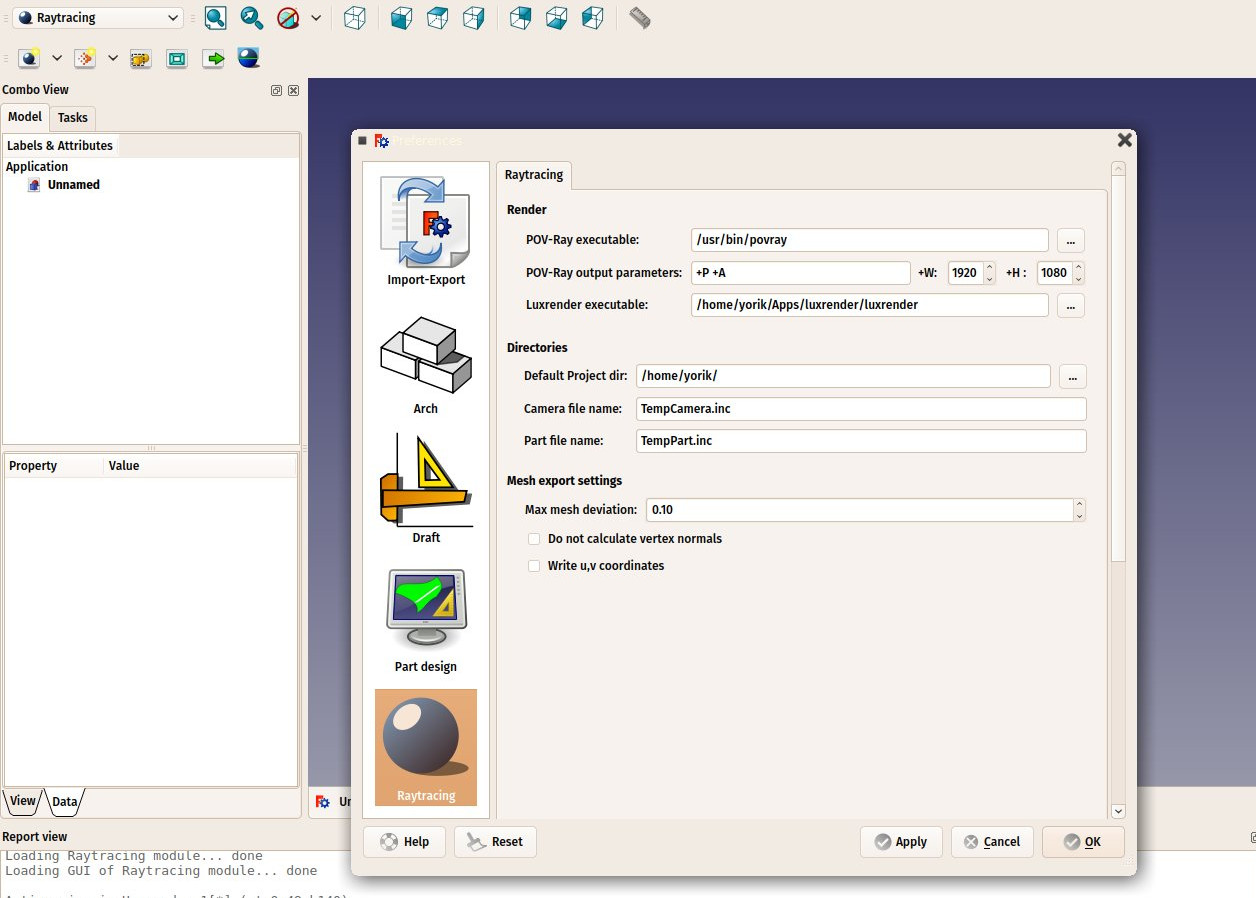
Po zainstalowaniu POV-Ray lub Luxrender, musimy ustawić ścieżkę do ich głównego pliku wykonywalnego w preferencjach FreeCAD. Zazwyczaj jest to wymagane tylko w systemach Windows i Mac. W systemie Linux FreeCAD wybierze go ze standardowych lokalizacji. Lokalizację plików wykonywalnych povray lub luxrender można znaleźć, wyszukując w systemie pliki o nazwie povray (lub povray.exe w systemie Windows) i luxrender (lub luxrender.exe w systemie Windows).
Na tym ekranie preferencji możemy również ustawić żądany rozmiar obrazu, który chcemy wygenerować.
Renderowanie przy użyciu PovRay
We will use the table we have been modelling in the traditional modeling chapter to produce renderings with PovRay and Luxrender.
- Start by loading the table.FCStd file that we modelled earlier or from the link at the bottom of this chapter.
- Press the small down arrow next to the
New Povray project button, and choose the RadiosityNormal template
- A warning message might appear telling you that the current 3D view is not in perspective mode and the rendering will therefore differ. Correct this by choosing No, choosing menu View->Perspective view and choosing the RadiosityNormal template again.
- You can also try other templates after you create a new project, simply by editing its Template property.
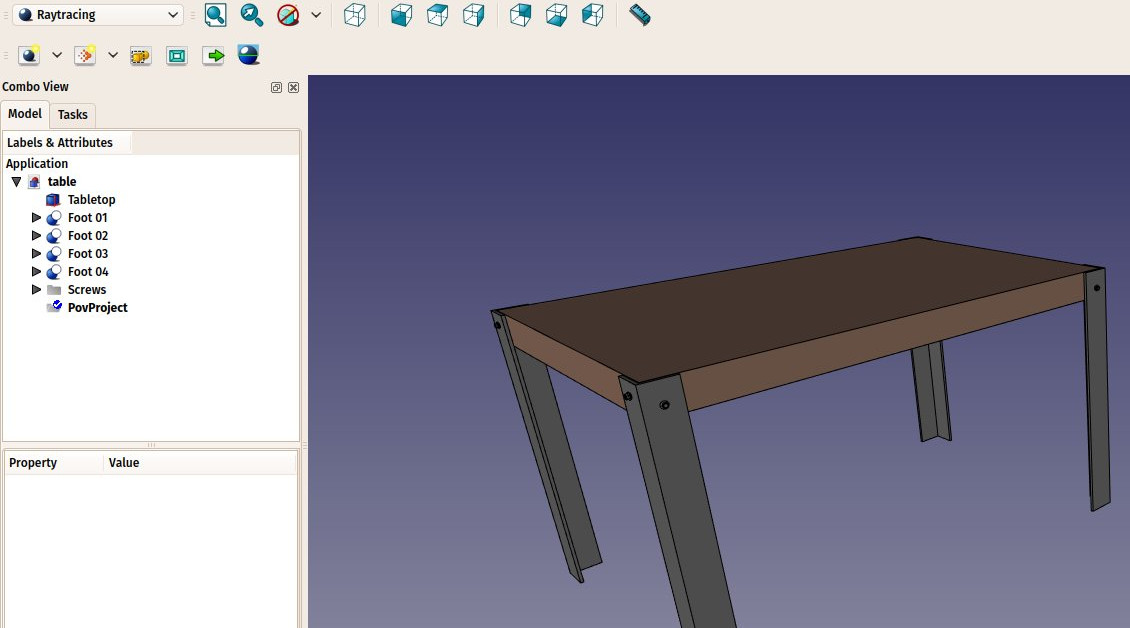
- A new project has now been created:
- The new project has adopted the point of view of the 3D view as it was at the moment we pressed the button. We can change the view, and update the view position stored in the Povray project anytime, by pressing the
Reset camera button.
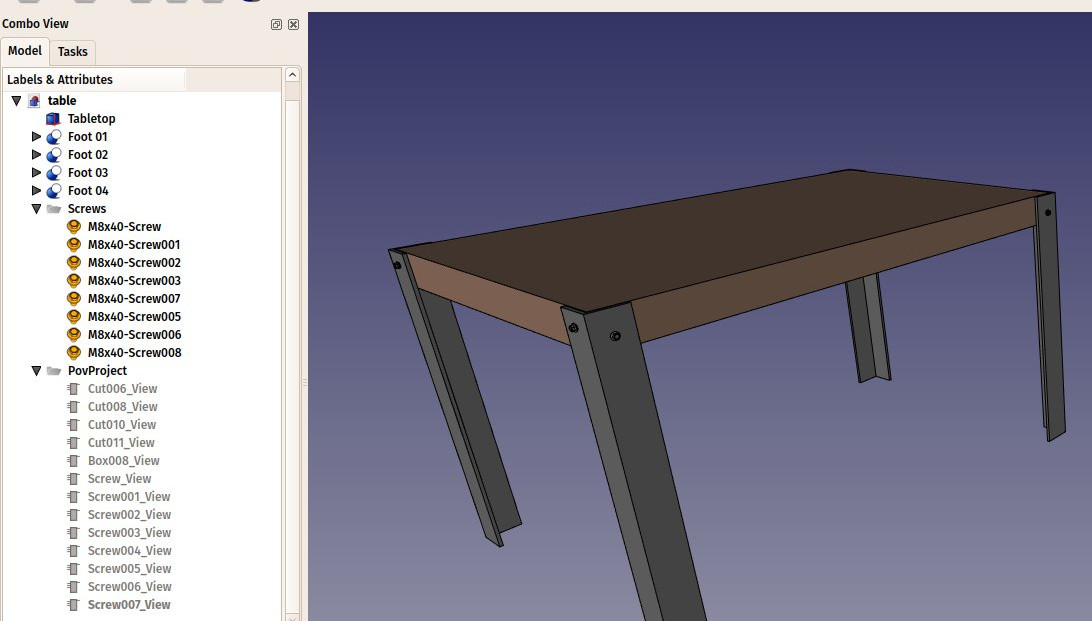
- The Raytracing Workbench works the same way as the Drawing Workbench: Once a project folder is created, we must add Views of our objects to it. We can now do that by selecting all the objects that compose the table, and press the
Insert part button:
- The views have taken the color and transparency values from their original parts, but you can change that in the properties of each individual view if you wish.
- We are now ready to produce our first Povray render. Press the
Render button.
- Note for windows users: when receiving (in Povray) a warning saying "I/O restrictions prohibit write access ..."
- open Povray
- choose "Options > Script I/O Restrictions" and make sure it is set to "No Restrictions"
- retry render
- You will be asked to give a file name and path for the .png image that will be saved by Povray.
- Povray will then open and calculate the image.
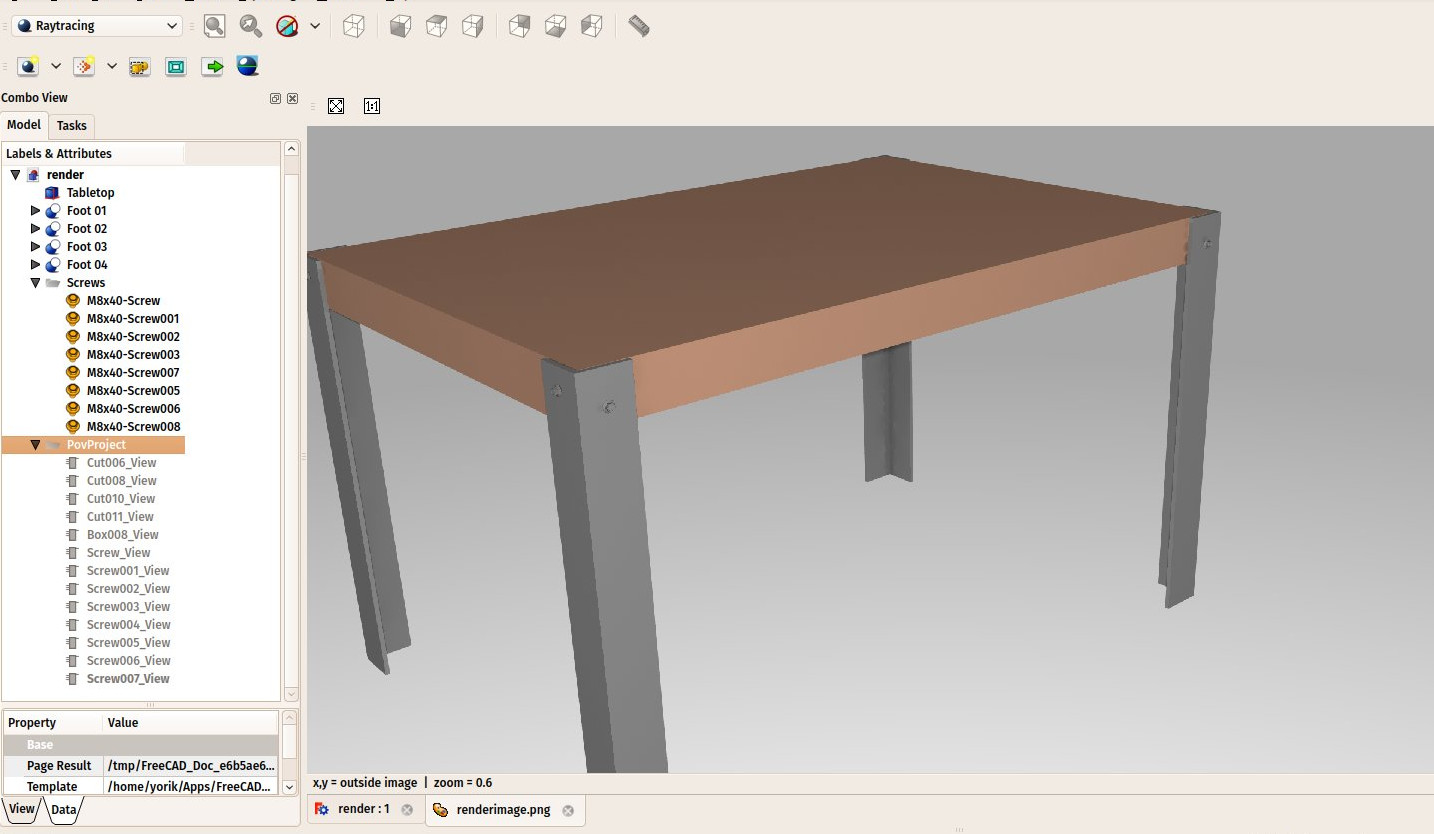
- When this is done, click the image to close the Povray window. The resulting image will be loaded in FreeCAD:
Rendering with LuxRender
- Rendering with Luxrender works almost the same way. We can leave our file open and create a new Luxrender project in the same file, or reload it to start from scratch.
- Press the little down arrow next to the
New Luxrender project button and choose the LuxOutdoor template.
- Select all the components of the table. If you still have the Povray project in your document, be sure to also select the Luxrender project itself, so the views created in the next step won't go in the wrong project by mistake.
- Press the
Insert part button.
- Select the Luxrender project, and press the
Render button.
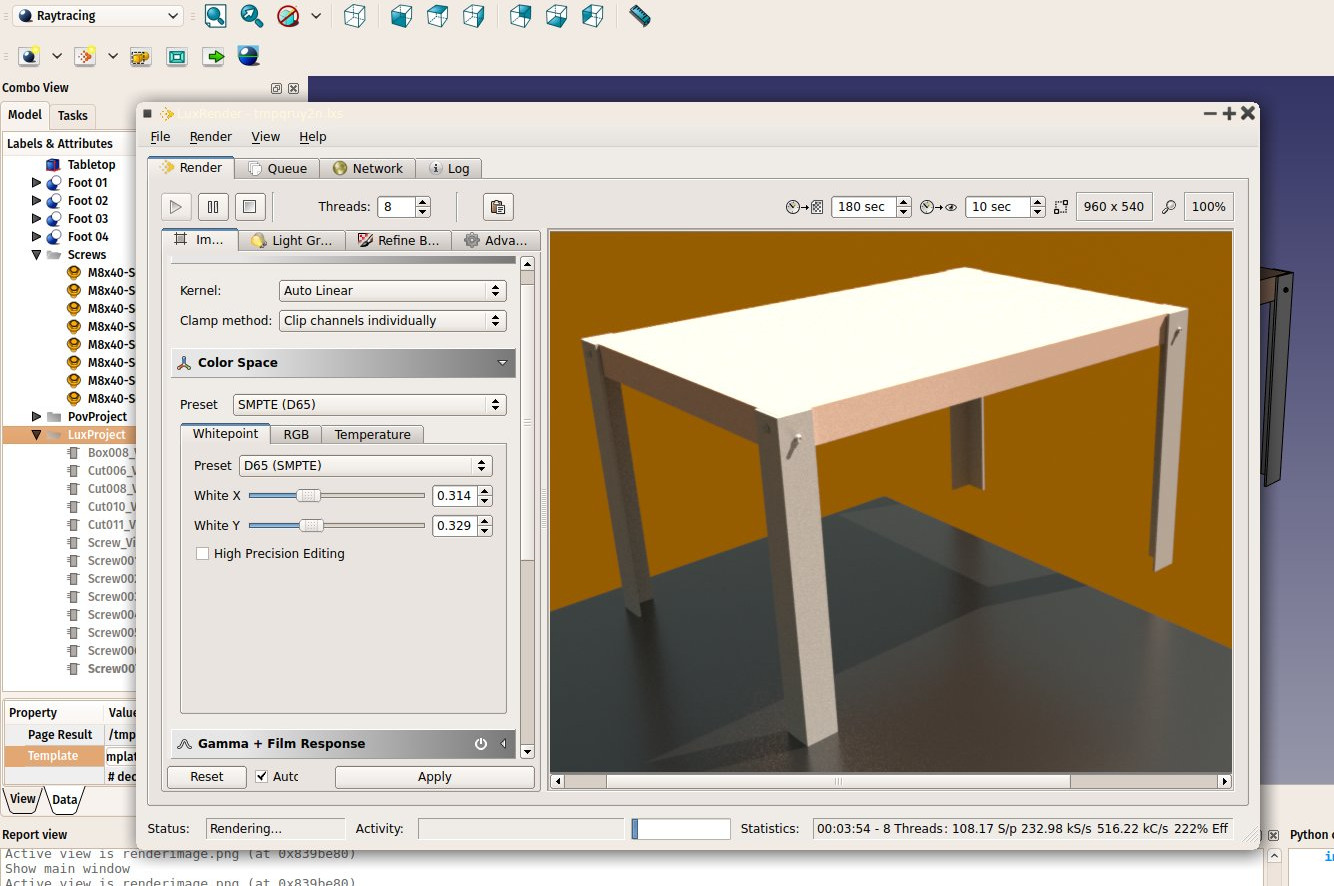
- Luxrender works differently to Povray. When you start the render, the Luxrender application will open and immediately start rendering:
- If you leave that window open, Luxrender will continue calculating and rendering forever, progressively refining the image. It is up to you to decide when the image has reached a sufficient quality for your needs, and stop the render.
- There are also many controls to play with, on the left panel. All these controls will change the aspect of the image being rendered on the fly, without stopping the rendering.
- When you feel the quality is good enough, press Render->stop, and then File->Export to image->Tonemapped low dynamic range to save the rendered image to a png file.
You can greatly extend the rendering possibilities of FreeCAD by creating new templates for Povray or Luxrender. This is explained in the Raytracing Workbench documentation.
Downloads
- The table model: https://github.com/yorikvanhavre/FreeCAD-manual/blob/master/files/table.FCStd
- The file produced during this exercise: https://github.com/yorikvanhavre/FreeCAD-manual/blob/master/files/render.FCStd
Read more
- Przybory: Nowy projekt Raytracing, Nowy projekt Luxrender, Wstaw część, Resetuj ujęcie widoku, Eksport projektu, Renderowanie
- Narzędzia: Eksport widoku, Eksport ujęcia widoku, Eksport Części
- Dodatkowe: Ustawienia
- Jak zacząć
- Instalacja: Pobieranie programu, Windows, Linux, Mac, Dodatkowych komponentów, Docker, AppImage, Ubuntu Snap
- Podstawy: Informacje na temat FreeCAD, Interfejs użytkownika, Profil nawigacji myszką, Metody wyboru, Nazwa obiektu, Edytor ustawień, Środowiska pracy, Struktura dokumentu, Właściwości, Pomóż w rozwoju FreeCAD, Dotacje
- Pomoc: Poradniki, Wideo poradniki
- Środowiska pracy: Strona Startowa, Architektura, Assembly, CAM, Rysunek Roboczy, MES, Inspekcja, Siatka, OpenSCAD, Część, Projekt Części, Punkty, Inżynieria Wsteczna, Robot, Szkicownik, Arkusz Kalkulacyjny, Powierzchnia 3D, Rysunek Techniczny, Test Framework
