CAM Vcarve/pl: Difference between revisions
(Created page with "===Przygotowanie kształtów do grawerowania===") |
(Created page with "===Widok===") |
||
| Line 118: | Line 118: | ||
* {{PropertyData|Visibility}}: - |
* {{PropertyData|Visibility}}: - |
||
= |
<span id="View"></span> |
||
===Widok=== |
|||
Empty |
Empty |
||
Revision as of 18:59, 31 October 2023
|
|
| Lokalizacja w menu |
|---|
| Ścieżka → Wycięcie V |
| Środowisko pracy |
| CAM |
| Domyślny skrót |
| brak |
| Wprowadzono w wersji |
| 0.19 |
| Zobacz także |
| brak |
Opis
Narzędzie Wycięcie V służy przede wszystkim do grawerowania w linii środkowej
Kształtu z tekstu na części. Jednakże, może być przydatne dla innych rodzajów operacji 2D.
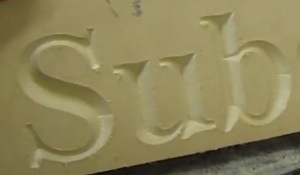
W przeciwieństwie do grawerowania, które podąża za liniami w obrysie, Wycięcie V wykorzystuje frez w kształcie litery V i próbuje oczyścić obszar, przesuwając frez w dół środka obszaru i zmieniając głębokość cięcia. Ponieważ promień frezu w kształcie litery V zmienia się wraz z głębokością, zmienia się również szerokość cięcia. Rezultatem jest bardziej naturalnie wyglądające cięcie, szczególnie w przypadku czcionek szeryfowych.
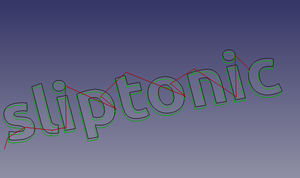
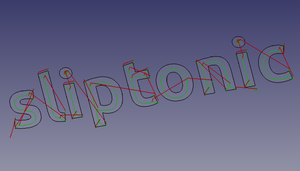
Algorytm Wycięcie V oblicza ścieżkę wzdłuż linii środkowej regionu przy użyciu diagramu Woronoja. Ta linia środkowa jest ścieżką, którą narzędzie będzie podążać w płaszczyźnie XY. Następnie oblicza "maksymalny wpisany okrąg" wzdłuż ścieżki. Jest to największy okrąg, jaki można narysować w tym punkcie i pozostać całkowicie wewnątrz obszaru oczyszczania. Korzystając z promienia okręgu i kąta wierzchołkowego frezu, obliczana jest głębokość cięcia.
Użycie
Przygotowanie kształtów do grawerowania
Draft ShapeStrings are usable out of the box
- SVG files require some massaging, both in the editor and in the
Draft Workbench:
- In the editor (e.g. Inkscape): make sure the file only contains paths and that the paths are ungrouped; make sure there are no self-intersecting paths, (in Inkscape) use Path → Simplify and union to join paths that overlap.
- Switch to the
Draft Workbench in workbench dropdown list
- Import the SVG using File → Import → select "SVG as geometry"
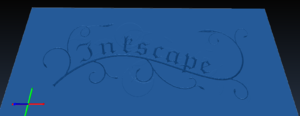
- The result should look similar to this:
- Paths with holes (letters, the vine in the image above) are imported as 2 separate paths (named along the lines of
Path905andPath905001in the Tree view), one of them is the hole and the other one is the outline; we'll deal with this in the next step
- Paths with holes (letters, the vine in the image above) are imported as 2 separate paths (named along the lines of
- In order to get the 2D faces, Path Vcarve needs:
- For paths without holes:
- For paths with holes:
- Select the outer path, then the inner path
- Choose Modification →
Downgrade twice
- In order to get the 2D faces, Path Vcarve needs:
Create the Vcarve operation
- Switch to the
Path Workbench in the workbench dropdown menu
- Add a job, use the objects named
Face<number>(or the ShapeString) as a base, add a v-bit tool controller, set feeds, speeds, etc. - The operation only supports one object (either a single Face object, or a ShapeString) so for each object:
- Select Path →
Vcarve from the top menu. This opens the configuration panel.
- Open the Base Geometry tab and add all faces of the ShapeString, or the face of a single Face object obtained above
- Press Apply and inspect the generated path; if necessary, adjust operation parameters (Threshold can be set higher in most situations)
- Press OK to finish
- Select Path →
Options
Empty
Properties
Data
Base
- DANEPlacement: -
- DANELabel: -
Depth
- DANEClearanceHeight: -
- DANEFinalDepth: -
- DANESafeHeight: -
- DANEStartDepth: -
- DANEStepDown: -
Op Values
- DANEOpFinalDepth: -
- DANEOpStartDepth: -
- DANEOpStockZMax: -
- DANEOpStockZMin: -
- DANEOpToolDiameter: -
Path
- DANEActive: -
- DANEComment: -
- DANECoolantMode: -
- DANEStartVertex: -
- DANEToolController: -
- DANEUserLabel: -
Hidden
- DANEBase: -
- DANEBaseObject: -
- DANEBaseShapes: -
- DANEExpressionEngine: -
- DANELabel2: -
- DANEPath: -
- DANEProxy: -
- DANEVisibility: -
Widok
Empty
Scripting
See also: FreeCAD Scripting Basics.
Example:
#Place code example here.
- Jak zacząć
- Instalacja: Pobieranie programu, Windows, Linux, Mac, Dodatkowych komponentów, Docker, AppImage, Ubuntu Snap
- Podstawy: Informacje na temat FreeCAD, Interfejs użytkownika, Profil nawigacji myszką, Metody wyboru, Nazwa obiektu, Edytor ustawień, Środowiska pracy, Struktura dokumentu, Właściwości, Pomóż w rozwoju FreeCAD, Dotacje
- Pomoc: Poradniki, Wideo poradniki
- Środowiska pracy: Strona Startowa, Architektura, Assembly, CAM, Rysunek Roboczy, MES, Inspekcja, Siatka, OpenSCAD, Część, Projekt Części, Punkty, Inżynieria Wsteczna, Robot, Szkicownik, Arkusz Kalkulacyjny, Powierzchnia 3D, Rysunek Techniczny, Test Framework

