Tutorials/zh-cn: Difference between revisions
(Created page with "FreeCAD提供了两种主要工作流程来实现零件造型(modeling part): * 组合对象(combining objects)零件工作台(Part workbench)中...") |
(Updating to match new version of source page) |
||
| (84 intermediate revisions by 4 users not shown) | |||
| Line 1: | Line 1: | ||
<languages/> |
<languages/> |
||
{{Docnav |
|||
|[[Frequently_asked_questions|FAQ]] |
|||
|[[Interface_Customization|Interface Customization]] |
|||
}} |
|||
{{TOCright}} |
|||
<div class="mw-translate-fuzzy"> |
|||
本页展示了一系列精选的高质量图文教程。完整无序的教程集可以在[[:Category:Tutorials]]找到。 |
本页展示了一系列精选的高质量图文教程。完整无序的教程集可以在[[:Category:Tutorials]]找到。 |
||
</div> |
|||
可通过访问[[offsite tutorials|离站教程]] 与 [[video tutorials|视频教程]]来查阅外网提供的系列教程。[https://YouTube.com YouTube]是一个极有用的视频教程源。 |
|||
<div class="mw-translate-fuzzy"> |
|||
如果您希望为FreeCAD维基文档与教程的编写做出贡献,请参考维基的通用指南[[WikiPages]],并阅读[[tutorial guidelines]]。 |
如果您希望为FreeCAD维基文档与教程的编写做出贡献,请参考维基的通用指南[[WikiPages]],并阅读[[tutorial guidelines]]。 |
||
</div> |
|||
请注意每个教程中所用的FreeCAD版本,因为有些教程采用的是老版FreeCAD。尽管常规的建模方式在新版FreeCAD中依然可行,但是某些工具却可能已经发生了变化。 |
请注意每个教程中所用的FreeCAD版本,因为有些教程采用的是老版FreeCAD。尽管常规的建模方式在新版FreeCAD中依然可行,但是某些工具却可能已经发生了变化。 |
||
See also [[Video_tutorials|video tutorials]] and [[Books|books]]. |
|||
<span id="Architecture_and_BIM"></span> |
|||
==建筑物与BIM== |
==建筑物与BIM== |
||
<gallery mode=packed heights=200px style="font-size:1.1em"> |
<gallery mode=packed heights=200px style="font-size:1.1em"> |
||
<div class="mw-translate-fuzzy"> |
|||
File:Arch tutorial 00.jpg|link=[[Arch tutorial]]|[[Arch tutorial]] (v0.14) <br/>This is the essential introduction to the Arch Workbench. It is extensive and showcases a typical workflow, from importing plans in DXF format to building the 3D model. |
|||
File:Arch tutorial 00.jpg|link=[[Arch tutorial]]|[[Arch tutorial|建筑工作台教程]] (v0.14) <br/>本文是一篇针对建筑工作台的基本介绍文章。文中通过DXF格式文件导入图纸,最后构建出对应的3D模型,整个流程大致展示了该工作台的一般工作流程。 |
|||
File:Exercise arch 01.jpg|link=[[Manual:BIM_modeling]]|[[Manual:BIM_modeling|BIM modeling]] <br/>How to model a small house, produce a blueprint with TechDraw, and export to IFC. |
|||
File:Exercise arch 01.jpg|link=[[Manual:BIM_modeling]]|[[Manual:BIM_modeling|BIM 建模]] <br/>本文讨论了如何建立一个小屋的模型、利用TechDraw工作台生成一份蓝图(blueprint),并导出为IFC格式文件。 |
|||
File:11_T01_window_all_symbol_top.png|link=[[Tutorial_for_open_windows]]|[[Tutorial for open windows|Open windows and doors]] (v0.18) <br/>How to display windows and doors as open, with elevation and plan symbols, and produce a basic floor plan with TechDraw. |
|||
File:11_T01_window_all_symbol_top.png|link=[[Tutorial_for_open_windows]]|[[Tutorial for open windows|打开窗口与门]] (v0.18) <br/>本文展示了如何利用elevation与plan符号显示打开的窗口与门,并利用TechDraw工作台生成一个基本的平面图。 |
|||
File:17_T02_sketch_2_attached_correctly.png|link=[[Tutorial custom placing of windows and doors]]|[[Tutorial custom placing of windows and doors|Design custom windows]] (v0.18) <br/>How to draw custom doors and windows using the Sketcher, and adjust their normals to correctly place them in walls. |
|||
File:17_T02_sketch_2_attached_correctly.png|link=[[Tutorial custom placing of windows and doors]]|[[Tutorial custom placing of windows and doors|设计自定义窗口]] (v0.18) <br/>本文展示了如何利用草图工作台来绘制自定义门窗,并将其调整至墙体中合适的位置。 |
|||
File:Arch_panel_tutorial_01.jpg|link=[[Arch panel tutorial]]|[[Arch panel tutorial]] (v0.15) <br/>Modeling a microhouse roof panel by using the Sketcher, the Window tool, and the Panel tool. |
|||
File:Arch_panel_tutorial_01.jpg|link=[[Arch panel tutorial]]|[[Arch panel tutorial|建筑面板教程]] (v0.15) <br/>文中利用草图工作台创建一个微型建筑的屋面板(roof panel)。这里会运用窗口工具与面板工具。 |
|||
File:Arch_Wikihouse_01.jpg|link=[[Wikihouse porting tutorial]]|[[Wikihouse porting tutorial|WikiHouse modelling]] <br/>Re-modeling the WikiHouse project using sketches and panels, starting from importing a mesh model created in SketchUp. |
|||
File:Arch_Wikihouse_01.jpg|link=[[Wikihouse porting tutorial]]|[[Wikihouse porting tutorial|维基房屋(WikiHouse)建模]] <br/>先导入由SketchUp创建的WikiHouse网格模型,再利用草图工作台与面板工具对其重新建模。 |
|||
</div> |
|||
</gallery> |
</gallery> |
||
<span id="Modeling_parts"></span> |
|||
<div class="mw-translate-fuzzy"> |
|||
==零件造型== |
==零件造型== |
||
</div> |
|||
<div class="mw-translate-fuzzy"> |
|||
FreeCAD提供了两种主要工作流程来实现零件造型(modeling part): |
FreeCAD提供了两种主要工作流程来实现零件造型(modeling part): |
||
* |
* 利用[[Part_Workbench|零件工作台(Part workbench)]]中的[https://en.wikipedia.org/wiki/Constructive_solid_geometry 构造实体几何(constructive solid geometry,简作CSG)]方法来组合对象(combining objects),以及 |
||
* 利用[[ |
* 利用[[PartDesign_Workbench|零件设计工作台]]进行参数化建模,并编辑[[Glossary#Feature|feature]]。 |
||
</div> |
|||
<div class="mw-translate-fuzzy"> |
|||
Please note that the [[PartDesign Workbench]] workflow was considerably changed from FreeCAD 0.17 onward; some of the tutorials haven't been updated and may refer to the 0.16 version. |
|||
请注意,[[PartDesign Workbench|零件设计工作台]]的工作流程自FreeCAD 0.17版起有了较大变化,而部分教程还未对此更新,可能仍然采用的是0.16版本。 |
|||
</div> |
|||
<gallery mode=packed heights=200px style="font-size:1.1em"> |
<gallery mode=packed heights=200px style="font-size:1.1em"> |
||
<div class="mw-translate-fuzzy"> |
|||
File:GGTuto1 Vue.PNG|link=[[Creating a simple part with PartDesign]]|[[Creating a simple part with PartDesign]] (v0.17)<br/>An introduction to the PartDesign workflow: tracing a sketch, using pad, pocket, and moving the object. |
|||
File:GGTuto1 Vue.PNG|link=[[Creating a simple part with PartDesign]]|[[Creating a simple part with PartDesign|利用PartDesign工作台创建一个简单的零件]] (v0.17)<br/>本文为PartDesign工作台工作流程的简介,在这里我们要:绘制草图、使用填充(pad)与挖槽(pocket)工具、并移动对象。 |
|||
PD WB Tutorial018.png|link=[[Basic Part Design Tutorial 017]]|[[Basic Part Design Tutorial 017|Basic Part Design Tutorial]] (v0.17)<br/>Model a simple part using a feature editing methodology: creating a sketch, using pad, external references, pocket, and mirror. |
|||
PD WB Tutorial018.png|link=[[Basic Part Design Tutorial 017]]|[[Basic Part Design Tutorial 017|零件设计基础教程]] (v0.17)<br/>本文利用功能编辑方式来建立一个简单的零件,主要流程为:创建草图,再利用填充、外部引用、挖槽与镜像等工具来生成零件实体。 |
|||
TBHS-model.png|link=[[Toothbrush Head Stand]]|[[Toothbrush Head Stand|Model an electric toothbrush head stand]] (v0.16)<br/>Multiple features used: sketch, distance and coincident constraints, pad, external references, fillet, chamfer, linear pattern, and draft. |
|||
TBHS-model.png|link=[[Toothbrush Head Stand]]|[[Toothbrush Head Stand|建立电动牙刷头架模型]] (v0.16)<br/>文中使用了多种功能:草图工具、距离约束与重合约束(coincident constraint)工具、填充工具、外部引用工具、倒圆角工具(fillet), 倒角工具(chamfer)、线性复制(linear pattern)工具与拔模(draft)。 |
|||
Exercise lego 01.jpg|link=[[Manual:Modeling for product design]]|[[Manual:Modeling for product design|Modeling for product design]] (v0.16)<br/>Modeling a Lego block: sketches, vertical and horizontal distance constraints, pad, pocket, external reference, linear pattern, and assembly. |
|||
Exercise lego 01.jpg|link=[[Manual:Modeling for product design]]|[[Manual:Modeling for product design|针对产品设计进行建模]] (v0.16)<br/>建立对乐高方块模型,要用到的工具有:草图、垂直距离与水平距离的约束、填充、挖槽、外部引用、线性复制与装配工作台。 |
|||
Exercise table complete.jpg|link=[[Manual:Traditional modeling, the CSG way]]|[[Manual:Traditional modeling, the CSG way|Traditional modeling, the CSG way]]<br/>Modeling a table by using simple solids like cubes and cylinders, and performing boolean operations (fusions and cuts) with them. |
|||
Exercise table complete.jpg|link=[[Manual:Traditional modeling, the CSG way/zh-cn]]|[[Manual:Traditional modeling, the CSG way/zh-cn|传统建模,CSG方式]]<br/>利用像立方体与圆柱体这样简单的实体,并辅以布尔运算(模拟“焊接”与“切割”)来创建一个桌子。 |
|||
TutorialDraftShapeString_Complete.jpg|link=[[Draft ShapeString tutorial]]|[[Draft ShapeString tutorial]] (v0.16)<br/>Create engraved text on a solid: extrude a shapestring to make it solid, then use a boolean cut to carve it from another solid. |
|||
TutorialDraftShapeString_Complete.jpg|link=[[Draft ShapeString tutorial]]|[[Draft ShapeString tutorial|底图ShapeString工具教程]] (v0.16)<br/>在实体上创建雕刻文字:首先挤压底图shapestring对象使之成为实体,再利用布尔运算从另一实体中将其切割,也就是对此文本进行雕刻。 |
|||
Tutorial WhiffleBall.jpg|link=[[Whiffle Ball tutorial]]|[[Whiffle Ball tutorial|Create a wiffle ball]] (v0.16)<br/>Use solid primitives, like cubes and cylinders, and boolean operations, like union and cut, to create a hollowed ball. |
|||
Tutorial WhiffleBall.jpg|link=[[Whiffle Ball tutorial]]|[[Whiffle Ball tutorial|创建一个威浮球(wiffle ball)]] (v0.16)<br/>对立方体与圆柱体等实体图元进行布尔运算(如并集与切割)来创建一个空心球。 |
|||
Tutorial-normand06.jpg|link=[[Basic modeling tutorial]]|[[Basic modeling tutorial]] <br/>Create an iron angle by two methods: using solid primitives, and boolean operations (CSG); and by extruding a planar profile. |
|||
Tutorial-normand06.jpg|link=[[Basic modeling tutorial]]|[[Basic modeling tutorial|建模基本教程]] <br/>创建利用两种方式一个角铁:第一种是对实体图元执行布尔运算(CSG);第二种是通过根据平面轮廓图纸进行挤压来实现。 |
|||
</div> |
|||
File:GGTuto1 Vue.PNG|link=[[Creating a simple part with Draft and Part WB]]|[[Creating_a_simple_part_with_Draft_and_Part_WB|Creating a simple part with Draft and Part Workbench]]<br/>An introduction to modeling solids with Draft Workbench by creating a 2d profile in draft. |
|||
File:GGTuto1 Vue.PNG|link=[[Creating a simple part with PartDesign]]|[[Creating_a_simple_part_with_PartDesign|Creating a simple part with PartDesign]] (v0.17)<br/>An introduction to the PartDesign workflow: tracing a sketch, using pad, pocket, and moving the object. |
|||
Pd_tut_final_solid.png|link=[[Basic_Part_Design_Tutorial]]|[[Basic_Part_Design_Tutorial|Basic Part Design Tutorial]] (v0.17)<br/>Model a simple part using a feature editing methodology: creating a sketch, using pad, external references, pocket, and mirror. |
|||
Pd_tut_final_solid.png|link=[[Basic_Part_Design_Tutorial_019]]|[[Basic_Part_Design_Tutorial_019|Basic Part Design Tutorial 019]] (v0.19 or above)<br/>An updated version of the previous tutorial that creates the same model using techniques that avoid the [[Topological_naming_problem|topological naming problem]]. |
|||
TBHS-model.png|link=[[Toothbrush_Head_Stand]]|[[Toothbrush_Head_Stand|Model an electric toothbrush head stand]] (v0.16 or above)<br/>Multiple features used: sketch, distance and coincident constraints, pad, external references, fillet, chamfer, linear pattern, and draft. |
|||
Exercise lego 01.jpg|link=[[Manual:Modeling_for_product_design]]|[[Manual:Modeling_for_product_design|Modeling for product design]] (v0.16)<br/>Modeling a Lego block: sketches, vertical and horizontal distance constraints, pad, pocket, external reference, linear pattern, and assembly. |
|||
Exercise table complete.jpg|link=[[Manual:Traditional_modeling,_the_CSG_way]]|[[Manual:Traditional_modeling,_the_CSG_way|Traditional modeling, the CSG way]]<br/>Modeling a table by using simple solids like cubes and cylinders, and performing boolean operations (fusions and cuts) with them. |
|||
08_T04_Part_ShapesString_Extrude_final_cut.png|link=[[Draft_ShapeString_tutorial]]|[[Draft_ShapeString_tutorial|Draft ShapeString tutorial]] (v0.19)<br/>Create engraved text on a solid: extrude a shapestring to make it solid, then use a boolean cut to carve it from another solid. |
|||
10_T03_Part_ball_fillet.png|link=[[Whiffle_Ball_tutorial]]|[[Whiffle_Ball_tutorial|Create a wiffle ball]] (v0.19)<br/>Use solid primitives, like cubes and cylinders, and boolean operations, like union and cut, to create a hollowed ball. |
|||
Tutorial-normand06.jpg|link=[[Basic modeling tutorial]]|[[Basic_modeling_tutorial|Basic modeling tutorial]] <br/>Create an iron angle by two methods: using solid primitives, and boolean operations (CSG); and by extruding a planar profile. |
|||
File:HTCaeroplane04.png|link=[[Aeroplane]]|[[Aeroplane|Aeroplane tutorial]] <br/>Understand placements in FreeCAD by creating a simple aeroplane model. Then learn about rotation angles, yaw (Z), pitch (Y), and roll (X). |
|||
File:T13_14_Threads_components.png|link=[[Thread_for_Screw_Tutorial]]|[[Thread_for_Screw_Tutorial|Thread for screw tutorial]] (v0.19)<br/>Understand how to create threads with several techniques that include use of the tools [[Part_Helix|Part Helix]], [[PartDesign_AdditivePipe|PartDesign AdditivePipe]], [[Part_Sweep|Part Sweep]], [[Part_Fuse|Part Fuse]], and [[Part_Cut|Part Cut]]. |
|||
</gallery> |
</gallery> |
||
The Raspberry Pi project has made simple tutorials that are easy to follow, particularly for those new to CAD systems: |
|||
==Drafting and Sketching == |
|||
* [https://projects.raspberrypi.org/en/projects/freecad-dice freecad-dice], model a die with six faces, and optionally 3D print it. |
|||
* [https://projects.raspberrypi.org/en/projects/freecad-headphone-tidy freecad-headphone-tidy], model a spool to organize and store earphones, and optionally 3D print it. |
|||
* [https://projects.raspberrypi.org/en/projects/freecad-chess-set freecad-chess-set], model and entire chess set in Bauhaus modernist style. |
|||
* [https://github.com/raspberrypilearning?utf8=%E2%9C%93&q=freecad&type=source&language= raspberrypilearning] repository (CC-BY 4.0) with other examples. |
|||
<span id="Drafting_and_Sketching"></span> |
|||
==绘制底图与草图== |
|||
<gallery mode=packed heights=200px style="font-size:1.1em"> |
<gallery mode=packed heights=200px style="font-size:1.1em"> |
||
<div class="mw-translate-fuzzy"> |
|||
Exercise cabin 01.jpg|link=[[Manual:Traditional 2D drafting]]|[[Manual:Traditional 2D drafting|Traditional 2D drafting]] <br/>Draw a floor plan with lines, wires, rectangles, circular arcs, and add hatch patterns, annotations, and dimensions. Export the result to DXF. |
|||
Exercise cabin 01.jpg|link=[[Manual:Traditional 2D drafting]]|[[Manual:Traditional 2D drafting|绘制传统的2D底图]] <br/>利用线段、连线、立方体、圆弧绘制建筑平面图,并为之添加填充图案、注释与标注。并将结果导出为DXF文件。 |
|||
Draft_tutorial_result.png|link=[[Draft tutorial]]|[[Draft tutorial]] (v0.16) <br/>This is a basic introduction to the tools of the Draft Workbench: working plane, grid, line, arc, upgrade, rectangle, circle, polygon, arrays, dimensions, annotations, and shapestring. |
|||
Draft_tutorial_result.png|link=[[Draft tutorial]]|[[Draft tutorial|底图教程]] (v0.16) <br/>本文简单介绍了底图工作台中的常见工具:工作平面、网格、线段、弧线、升级(upgrade)、矩形、圆形、多边形、阵列、标注、注释与shapestring。 |
|||
Sketcher tutorial result.png|link=[[Sketcher tutorial]]|[[Sketcher tutorial]] (v0.16) <br/>This is a basic introduction to the tools of the Sketcher Workbench: construction mode, line, circle, arc, constraints (equality, vertical, horizontal, tangential, distance, angle, radius). |
|||
Sketcher tutorial result.png|link=[[Basic_Sketcher_Tutorial]]|[[Basic_Sketcher_Tutorial|草图教程]] (v0.16) <br/>本文简单介绍了草图工作台中的常用工具:构建模式(construction mode)、线段、圆形、弧线、约束(等长约束、垂直约束、水平约束、相切约束、距离约束、角度约束、半径约束)。 |
|||
Constrain3.png|link=[[Sketcher Micro Tutorial - Constraint Practices]]|[[Sketcher Micro Tutorial - Constraint Practices|Sketcher micro tutorial]] (v0.16)<br/>Learn to efficiently constrain a sketch. Prefer geometric constraints over dimensional constraints. |
|||
Constrain3.png|link=[[Sketcher Micro Tutorial - Constraint Practices]]|[[Sketcher Micro Tutorial - Constraint Practices|草图工作台中宏的使用教程]] (v0.16)<br/>学习高效地对草图进行约束。几何约束较之尺寸约束更受人们青睐。 |
|||
</div> |
|||
</gallery> |
</gallery> |
||
<span id="Technical_Drawings"></span> |
|||
==Technical Drawings == |
|||
<div class="mw-translate-fuzzy"> |
|||
==技术制图 == |
|||
</div> |
|||
<gallery mode=packed heights=200px style="font-size:1.1em"> |
<gallery mode=packed heights=200px style="font-size:1.1em"> |
||
<div class="mw-translate-fuzzy"> |
|||
TDTut ProjGroup21.png|link=[[Basic TechDraw Tutorial]]|[[Basic TechDraw Tutorial|Basic TechDraw Tutorial]] (v0.17) <br/>This is the essential introduction to the tools of the TechDraw Workbench: page, view, scale, vertical and horizontal dimensions, annotations, projection groups, linking dimensions to the 3D view. |
|||
TDTut ProjGroup21.png|link=[[Basic TechDraw Tutorial]]|[[Basic TechDraw Tutorial|TechDraw工作台基础教程]] (v0.17) <br/>本文内容为针对TechDraw工作台中常见工具的基本介绍,如:页(page)、视图(view)、缩放(scale)、垂直标注与水平标注(vertical and horizontal dimensions)、注释( annotations)、正交投影组(projection groups)以及将标注与3D视图联系起来。 |
|||
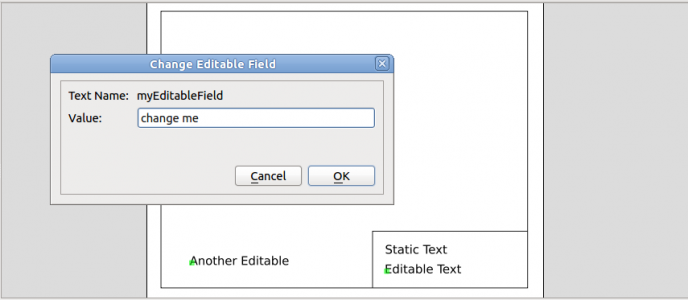
File:FCTemplateHow.png|link=[[TechDraw_TemplateHowTo]]|[[TechDraw_TemplateHowTo|Creating a new background template]] (v0.17) <br/>Instructions to create a page template in Inkscape for using it with the TechDraw Workbench. Determine the size of the sheet, draw a frame for the page, define fixed text, and editable text fields. |
|||
File:FCTemplateHow.png|link=[[TechDraw_TemplateHowTo]]|[[TechDraw_TemplateHowTo|创建一个新的背景模板]] (v0.17) <br/>介绍如何在TechDraw工作台中使用以Inkscape创建的页模板。涉及的步骤有:确定表单的规格大小、为页面绘制布局框架、定义固有的文本并编辑文本域。 |
|||
</div> |
|||
</gallery> |
</gallery> |
||
| Line 57: | Line 109: | ||
<gallery mode=packed heights=200px style="font-size:1.1em"> |
<gallery mode=packed heights=200px style="font-size:1.1em"> |
||
FEM example01 pic00.jpg|link=[[FEM CalculiX Cantilever 3D]]|[[FEM CalculiX Cantilever 3D|CalculiX cantilever FEM analysis]] (v0. |
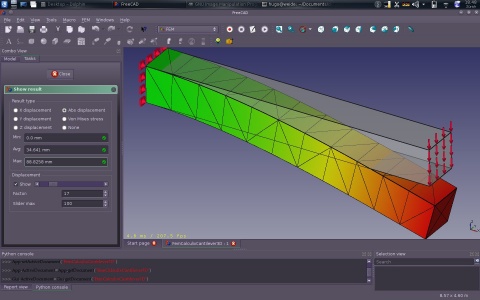
FEM example01 pic00.jpg|link=[[FEM CalculiX Cantilever 3D]]|[[FEM CalculiX Cantilever 3D|CalculiX cantilever FEM analysis]] (v0.20) <br/>This in an example included in every installation of FreeCAD; it demonstrates a basic analysis with the CalculiX FE solver. Purge the current result, re-run the solver, and view the displacements and stresses in the deformed mesh in the viewport. |
||
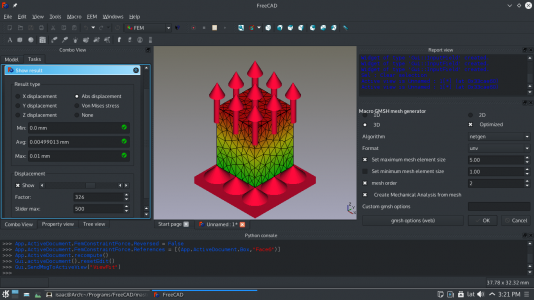
FEM tutorial result.png|link=[[FEM tutorial]]|[[FEM tutorial|Simple FEM introduction]] (v0.17) <br/>This is a short introduction to the steps required to perform an analysis in the FEM Workbench: model your object, create a mesh, add constraints and forces, add a material, run the solver, and visualize the results. |
|||
FEM tutorial result.png|link=[[FEM tutorial]]|[[FEM tutorial|Simple FEM introduction]] (v0.20) <br/>This is a short introduction to the steps required to perform an analysis in the FEM Workbench: model your object, create a mesh, add constraints and forces, add a material, run the solver, and visualize the results. |
|||
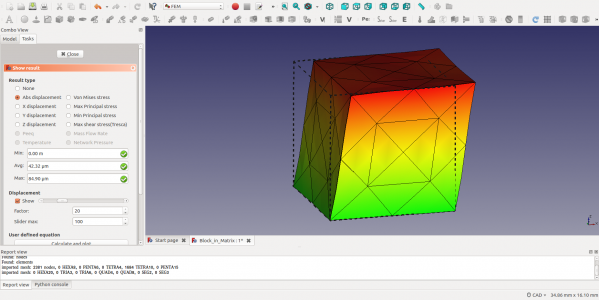
Figure 11 Deformed Mesh.png|link=[[FEM Shear of a Composite Block]]|[[FEM Shear of a Composite Block|FEM shear analysis of a composite block]] (v0.17) <br/>Study the deformation of a block made of a hard nucleus surrounded by a softer material: create mesh regions, add materials, set up sliding constraints, add shear loads, run the solver, and visualize the results with a clip plane. |
Figure 11 Deformed Mesh.png|link=[[FEM Shear of a Composite Block]]|[[FEM Shear of a Composite Block|FEM shear analysis of a composite block]] (v0.17) <br/>Study the deformation of a block made of a hard nucleus surrounded by a softer material: create mesh regions, add materials, set up sliding constraints, add shear loads, run the solver, and visualize the results with a clip plane. |
||
</gallery> |
|||
Femconcrete_Wall_3D_rx_PSS.png|link=[[Analysis_of_reinforced_concrete_with_FEM]]|[[Analysis_of_reinforced_concrete_with_FEM|Analysis of reinforced concrete with FEM]] (v0.19) <br/>Estimate the level of reinforcement required in a concrete structure to prevent brittle failure under tension or shear. |
|||
==CNC & 3D Printing == |
|||
Two_balls_result_2-cropped.png|link=[[FEM_Example_Capacitance_Two_Balls]]|[[FEM_Example_Capacitance_Two_Balls|Electrostatic equation – Capacitance of two balls]] (v0.19)<br/>This example shows how to simulate a capacitance. It illustrates how to setup the example, study it's various parts, solve it using the [[FEM_SolverElmer|Elmer Solver]] and visualize the results using [[FEM_PostFilterClipRegion|Clip Filter]]. |
|||
<gallery mode=packed heights=200px style="font-size:1.1em"> |
|||
Path-WalkThroughResult.gif|link=[[Path Walkthrough for the Impatient]]|[[Path Walkthrough for the Impatient|Path Workbench for the impatient]] <br/>This is a quick presentation of the workflow for the Path Workbench: create a job, define the output, define the milling tool, define the path operations, start the simulation, and generate a G-code output file. |
|||
FEM_post-processing_Paraview.png|link=[[Post-Processing_of_FEM_Results_with_Paraview]]|[[Post-Processing_of_FEM_Results_with_Paraview|Post-Processing of FEM results with Paraview]] (v0.19)<br/>This tutorial explains the basics of transferring data from the FEM Workbench to Paraview and shows some of the options and settings for displaying data. |
|||
Exercise meshing 03.jpg|link=[[Manual:Preparing models for 3D printing]]|[[Manual:Preparing models for 3D printing|Preparing models for 3D printing]] (v0.16)<br/>Convert a solid object to a mesh object using the Mesh Workbench, export the mesh to STL format, and use Slic3r to prepare the G-code. Alternatively use the Cura Workbench or the Path Workbench to generate the G-code. |
|||
</gallery> |
</gallery> |
||
<span id="CNC_&_3D_Printing"></span> |
|||
==Import and Export == |
|||
==CNC & 3D打印 == |
|||
<gallery mode=packed heights=200px style="font-size:1.1em"> |
<gallery mode=packed heights=200px style="font-size:1.1em"> |
||
Path-WalkThroughResult.gif|link=[[CAM_Walkthrough_for_the_Impatient]]|[[CAM_Walkthrough_for_the_Impatient|CAM Workbench for the impatient]] <br/>This is a quick presentation of the workflow for the CAM Workbench: create a job, define the output, define the milling tool, define the path operations, start the simulation, and generate a G-code output file. |
|||
Dxf Importer Install 11.png|link=[[Dxf Importer Install]]|[[Dxf Importer Install|DXF importer installation]] <br/>Install the DXF importer program in you system, so that you can open DXF and DWG files with FreeCAD. |
|||
Exercise meshing 03.jpg|link=[[Manual:Preparing models for 3D printing]]|[[Manual:Preparing models for 3D printing|Preparing models for 3D printing]] (v0.16)<br/>Convert a solid object to a mesh object using the Mesh Workbench, export the mesh to STL format, and use Slic3r to prepare the G-code. Alternatively use the Cura Workbench or the CAM Workbench to generate the G-code. |
|||
</gallery> |
</gallery> |
||
= |
<span id="Rendering"></span> |
||
==渲染== |
|||
<gallery mode=packed heights=200px style="font-size:1.1em"> |
<gallery mode=packed heights=200px style="font-size:1.1em"> |
||
Exercise raytracing 05.jpg|link=[[Manual:Creating renderings]]|[[Manual:Creating renderings| |
Exercise raytracing 05.jpg|link=[[Manual:Creating renderings]]|[[Manual:Creating renderings|创建渲染文件]] <br/>如果系统中安装了POV-Ray与LuxRender,就利用它们为您的设计快速地渲染出一幅图像。 |
||
Raytracing tutorial result.png|link=[[Raytracing tutorial]]|[[Raytracing tutorial]] (v0.16) <br/>本文描述了在光线追踪工作台中使用POV-Ray或LuxRender的基本工作流程:设置渲染器的工作路径、创建工程、设置摄像机的位置、选择模型、运行渲染器。12_T04_FreeCAD_POVray_render_floor_wood_walls_radiosity_final.png|link=[[Tutorial FreeCAD POV ray]]|[[Tutorial FreeCAD POV ray|FreeCAD与POV-ray中级教程]] (v0.18) <br/>利用POV-Ray生成更佳渲染效果的工作流程:创建工程、添加对象、设置摄像机、保存.pov文件,手动编辑此文件来改良其纹理、表面、光照,最后运行渲染器。 |
|||
Raytracing tutorial result.png|link=[[Raytracing tutorial]]|[[Raytracing tutorial]] (v0.16) <br/>Describes the basic workflow of the Raytracing Workbench using POV-Ray or LuxRender: set the path to the renderers, create a project, set the camera position, select the model, run the renderer. |
|||
07_T03_FreeCAD_Blender_EEVEE_render.png|link=[[Tutorial_Render_with_Blender]]|[[Tutorial Render with Blender|利用Blender渲染一个FreeCAD部件]] (v0.18) <br/>从FreeCAD中将部件导出为Wavefront的.obj格式,再将其导入Blender中,建立一个简单的太阳光源,利用Principled BSDF着色器为之赋予基本材质,最后通过EEVEE与Cycles来生成渲染图片。 |
|||
12_T04_FreeCAD_POVray_render_floor_wood_walls_radiosity_final.png|link=[[Tutorial FreeCAD POV ray]]|[[Tutorial FreeCAD POV ray|Intermediate FreeCAD and POV-ray tutorial]] (v0.18) <br/>Workflow to produce a better render with POV-Ray: create a project, add objects, set the camera, save the .pov file, manually edit the file to improve the textures, planes, lights, and then run the renderer. |
|||
07_T03_FreeCAD_Blender_EEVEE_render.png|link=[[Tutorial_Render_with_Blender]]|[[Tutorial Render with Blender|Rendering a FreeCAD assembly with Blender]] (v0.18) <br/>Export bodies from FreeCAD to Wavefront .obj, import the file into Blender, set up a simple Sun light, assign basic materials with the Principled BSDF shader, and produce a rendered image with EEVEE and Cycles. |
|||
</gallery> |
</gallery> |
||
==Robot workbench == |
==Robot workbench == |
||
<div class="mw-translate-fuzzy"> |
|||
<gallery mode=packed heights=200px style="font-size:1.1em"> |
|||
==机器人工作台 == |
|||
Robot Tutorial RobotSimulation.gif|link=[[Robot tutorial]]|[[Robot tutorial]] (v0.17) <br/>Simulate the movement of an industrial robot: set up a trajectory, set up home position, change the robot position, insert various waypoints, and simulate the robot movement. |
|||
</ |
</div> |
||
== Plotting == |
|||
<gallery mode=packed heights=200px style="font-size:1.1em"> |
<gallery mode=packed heights=200px style="font-size:1.1em"> |
||
<div class="mw-translate-fuzzy"> |
|||
Plot_Trigonometric_Example.png|link=[[Plot Basic tutorial]]|[[Plot Basic tutorial|Basic plot]] <br/>Draw simple mathematical functions in the Plot Workbench using the underlying Python plotting libraries: define the input list (X), two output lists (Y1, Y2), plot the functions (Y1 and Y2 against X), set the grid, line styles, legends, axes labels, plot title, and save the plot. |
|||
Robot Tutorial RobotSimulation.gif|link=[[Robot tutorial]]|[[Robot tutorial|机器人工作台教程]] (v0.17) <br/>模拟工业机器人的运动:建立一个机器人的运动轨迹(trajectory)、建立初始位置(home position)、改变机器人的位置、插入各种路点(waypoints),并模拟机器人的运动。 |
|||
Plot_MultiAxes_Example.png|link=[[Plot MultiAxes tutorial]]|[[Plot MultiAxes tutorial|Multiaxes plot]] <br/>Draw a more complicated plot in the Plot Workbench with two different input lists (X, T), and three output lists (Y1, Y2, Y3), then create two sets of axes in the same plot, and plot the pairs of lists (Y1 against X, and Y2 and Y3 against T); set the axes labels and grid, and move the legends and title. |
|||
</div> |
|||
</gallery> |
</gallery> |
||
== |
== Scripting == |
||
{{VeryImportantMessage|Development of the [[Drawing Workbench]] stopped in FreeCAD 0.16. Consider using the [[TechDraw Workbench]] instead.}} |
|||
These are tutorials that are related to scripting or programming. They are geared towards more experienced users, who are already somewhat familiar with the program. |
|||
<gallery mode=packed heights=200px style="font-size:1.1em"> |
|||
* [[Python_scripting_tutorial|Python scripting tutorial]] |
|||
Drawing_tutorial_result.png|link=[[Drawing tutorial]]|[[Drawing tutorial]] (v0.16)<br/>This is the essential introduction to the tools of the Drawing Workbench to create blueprints. |
|||
* [[How_to_install_macros|How to install macros]] |
|||
Exercise drawing 01.jpg|link=[[Manual:Generating 2D drawings]]|[[Manual:Generating 2D drawings|Generating 2D drawings]] (v0.16)<br/>Generate 2D projections of your 3D models, and add dimensions. |
|||
* [[How_to_install_additional_workbenches|How to install additional workbenches]] |
|||
</gallery> |
|||
== Tutorials - Comprehensive list == |
|||
Here are listed all the tutorials that are not in the manual '''regardless of their quality'''. If a tutorial is listed in the [[:Category:Tutorials]] and not in this table please insert it. |
|||
{| class="wikitable sortable" |
|||
|- |
|||
! Tutorial |
|||
! Topic |
|||
! Level |
|||
! Time to complete hh:mm |
|||
! Authors |
|||
! FreeCAD version |
|||
! Example files |
|||
<!-- Template for new entries |
|||
|- |
|||
| [[Tutorial|Tutorial]] |
|||
| Topic |
|||
| Level |
|||
| 0:00 |
|||
| [[User:Name|Name]] |
|||
| 1.0 |
|||
| None |
|||
--> |
|||
|- |
|||
| [[Add_Button_to_FEM_Toolbar_Tutorial|Add Button to FEM Toolbar Tutorial]] |
|||
| Finite Element Analysis |
|||
| |
|||
| |
|||
| [[User:JohnWang|JohnWang]] |
|||
| |
|||
| |
|||
|- |
|||
| [[Add_FEM_Constraint_Tutorial|Add FEM Constraint Tutorial]] |
|||
| Finite Element Analysis |
|||
| |
|||
| |
|||
| [[User:M42kus|M42kus]] |
|||
| |
|||
| |
|||
|- |
|||
| [[Add_FEM_Equation_Tutorial|Add FEM Equation Tutorial]] |
|||
| Finite Element Analysis |
|||
| |
|||
| |
|||
| [[User:JohnWang|JohnWang]] |
|||
| |
|||
| |
|||
|- |
|||
| [[Adding_a_new_mouse_navigation_option_to_FreeCAD|Adding a new mouse navigation option to FreeCAD (unfinished)]] |
|||
| Programming |
|||
| Advanced |
|||
| |
|||
| [[User:Kunda1|Kunda1]] |
|||
| 0.19.x |
|||
| None |
|||
|- |
|||
| [[Advanced_Attachment_OYX|Advanced Attachment OYX]] |
|||
| Attachment |
|||
| Intermediate/Advanced |
|||
| |
|||
| [[User:drmacro|drmacro]] |
|||
| 0.19 |
|||
| None |
|||
|- |
|||
| [[Advanced_TechDraw_Tutorial|Advanced TechDraw Tutorial (unfinished)]] |
|||
| TechDraw Workbench |
|||
| Advanced |
|||
| |
|||
| [[User:domad|domad]] |
|||
| 0.19 |
|||
| None |
|||
|- |
|||
| [[Aeroplane|Aeroplane]] |
|||
| Part Workbench |
|||
| Beginner |
|||
| 0:10 |
|||
| Hughthecat |
|||
| |
|||
| |
|||
|- |
|||
| [[Analysis_of_reinforced_concrete_with_FEM|Analysis of reinforced concrete with FEM]] |
|||
| Finite Element Analysis |
|||
| Intermediate |
|||
| 1:00 |
|||
| [[User:HarryvL|HarryvL]] |
|||
| 0.19 or above |
|||
| |
|||
|- |
|||
| [[Arch_panel_tutorial|Arch panel tutorial]] |
|||
| Arch Workbench |
|||
| Beginner |
|||
| 1:00 |
|||
| Yorik |
|||
| |
|||
| |
|||
|- |
|||
| [[Arch_tutorial|Arch tutorial]] |
|||
| Modeling |
|||
| Intermediate |
|||
| |
|||
| [[User:Yorik|Yorik]] |
|||
| 0.14 |
|||
| |
|||
|- |
|||
| [[Basic_Attachment_Tutorial|Basic Attachment Tutorial]] |
|||
| Attachment |
|||
| Beginner/intermediate |
|||
| 1:00 |
|||
| [[User:Bance|Bance]] |
|||
| 0.17 or above |
|||
| [https://github.com/BanceFC/Examples/blob/master/Basic_Attachment_Tutorial.FCStd Basic Attachment Tutorial.FCStd] |
|||
|- |
|||
| [[Basic_modeling_tutorial|Basic modeling tutorial]] |
|||
| Modelling |
|||
| Beginner |
|||
| 0:15 |
|||
| [[User:NormandC|NormandC]] |
|||
| Any |
|||
| None |
|||
|- |
|||
| [[Basic_Part_Design_Tutorial|Basic Part Design Tutorial]] |
|||
| Modeling |
|||
| Beginner |
|||
| |
|||
| [[User:Quick61|Mark Stephen (Quick61)]] and [[User:HarryGeier|HarryGeier]] |
|||
| 0.17 or above |
|||
| [https://github.com/FreeCAD/Examples/blob/master/Basic_Part_Design_Tutorial_Example_017_Files/Basic_Part_Design_Tutorial_017.fcstd Basic Part Design for v0.17] |
|||
|- |
|||
| [[Basic_Part_Design_Tutorial_019|Basic Part Design Tutorial 019]] |
|||
| Modeling |
|||
| Beginner |
|||
| 1:00 |
|||
| [[User:Onekk|Carlo Dormeletti]] and [[User:Edwilliams16|Ed Williams]] |
|||
| 0.19 or above |
|||
| |
|||
|- |
|||
| [[Basic_Sketcher_Tutorial|Basic Sketcher Tutorial]] |
|||
| Sketcher Workbench |
|||
| Beginner |
|||
| 1:00 |
|||
| [[User:Drei|Drei]] and [[User:Vocx|Vocx]] |
|||
| 0.19 |
|||
| [https://forum.freecadweb.org/viewtopic.php?f=36&t=43594 Basic Sketcher tutorial ] |
|||
|- |
|||
| [[Basic_TechDraw_Tutorial|Basic TechDraw Tutorial]] |
|||
| TechDraw Workbench |
|||
| Beginner |
|||
| |
|||
| [[User:WandererFan|WandererFan]] |
|||
| 0.17 or above |
|||
| [https://github.com/FreeCAD/Examples/blob/master/Basic_Part_Design_Tutorial_Example_017_Files/Basic_Part_Design_Tutorial_017.fcstd Basic Part Design for v0.17 Sample] [https://github.com/FreeCAD/Examples/blob/master/Basic_TechDraw_Tutorial_Example_Files/Basic_TechDraw_Tutorial.fcstd Basic TechDraw Tutorial Sample] |
|||
|- |
|||
| [[BIM_ingame_tutorial|BIM ingame tutorial]] |
|||
| Arch Workbench |
|||
| Beginner |
|||
| |
|||
| [[User:Yorik|Yorik]] |
|||
| |
|||
| |
|||
|- |
|||
| [[CAM_Walkthrough_for_the_Impatient|CAM Walkthrough for the Impatient]] |
|||
| CAM Workbench |
|||
| |
|||
| |
|||
| Chrisb |
|||
| |
|||
| |
|||
|- |
|||
| [[Code_snippets|Code snippets]] |
|||
| Python |
|||
| Beginner |
|||
| |
|||
| |
|||
| |
|||
| |
|||
|- |
|||
| [[Creating_a_simple_part_with_Draft_and_Part_WB|Creating a simple part with Draft and Part WB]] |
|||
| Modeling |
|||
| Beginner |
|||
| 1:30 |
|||
| Heda |
|||
| - |
|||
| - |
|||
|- |
|||
| [[Creating_a_simple_part_with_Part_WB|Creating a simple part with Part WB]] |
|||
| Modeling |
|||
| Beginner |
|||
| 2:00 |
|||
| Heda |
|||
| - |
|||
| - |
|||
|- |
|||
| [[Creating_a_simple_part_with_PartDesign|Creating a simple part with PartDesign]] |
|||
| Modeling |
|||
| Beginner |
|||
| 1:00 |
|||
| GlouGlou |
|||
| 0.17 or above |
|||
| [https://github.com/FreeCAD/Examples/blob/master/Creating_a_simple_PartDesign_Body.FCStd Creating a simple PartDesign Body.FCStd] |
|||
|- |
|||
| [[Customize_Toolbars|Customize Toolbars]] |
|||
| Customization |
|||
| Beginner |
|||
| 0:05 |
|||
| [[User:Mario52|Mario52]] |
|||
| Any |
|||
| None |
|||
|- |
|||
| [[Draft_ShapeString_tutorial|Draft ShapeString tutorial]] |
|||
| Product Design |
|||
| Beginner |
|||
| 0:30 |
|||
| r-frank and vocx |
|||
| 0.17 or above |
|||
| [https://github.com/FreeCAD/Examples/blob/master/Draft_Shapestring_Tutorial_Examples/Draft_Shapestring_Tutorial_Text.FCStd?raw=true Draft_Shapestring_Text] |
|||
|- |
|||
| [[Draft_tutorial|Draft tutorial]] |
|||
| Draft Workbench |
|||
| Beginner |
|||
| 0:30 |
|||
| [[User:Drei|Drei]] and vocx |
|||
| 0.19 |
|||
| [https://forum.freecadweb.org/viewtopic.php?f=36&t=43651 Draft tutorial updated] |
|||
|- |
|||
| [[Engine_Block_Tutorial|Engine Block Tutorial]] |
|||
| Part Workbench |
|||
| Beginner |
|||
| 1:00 |
|||
| Andrewbuck40 |
|||
| 0.14.3700 |
|||
| |
|||
|- |
|||
| [[Example_Combined_Footing|Example Combined Footing]] |
|||
| Reinforcement Workbench |
|||
| Intermediate |
|||
| |
|||
| [[User:Shiv_Charan|Shiv Charan]] |
|||
| 0.20 |
|||
| None |
|||
|- |
|||
| [[Example_Slab_Having_LShape_Rebars_Reinforcement_Mesh|Example Slab Having LShape Rebars Reinforcement Mesh]] |
|||
| Reinforcement Workbench |
|||
| Intermediate |
|||
| |
|||
| [[User:Shiv_Charan|Shiv Charan]] |
|||
| 0.20 |
|||
| None |
|||
|- |
|||
| [[Example_Slab_Having_Mesh_Of_Straight_Rebars|Example Slab Having Mesh Of Straight Rebars]] |
|||
| Reinforcement Workbench |
|||
| Intermediate |
|||
| |
|||
| [[User:Shiv_Charan|Shiv Charan]] |
|||
| 0.20 |
|||
| None |
|||
|- |
|||
| [[Example_Slab_Having_UShape_Rebars_Reinforcement_Mesh|Example Slab Having UShape Rebars Reinforcement Mesh]] |
|||
| Reinforcement Workbench |
|||
| Intermediate |
|||
| |
|||
| [[User:Shiv_Charan|Shiv Charan]] |
|||
| 0.20 |
|||
| None |
|||
|- |
|||
| [[Example_Slab_Spanning_in_One_Direction|Example Slab Spanning in One Direction]] |
|||
| Reinforcement Workbench |
|||
| Intermediate |
|||
| |
|||
| [[User:Shiv_Charan|Shiv Charan]] |
|||
| 0.20 |
|||
| None |
|||
|- |
|||
| [[Example_Slab_Spanning_in_Two_Directions|Example Slab Spanning in Two Directions]] |
|||
| Reinforcement Workbench |
|||
| Intermediate |
|||
| |
|||
| [[User:Shiv_Charan|Shiv Charan]] |
|||
| 0.20 |
|||
| None |
|||
|- |
|||
| [[Export_to_STL_or_OBJ|Export to STL or OBJ]] |
|||
| Export |
|||
| Beginner |
|||
| 0:20 |
|||
| r-frank |
|||
| 0.16.6703 |
|||
| |
|||
|- |
|||
| [[Extend_FEM_Module|Extend FEM Module]] |
|||
| Finite Element Analysis |
|||
| |
|||
| |
|||
| [[User:M42kus|M42kus]] |
|||
| |
|||
| |
|||
|- |
|||
| [[FEM_CalculiX_Cantilever_3D|FEM CalculiX Cantilever 3D]] |
|||
| Finite Element Analysis |
|||
| Beginner |
|||
| 0:10 |
|||
| [[User:Bernd|Bernd]] |
|||
| 0.16.6377 or above |
|||
| |
|||
|- |
|||
| [[FEM_Example_Capacitance_Two_Balls|FEM Example Capacitance Two Balls]] |
|||
| Finite Element Analysis |
|||
| Beginner |
|||
| |
|||
| [[User:Sudhanshu Dubey|Sudhanshu Dubey]] |
|||
| 0.19 |
|||
| None |
|||
|- |
|||
| [[FEM_Shear_of_a_Composite_Block|FEM Shear of a Composite Block]] |
|||
| Finite Element Analysis |
|||
| Beginner/Intermediate |
|||
| 0:30 |
|||
| [[User:HarryvL|HarryvL]] |
|||
| 0.17.12960 or above |
|||
| |
|||
|- |
|||
| [[FEM_tutorial|FEM tutorial]] |
|||
| Finite Element Analysis |
|||
| Beginner |
|||
| 0:10 |
|||
| [[User:Drei|Drei]] |
|||
| 0.17 or above |
|||
| |
|||
|- |
|||
| [[FEM_Tutorial_Python|FEM Tutorial Python]] |
|||
| Finite Element Analysis |
|||
| Intermediate |
|||
| 0:30 |
|||
| [[User:Bernd|Bernd]] |
|||
| 0.18.15985 or above |
|||
| |
|||
|- |
|||
| [[FreeCAD-Ship_s60_tutorial|FreeCAD-Ship s60 tutorial]] |
|||
| Ship Workbench |
|||
| Beginner |
|||
| |
|||
| |
|||
| |
|||
| |
|||
|- |
|||
| [[FreeCAD-Ship_s60_tutorial_(II)|FreeCAD-Ship s60 tutorial (II)]] |
|||
| Ship Workbench |
|||
| Beginner |
|||
| |
|||
| |
|||
| |
|||
| |
|||
|- |
|||
| [[How_to_install_additional_workbenches|How to install additional workbenches]] |
|||
| Programming |
|||
| Medium programmer |
|||
| 0:15 |
|||
| [[User:R-frank|r-frank]] |
|||
| Any |
|||
| None |
|||
|- |
|||
| [[How_to_install_macros|How to install macros]] |
|||
| Programming |
|||
| Medium programmer |
|||
| 0:15 |
|||
| [[User:Mario52|Mario52]] |
|||
| Any |
|||
| None |
|||
|- |
|||
| [[Import_from_STL_or_OBJ|Import from STL or OBJ]] |
|||
| Import |
|||
| Beginner |
|||
| 0:30 |
|||
| r-frank |
|||
| 0.16.6703 |
|||
| |
|||
|- |
|||
| [[Import_OpenSCAD_code|Import OpenSCAD code]] |
|||
| Import |
|||
| Beginner |
|||
| 0:30 |
|||
| r-frank |
|||
| 0.16.6704 |
|||
| None |
|||
|- |
|||
| [[Import_text_and_geometry_from_Inkscape|Import text and geometry from Inkscape]] |
|||
| Import |
|||
| Beginner |
|||
| 0:30 |
|||
| r-frank |
|||
| 0.16.6704 |
|||
| |
|||
|- |
|||
| [[Import/Export_IFC_-_compiling_IfcOpenShell|Import/Export IFC - compiling IfcOpenShell]] |
|||
| Arch Workbench |
|||
| Advanced |
|||
| 2:00 |
|||
| Pablo Gil |
|||
| |
|||
| |
|||
|- |
|||
| [[Measurement_Of_Angles_On_Holes|Measurement Of Angles On Holes]] |
|||
| TechDraw Workbench |
|||
| Beginner |
|||
| 0:01 |
|||
| AnHi |
|||
| 0.19 |
|||
| |
|||
|- |
|||
| [[PartDesign_Bearingholder_Tutorial_I|PartDesign Bearingholder Tutorial I]] |
|||
| Product design |
|||
| Beginner |
|||
| 1:00 |
|||
| NormandC |
|||
| |
|||
| |
|||
|- |
|||
| [[PartDesign_Bearingholder_Tutorial_II|PartDesign Bearingholder Tutorial II]] |
|||
| Product design |
|||
| Beginner |
|||
| 1:00 |
|||
| NormandC |
|||
| |
|||
| |
|||
|- |
|||
| [[PartDesign_tutorial|PartDesign tutorial]] |
|||
| Sketcher Workbench |
|||
| Beginner |
|||
| 0:15 |
|||
| [[User:Drei|Drei]] |
|||
| 0.16 or above |
|||
| |
|||
|- |
|||
| [[Plot_Basic_tutorial|Plot Basic tutorial]] |
|||
| Plot Workbench |
|||
| Beginner |
|||
| |
|||
| |
|||
| |
|||
| |
|||
|- |
|||
| [[Plot_MultiAxes_tutorial|Plot MultiAxes tutorial]] |
|||
| Plot workbench |
|||
| Intermediate |
|||
| |
|||
| |
|||
| |
|||
| |
|||
|- |
|||
| [[Post-Processing_of_FEM_Results_with_Paraview|Post-Processing of FEM Results with Paraview]] |
|||
| Finite Element Analysis |
|||
| Intermediate |
|||
| 2:00 |
|||
| [[User:HarryvL|HarryvL]] |
|||
| 0.19 |
|||
| [https://forum.freecadweb.org/download/file.php?id=103403 Beam] and [https://forum.freecadweb.org/download/file.php?id=103557 wall] |
|||
|- |
|||
| [[Private_Preference_Packs|Private Preference Packs]] |
|||
| Customization |
|||
| Intermediate/Advanced |
|||
| |
|||
| [[User:Drmacro|drmacro]] |
|||
| 1.0 or above |
|||
| |
|||
|- |
|||
| [[Python_scripting_tutorial|Python scripting tutorial]] |
|||
| Programming |
|||
| Intermediate |
|||
| |
|||
| |
|||
| |
|||
| |
|||
|- |
|||
| [[Raytracing_tutorial|Raytracing tutorial]] |
|||
| Raytracing Workbench |
|||
| Beginner |
|||
| 0:10 |
|||
| [[User:Drei|Drei]] |
|||
| 0.16 or above |
|||
| |
|||
|- |
|||
| [[Robot_6-Axis|Robot 6-Axis]] |
|||
| Robot Workbench |
|||
| Intermediate |
|||
| |
|||
| |
|||
| |
|||
| |
|||
|- |
|||
| [[Robot_tutorial|Robot tutorial]] |
|||
| Robot Workbench |
|||
| Beginner |
|||
| |
|||
| r-frank |
|||
| |
|||
| |
|||
|- |
|||
| [[Scripted_Parts:_Ball_Bearing_-_Part_1|Scripted Parts: Ball Bearing - Part 1]] |
|||
| Python |
|||
| Beginner |
|||
| 0:30 |
|||
| r-frank |
|||
| 0.16.6706 |
|||
| |
|||
|- |
|||
| [[Scripted_Parts:_Ball_Bearing_-_Part_2|Scripted Parts: Ball Bearing - Part 2]] |
|||
| Python |
|||
| Beginner |
|||
| 0:30 |
|||
| r-frank |
|||
| 0.16.6706 |
|||
| |
|||
|- |
|||
| [[Scripts|Scripts]] |
|||
| Python |
|||
| Beginner |
|||
| |
|||
| onekk Carlo |
|||
| 0.19 |
|||
| |
|||
|- |
|||
| [[Sketcher_Micro_Tutorial_-_Constraint_Practices|Sketcher Micro Tutorial - Constraint Practices]] |
|||
| Sketcher Workbench |
|||
| Beginner |
|||
| 0:30 |
|||
| [[User:Quick61|Mark Stephen (Quick61)]] and vocx |
|||
| 0.19 |
|||
| [https://forum.freecadweb.org/viewtopic.php?f=36&p=371659#p371659 Sketcher Constraints practices] |
|||
|- |
|||
| [[Sketcher_reference|Sketcher reference]] |
|||
| Sketcher Workbench |
|||
| |
|||
| |
|||
| |
|||
| |
|||
| |
|||
|- |
|||
| [[Sketcher_requirement_for_a_sketch|Sketcher requirement for a sketch]] |
|||
| Sketcher Workbench |
|||
| Beginner |
|||
| |
|||
| [[User:Maker|Maker]] |
|||
| |
|||
| None |
|||
|- |
|||
| [[Sketcher_Tutorial|Sketcher Tutorial]] |
|||
| Sketcher Workbench |
|||
| Beginner |
|||
| |
|||
| Ulrich |
|||
| |
|||
| |
|||
|- |
|||
| [[TechDraw_HowTo_Page|TechDraw HowTo Page]] |
|||
| TechDraw Workbench |
|||
| |
|||
| |
|||
| |
|||
| 0.19 |
|||
| None |
|||
|- |
|||
| [[TechDraw_Pitch_Circle_Tutorial|TechDraw Pitch Circle Tutorial]] |
|||
| TechDraw Workbench |
|||
| Beginner |
|||
| 0:10 |
|||
| Andergrin |
|||
| 0.19 |
|||
| None |
|||
|- |
|||
| [[TechDraw_TemplateGenerator|TechDraw TemplateGenerator]] |
|||
| TechDraw Workbench |
|||
| Intermediate |
|||
| |
|||
| [[User:FBXL5|FBXL5]] |
|||
| 0.19 |
|||
| None |
|||
|- |
|||
| [[TechDraw_TemplateHowTo|TechDraw TemplateHowTo]] |
|||
| TechDraw Workbench |
|||
| Intermediate |
|||
| 1:00 |
|||
| wandererfan |
|||
| 0.17 |
|||
| None |
|||
|- |
|||
| [[Thread_for_Screw_Tutorial|Thread for Screw Tutorial]] |
|||
| Product design |
|||
| Advanced |
|||
| 1:00 |
|||
| [[User:DeepSOIC|DeepSOIC]], [[User:Murdic|Murdic]], vocx |
|||
| 0.19 |
|||
| [https://forum.freecadweb.org/viewtopic.php?f=36&t=44668 Updated: Thread for screw tutorial] |
|||
|- |
|||
| [[Toothbrush_Head_Stand|Toothbrush Head Stand]] |
|||
| Modeling |
|||
| Beginner |
|||
| 1:00 |
|||
| [[User:EmmanuelG|EmmanuelG]] |
|||
| 0.16 or above |
|||
| [https://www.thingiverse.com/thing:2403310 Thingiverse 2403310] |
|||
|- |
|||
| [[Topological_data_scripting|Topological data scripting]] |
|||
| Programming |
|||
| Intermediate |
|||
| |
|||
| |
|||
| |
|||
| |
|||
|- |
|||
| [[Transient_FEM_analysis|Transient FEM analysis]] |
|||
| Finite Element Analysis |
|||
| |
|||
| |
|||
| |
|||
| |
|||
| |
|||
|- |
|||
| [[Tutorial_custom_placing_of_windows_and_doors|Tutorial custom placing of windows and doors]] |
|||
| Arch Workbench |
|||
| Intermediate |
|||
| 1:00 |
|||
| [[User:Vocx|Vocx]] |
|||
| 0.18 or above |
|||
| None |
|||
|- |
|||
| [[Tutorial_for_open_windows|Tutorial for open windows]] |
|||
| Arch Workbench |
|||
| Beginner |
|||
| 1:00 |
|||
| [[User:Vocx|Vocx]] |
|||
| 0.18 or above |
|||
| None |
|||
|- |
|||
| [[Tutorial_FreeCAD_POV_ray|Tutorial FreeCAD POV ray]] |
|||
| Raytracing Workbench |
|||
| Intermediate |
|||
| 2:00 |
|||
| [[User:Vocx|Vocx]] |
|||
| 0.18 or above |
|||
| None |
|||
|- |
|||
| [[Tutorial_KinematicAssembly|Tutorial KinematicAssembly]] |
|||
| Assembly3 Workbench |
|||
| Beginner |
|||
| 0:30 |
|||
| [[User:FBXL5|FBXL5]] |
|||
| 0.20 or above |
|||
| None |
|||
|- |
|||
| [[Tutorial_KinematicController|Tutorial KinematicController]] |
|||
| Programming |
|||
| Intermediate |
|||
| 1:00 |
|||
| [[User:FBXL5|FBXL5]] |
|||
| 0.20 or above |
|||
| None |
|||
|- |
|||
| [[Tutorial_KinematicSkeleton|Tutorial KinematicSkeleton]] |
|||
| Assembly3 Workbench |
|||
| Intermediate |
|||
| 0:40 |
|||
| [[User:FBXL5|FBXL5]] |
|||
| 0.20 |
|||
| None |
|||
|- |
|||
| [[Tutorial_Render_with_Blender|Tutorial Render with Blender]] |
|||
| Rendering |
|||
| Intermediate |
|||
| 1:00 |
|||
| [[User:Vocx|Vocx]] |
|||
| 0.18 or above |
|||
| None |
|||
|- |
|||
| [[VRML_Preparation_for_Robot_Simulation|VRML Preparation for Robot Simulation]] |
|||
| Robot Workbench |
|||
| Intermediate |
|||
| |
|||
| |
|||
| 0.11.4252ppa1 |
|||
| |
|||
|- |
|||
| [[Whiffle_Ball_tutorial|Whiffle Ball tutorial]] |
|||
| Product design |
|||
| Beginner |
|||
| 0:30 |
|||
| r-frank and vocx |
|||
| 0.17 or above |
|||
| [https://github.com/FreeCAD/Examples/blob/master/Whiffle_Ball_Tutorial_ExampleFiles/WhiffleBall_Tutorial_FCWiki.FCStd?raw=true WhiffleBall_Tutorial_FCWiki.FCStd] |
|||
|- |
|||
| [[Wikihouse_porting_tutorial|Wikihouse porting tutorial]] |
|||
| Import |
|||
| Intermediate/Advanced |
|||
| 1:00 |
|||
| |
|||
| |
|||
| |
|||
|} |
|||
{{Docnav |
|||
{{docnav|List of Commands|Interface Customization}} |
|||
|[[Frequently_asked_questions|FAQ]] |
|||
|[[Interface_Customization|Interface Customization]] |
|||
}} |
|||
{{Userdocnavi{{#translation:}}}} |
|||
[[Category:Tutorials/zh-cn]] |
|||
[[Category: |
[[Category:Tutorials{{#translation:}}]] |
||
Latest revision as of 09:18, 18 March 2024
本页展示了一系列精选的高质量图文教程。完整无序的教程集可以在Category:Tutorials找到。
如果您希望为FreeCAD维基文档与教程的编写做出贡献,请参考维基的通用指南WikiPages,并阅读tutorial guidelines。
请注意每个教程中所用的FreeCAD版本,因为有些教程采用的是老版FreeCAD。尽管常规的建模方式在新版FreeCAD中依然可行,但是某些工具却可能已经发生了变化。
See also video tutorials and books.
建筑物与BIM
-
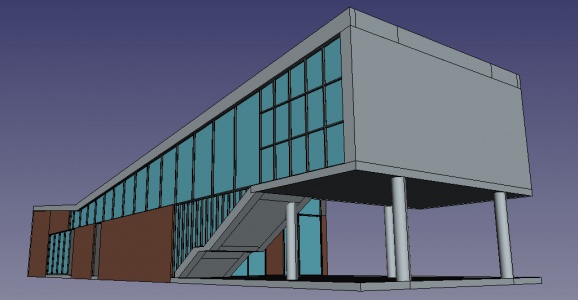
建筑工作台教程 (v0.14)
本文是一篇针对建筑工作台的基本介绍文章。文中通过DXF格式文件导入图纸,最后构建出对应的3D模型,整个流程大致展示了该工作台的一般工作流程。 -
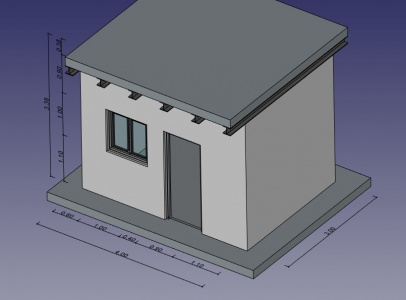
BIM 建模
本文讨论了如何建立一个小屋的模型、利用TechDraw工作台生成一份蓝图(blueprint),并导出为IFC格式文件。 -
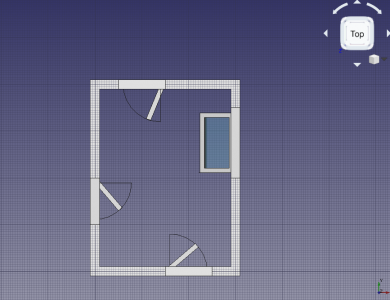
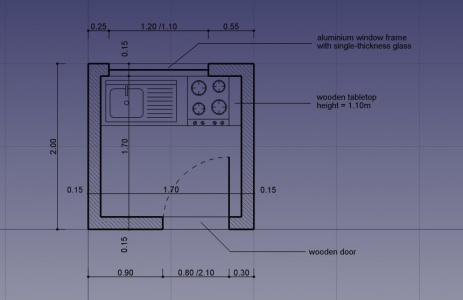
打开窗口与门 (v0.18)
本文展示了如何利用elevation与plan符号显示打开的窗口与门,并利用TechDraw工作台生成一个基本的平面图。 -
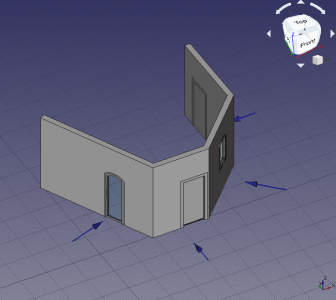
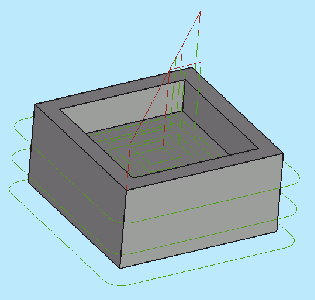
设计自定义窗口 (v0.18)
本文展示了如何利用草图工作台来绘制自定义门窗,并将其调整至墙体中合适的位置。 -
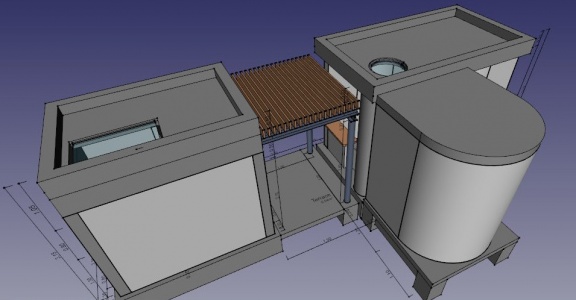
建筑面板教程 (v0.15)
文中利用草图工作台创建一个微型建筑的屋面板(roof panel)。这里会运用窗口工具与面板工具。 -
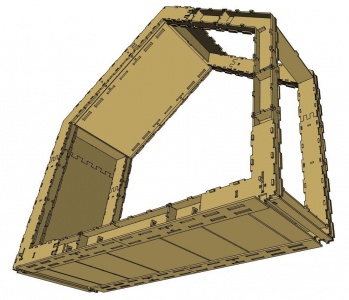
维基房屋(WikiHouse)建模
先导入由SketchUp创建的WikiHouse网格模型,再利用草图工作台与面板工具对其重新建模。
零件造型
FreeCAD提供了两种主要工作流程来实现零件造型(modeling part):
- 利用零件工作台(Part workbench)中的构造实体几何(constructive solid geometry,简作CSG)方法来组合对象(combining objects),以及
- 利用零件设计工作台进行参数化建模,并编辑feature。
请注意,零件设计工作台的工作流程自FreeCAD 0.17版起有了较大变化,而部分教程还未对此更新,可能仍然采用的是0.16版本。
-
利用PartDesign工作台创建一个简单的零件 (v0.17)
本文为PartDesign工作台工作流程的简介,在这里我们要:绘制草图、使用填充(pad)与挖槽(pocket)工具、并移动对象。 -
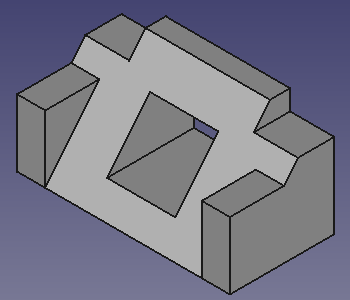
零件设计基础教程 (v0.17)
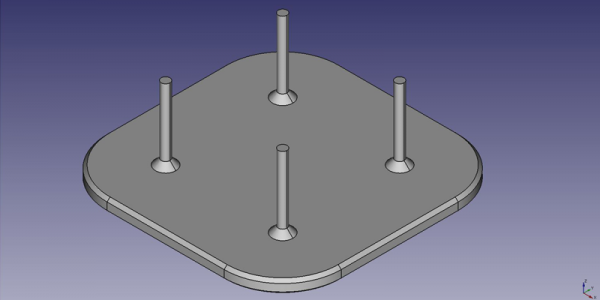
本文利用功能编辑方式来建立一个简单的零件,主要流程为:创建草图,再利用填充、外部引用、挖槽与镜像等工具来生成零件实体。 -
建立电动牙刷头架模型 (v0.16)
文中使用了多种功能:草图工具、距离约束与重合约束(coincident constraint)工具、填充工具、外部引用工具、倒圆角工具(fillet), 倒角工具(chamfer)、线性复制(linear pattern)工具与拔模(draft)。 -
针对产品设计进行建模 (v0.16)
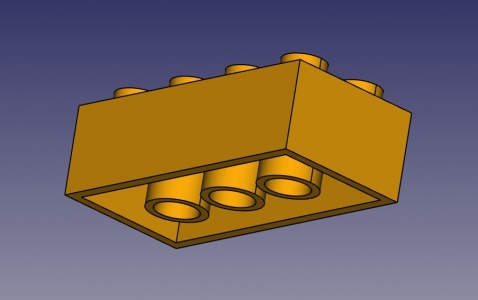
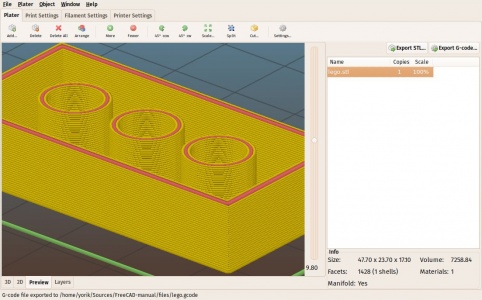
建立对乐高方块模型,要用到的工具有:草图、垂直距离与水平距离的约束、填充、挖槽、外部引用、线性复制与装配工作台。 -
传统建模,CSG方式
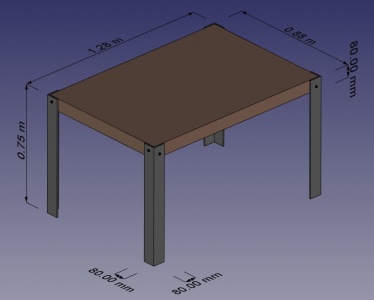
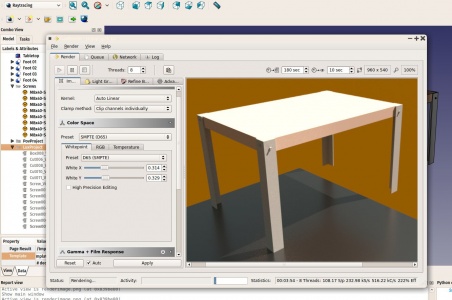
利用像立方体与圆柱体这样简单的实体,并辅以布尔运算(模拟“焊接”与“切割”)来创建一个桌子。 -
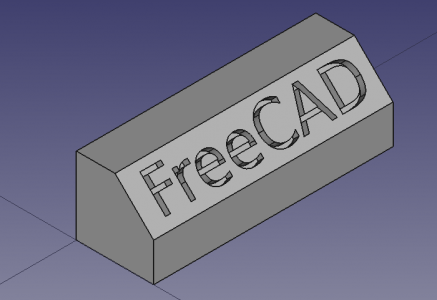
底图ShapeString工具教程 (v0.16)
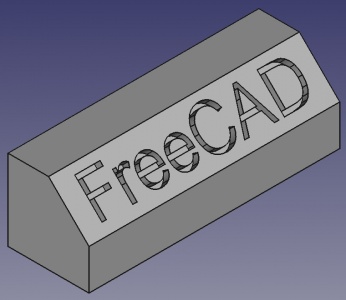
在实体上创建雕刻文字:首先挤压底图shapestring对象使之成为实体,再利用布尔运算从另一实体中将其切割,也就是对此文本进行雕刻。 -
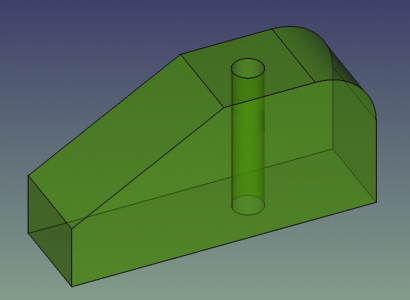
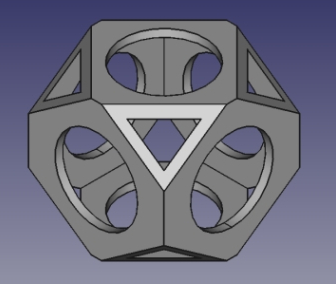
创建一个威浮球(wiffle ball) (v0.16)
对立方体与圆柱体等实体图元进行布尔运算(如并集与切割)来创建一个空心球。 -
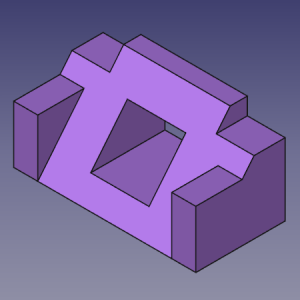
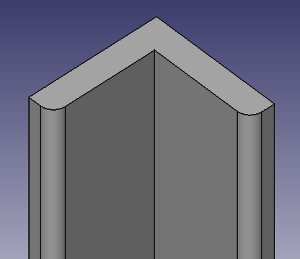
建模基本教程
创建利用两种方式一个角铁:第一种是对实体图元执行布尔运算(CSG);第二种是通过根据平面轮廓图纸进行挤压来实现。 -
Creating a simple part with Draft and Part Workbench
An introduction to modeling solids with Draft Workbench by creating a 2d profile in draft. -
Creating a simple part with PartDesign (v0.17)
An introduction to the PartDesign workflow: tracing a sketch, using pad, pocket, and moving the object. -
Basic Part Design Tutorial (v0.17)
Model a simple part using a feature editing methodology: creating a sketch, using pad, external references, pocket, and mirror. -
Basic Part Design Tutorial 019 (v0.19 or above)
An updated version of the previous tutorial that creates the same model using techniques that avoid the topological naming problem. -
Model an electric toothbrush head stand (v0.16 or above)
Multiple features used: sketch, distance and coincident constraints, pad, external references, fillet, chamfer, linear pattern, and draft. -
Modeling for product design (v0.16)
Modeling a Lego block: sketches, vertical and horizontal distance constraints, pad, pocket, external reference, linear pattern, and assembly. -
Traditional modeling, the CSG way
Modeling a table by using simple solids like cubes and cylinders, and performing boolean operations (fusions and cuts) with them. -
Draft ShapeString tutorial (v0.19)
Create engraved text on a solid: extrude a shapestring to make it solid, then use a boolean cut to carve it from another solid. -
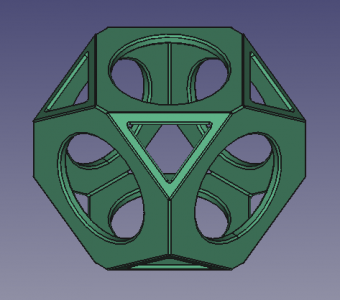
Create a wiffle ball (v0.19)
Use solid primitives, like cubes and cylinders, and boolean operations, like union and cut, to create a hollowed ball. -
Basic modeling tutorial
Create an iron angle by two methods: using solid primitives, and boolean operations (CSG); and by extruding a planar profile. -
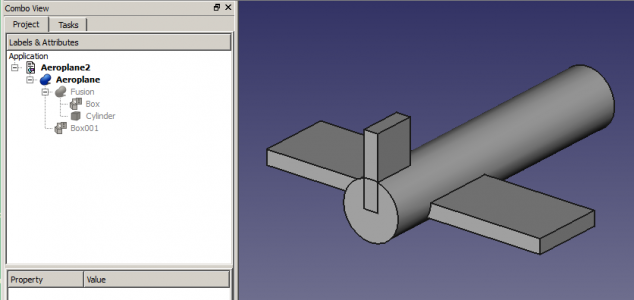
Aeroplane tutorial
Understand placements in FreeCAD by creating a simple aeroplane model. Then learn about rotation angles, yaw (Z), pitch (Y), and roll (X). -
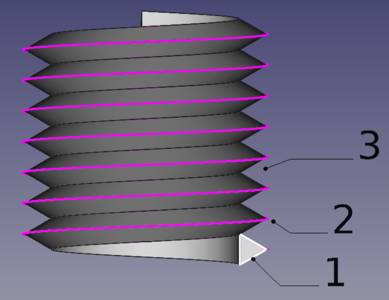
Thread for screw tutorial (v0.19)
Understand how to create threads with several techniques that include use of the tools Part Helix, PartDesign AdditivePipe, Part Sweep, Part Fuse, and Part Cut.
The Raspberry Pi project has made simple tutorials that are easy to follow, particularly for those new to CAD systems:
- freecad-dice, model a die with six faces, and optionally 3D print it.
- freecad-headphone-tidy, model a spool to organize and store earphones, and optionally 3D print it.
- freecad-chess-set, model and entire chess set in Bauhaus modernist style.
- raspberrypilearning repository (CC-BY 4.0) with other examples.
绘制底图与草图
-
绘制传统的2D底图
利用线段、连线、立方体、圆弧绘制建筑平面图,并为之添加填充图案、注释与标注。并将结果导出为DXF文件。 -
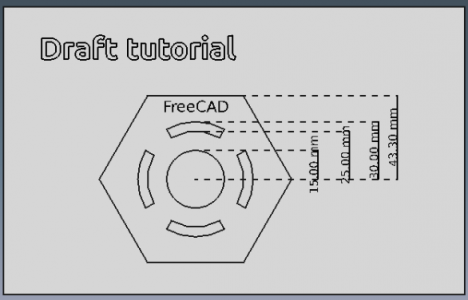
底图教程 (v0.16)
本文简单介绍了底图工作台中的常见工具:工作平面、网格、线段、弧线、升级(upgrade)、矩形、圆形、多边形、阵列、标注、注释与shapestring。 -
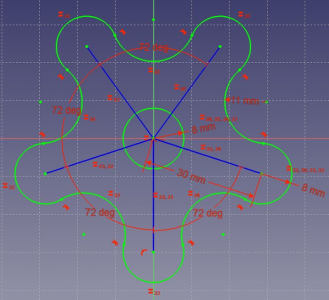
草图教程 (v0.16)
本文简单介绍了草图工作台中的常用工具:构建模式(construction mode)、线段、圆形、弧线、约束(等长约束、垂直约束、水平约束、相切约束、距离约束、角度约束、半径约束)。 -
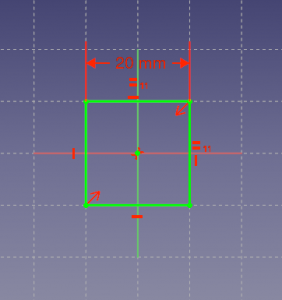
草图工作台中宏的使用教程 (v0.16)
学习高效地对草图进行约束。几何约束较之尺寸约束更受人们青睐。
技术制图
-
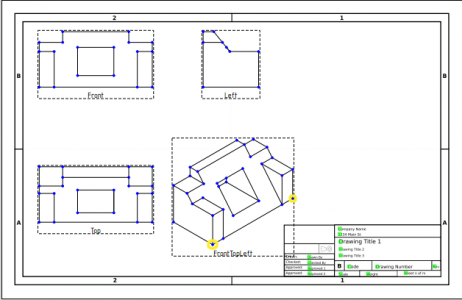
TechDraw工作台基础教程 (v0.17)
本文内容为针对TechDraw工作台中常见工具的基本介绍,如:页(page)、视图(view)、缩放(scale)、垂直标注与水平标注(vertical and horizontal dimensions)、注释( annotations)、正交投影组(projection groups)以及将标注与3D视图联系起来。 -
创建一个新的背景模板 (v0.17)
介绍如何在TechDraw工作台中使用以Inkscape创建的页模板。涉及的步骤有:确定表单的规格大小、为页面绘制布局框架、定义固有的文本并编辑文本域。
FEM
-
CalculiX cantilever FEM analysis (v0.20)
This in an example included in every installation of FreeCAD; it demonstrates a basic analysis with the CalculiX FE solver. Purge the current result, re-run the solver, and view the displacements and stresses in the deformed mesh in the viewport. -
Simple FEM introduction (v0.20)
This is a short introduction to the steps required to perform an analysis in the FEM Workbench: model your object, create a mesh, add constraints and forces, add a material, run the solver, and visualize the results. -
FEM shear analysis of a composite block (v0.17)
Study the deformation of a block made of a hard nucleus surrounded by a softer material: create mesh regions, add materials, set up sliding constraints, add shear loads, run the solver, and visualize the results with a clip plane. -
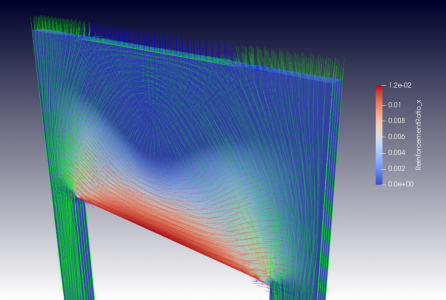
Analysis of reinforced concrete with FEM (v0.19)
Estimate the level of reinforcement required in a concrete structure to prevent brittle failure under tension or shear. -
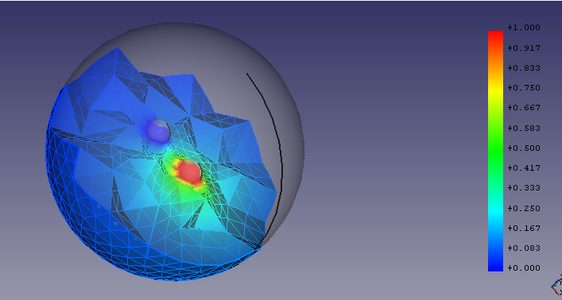
Electrostatic equation – Capacitance of two balls (v0.19)
This example shows how to simulate a capacitance. It illustrates how to setup the example, study it's various parts, solve it using the Elmer Solver and visualize the results using Clip Filter. -
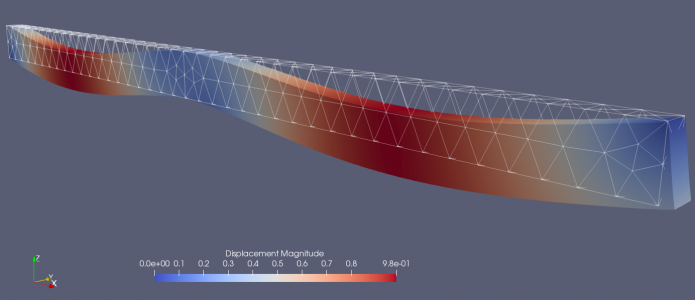
Post-Processing of FEM results with Paraview (v0.19)
This tutorial explains the basics of transferring data from the FEM Workbench to Paraview and shows some of the options and settings for displaying data.
CNC & 3D打印
-
CAM Workbench for the impatient
This is a quick presentation of the workflow for the CAM Workbench: create a job, define the output, define the milling tool, define the path operations, start the simulation, and generate a G-code output file. -
Preparing models for 3D printing (v0.16)
Convert a solid object to a mesh object using the Mesh Workbench, export the mesh to STL format, and use Slic3r to prepare the G-code. Alternatively use the Cura Workbench or the CAM Workbench to generate the G-code.
渲染
-
创建渲染文件
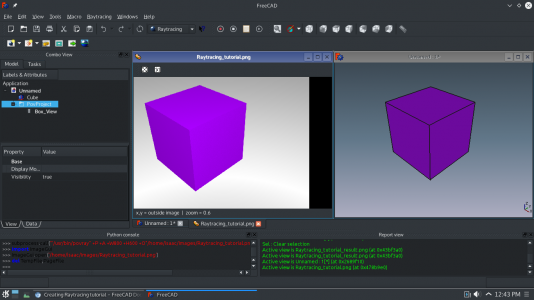
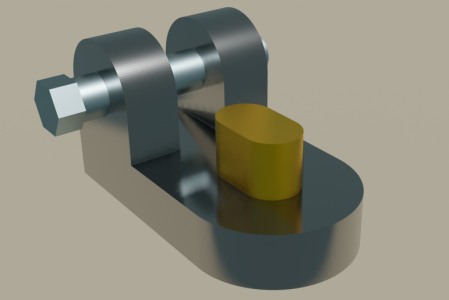
如果系统中安装了POV-Ray与LuxRender,就利用它们为您的设计快速地渲染出一幅图像。 -
FreeCAD与POV-ray中级教程 (v0.18)
利用POV-Ray生成更佳渲染效果的工作流程:创建工程、添加对象、设置摄像机、保存.pov文件,手动编辑此文件来改良其纹理、表面、光照,最后运行渲染器。 -
利用Blender渲染一个FreeCAD部件 (v0.18)
从FreeCAD中将部件导出为Wavefront的.obj格式,再将其导入Blender中,建立一个简单的太阳光源,利用Principled BSDF着色器为之赋予基本材质,最后通过EEVEE与Cycles来生成渲染图片。
Robot workbench
机器人工作台
-
机器人工作台教程 (v0.17)
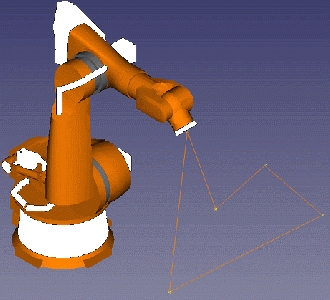
模拟工业机器人的运动:建立一个机器人的运动轨迹(trajectory)、建立初始位置(home position)、改变机器人的位置、插入各种路点(waypoints),并模拟机器人的运动。
Scripting
These are tutorials that are related to scripting or programming. They are geared towards more experienced users, who are already somewhat familiar with the program.
Tutorials - Comprehensive list
Here are listed all the tutorials that are not in the manual regardless of their quality. If a tutorial is listed in the Category:Tutorials and not in this table please insert it.
| Tutorial | Topic | Level | Time to complete hh:mm | Authors | FreeCAD version | Example files
|
|---|---|---|---|---|---|---|
| Add Button to FEM Toolbar Tutorial | Finite Element Analysis | JohnWang | ||||
| Add FEM Constraint Tutorial | Finite Element Analysis | M42kus | ||||
| Add FEM Equation Tutorial | Finite Element Analysis | JohnWang | ||||
| Adding a new mouse navigation option to FreeCAD (unfinished) | Programming | Advanced | Kunda1 | 0.19.x | None | |
| Advanced Attachment OYX | Attachment | Intermediate/Advanced | drmacro | 0.19 | None | |
| Advanced TechDraw Tutorial (unfinished) | TechDraw Workbench | Advanced | domad | 0.19 | None | |
| Aeroplane | Part Workbench | Beginner | 0:10 | Hughthecat | ||
| Analysis of reinforced concrete with FEM | Finite Element Analysis | Intermediate | 1:00 | HarryvL | 0.19 or above | |
| Arch panel tutorial | Arch Workbench | Beginner | 1:00 | Yorik | ||
| Arch tutorial | Modeling | Intermediate | Yorik | 0.14 | ||
| Basic Attachment Tutorial | Attachment | Beginner/intermediate | 1:00 | Bance | 0.17 or above | Basic Attachment Tutorial.FCStd |
| Basic modeling tutorial | Modelling | Beginner | 0:15 | NormandC | Any | None |
| Basic Part Design Tutorial | Modeling | Beginner | Mark Stephen (Quick61) and HarryGeier | 0.17 or above | Basic Part Design for v0.17 | |
| Basic Part Design Tutorial 019 | Modeling | Beginner | 1:00 | Carlo Dormeletti and Ed Williams | 0.19 or above | |
| Basic Sketcher Tutorial | Sketcher Workbench | Beginner | 1:00 | Drei and Vocx | 0.19 | Basic Sketcher tutorial |
| Basic TechDraw Tutorial | TechDraw Workbench | Beginner | WandererFan | 0.17 or above | Basic Part Design for v0.17 Sample Basic TechDraw Tutorial Sample | |
| BIM ingame tutorial | Arch Workbench | Beginner | Yorik | |||
| CAM Walkthrough for the Impatient | CAM Workbench | Chrisb | ||||
| Code snippets | Python | Beginner | ||||
| Creating a simple part with Draft and Part WB | Modeling | Beginner | 1:30 | Heda | - | - |
| Creating a simple part with Part WB | Modeling | Beginner | 2:00 | Heda | - | - |
| Creating a simple part with PartDesign | Modeling | Beginner | 1:00 | GlouGlou | 0.17 or above | Creating a simple PartDesign Body.FCStd |
| Customize Toolbars | Customization | Beginner | 0:05 | Mario52 | Any | None |
| Draft ShapeString tutorial | Product Design | Beginner | 0:30 | r-frank and vocx | 0.17 or above | Draft_Shapestring_Text |
| Draft tutorial | Draft Workbench | Beginner | 0:30 | Drei and vocx | 0.19 | Draft tutorial updated |
| Engine Block Tutorial | Part Workbench | Beginner | 1:00 | Andrewbuck40 | 0.14.3700 | |
| Example Combined Footing | Reinforcement Workbench | Intermediate | Shiv Charan | 0.20 | None | |
| Example Slab Having LShape Rebars Reinforcement Mesh | Reinforcement Workbench | Intermediate | Shiv Charan | 0.20 | None | |
| Example Slab Having Mesh Of Straight Rebars | Reinforcement Workbench | Intermediate | Shiv Charan | 0.20 | None | |
| Example Slab Having UShape Rebars Reinforcement Mesh | Reinforcement Workbench | Intermediate | Shiv Charan | 0.20 | None | |
| Example Slab Spanning in One Direction | Reinforcement Workbench | Intermediate | Shiv Charan | 0.20 | None | |
| Example Slab Spanning in Two Directions | Reinforcement Workbench | Intermediate | Shiv Charan | 0.20 | None | |
| Export to STL or OBJ | Export | Beginner | 0:20 | r-frank | 0.16.6703 | |
| Extend FEM Module | Finite Element Analysis | M42kus | ||||
| FEM CalculiX Cantilever 3D | Finite Element Analysis | Beginner | 0:10 | Bernd | 0.16.6377 or above | |
| FEM Example Capacitance Two Balls | Finite Element Analysis | Beginner | Sudhanshu Dubey | 0.19 | None | |
| FEM Shear of a Composite Block | Finite Element Analysis | Beginner/Intermediate | 0:30 | HarryvL | 0.17.12960 or above | |
| FEM tutorial | Finite Element Analysis | Beginner | 0:10 | Drei | 0.17 or above | |
| FEM Tutorial Python | Finite Element Analysis | Intermediate | 0:30 | Bernd | 0.18.15985 or above | |
| FreeCAD-Ship s60 tutorial | Ship Workbench | Beginner | ||||
| FreeCAD-Ship s60 tutorial (II) | Ship Workbench | Beginner | ||||
| How to install additional workbenches | Programming | Medium programmer | 0:15 | r-frank | Any | None |
| How to install macros | Programming | Medium programmer | 0:15 | Mario52 | Any | None |
| Import from STL or OBJ | Import | Beginner | 0:30 | r-frank | 0.16.6703 | |
| Import OpenSCAD code | Import | Beginner | 0:30 | r-frank | 0.16.6704 | None |
| Import text and geometry from Inkscape | Import | Beginner | 0:30 | r-frank | 0.16.6704 | |
| Import/Export IFC - compiling IfcOpenShell | Arch Workbench | Advanced | 2:00 | Pablo Gil | ||
| Measurement Of Angles On Holes | TechDraw Workbench | Beginner | 0:01 | AnHi | 0.19 | |
| PartDesign Bearingholder Tutorial I | Product design | Beginner | 1:00 | NormandC | ||
| PartDesign Bearingholder Tutorial II | Product design | Beginner | 1:00 | NormandC | ||
| PartDesign tutorial | Sketcher Workbench | Beginner | 0:15 | Drei | 0.16 or above | |
| Plot Basic tutorial | Plot Workbench | Beginner | ||||
| Plot MultiAxes tutorial | Plot workbench | Intermediate | ||||
| Post-Processing of FEM Results with Paraview | Finite Element Analysis | Intermediate | 2:00 | HarryvL | 0.19 | Beam and wall |
| Private Preference Packs | Customization | Intermediate/Advanced | drmacro | 1.0 or above | ||
| Python scripting tutorial | Programming | Intermediate | ||||
| Raytracing tutorial | Raytracing Workbench | Beginner | 0:10 | Drei | 0.16 or above | |
| Robot 6-Axis | Robot Workbench | Intermediate | ||||
| Robot tutorial | Robot Workbench | Beginner | r-frank | |||
| Scripted Parts: Ball Bearing - Part 1 | Python | Beginner | 0:30 | r-frank | 0.16.6706 | |
| Scripted Parts: Ball Bearing - Part 2 | Python | Beginner | 0:30 | r-frank | 0.16.6706 | |
| Scripts | Python | Beginner | onekk Carlo | 0.19 | ||
| Sketcher Micro Tutorial - Constraint Practices | Sketcher Workbench | Beginner | 0:30 | Mark Stephen (Quick61) and vocx | 0.19 | Sketcher Constraints practices |
| Sketcher reference | Sketcher Workbench | |||||
| Sketcher requirement for a sketch | Sketcher Workbench | Beginner | Maker | None | ||
| Sketcher Tutorial | Sketcher Workbench | Beginner | Ulrich | |||
| TechDraw HowTo Page | TechDraw Workbench | 0.19 | None | |||
| TechDraw Pitch Circle Tutorial | TechDraw Workbench | Beginner | 0:10 | Andergrin | 0.19 | None |
| TechDraw TemplateGenerator | TechDraw Workbench | Intermediate | FBXL5 | 0.19 | None | |
| TechDraw TemplateHowTo | TechDraw Workbench | Intermediate | 1:00 | wandererfan | 0.17 | None |
| Thread for Screw Tutorial | Product design | Advanced | 1:00 | DeepSOIC, Murdic, vocx | 0.19 | Updated: Thread for screw tutorial |
| Toothbrush Head Stand | Modeling | Beginner | 1:00 | EmmanuelG | 0.16 or above | Thingiverse 2403310 |
| Topological data scripting | Programming | Intermediate | ||||
| Transient FEM analysis | Finite Element Analysis | |||||
| Tutorial custom placing of windows and doors | Arch Workbench | Intermediate | 1:00 | Vocx | 0.18 or above | None |
| Tutorial for open windows | Arch Workbench | Beginner | 1:00 | Vocx | 0.18 or above | None |
| Tutorial FreeCAD POV ray | Raytracing Workbench | Intermediate | 2:00 | Vocx | 0.18 or above | None |
| Tutorial KinematicAssembly | Assembly3 Workbench | Beginner | 0:30 | FBXL5 | 0.20 or above | None |
| Tutorial KinematicController | Programming | Intermediate | 1:00 | FBXL5 | 0.20 or above | None |
| Tutorial KinematicSkeleton | Assembly3 Workbench | Intermediate | 0:40 | FBXL5 | 0.20 | None |
| Tutorial Render with Blender | Rendering | Intermediate | 1:00 | Vocx | 0.18 or above | None |
| VRML Preparation for Robot Simulation | Robot Workbench | Intermediate | 0.11.4252ppa1 | |||
| Whiffle Ball tutorial | Product design | Beginner | 0:30 | r-frank and vocx | 0.17 or above | WhiffleBall_Tutorial_FCWiki.FCStd |
| Wikihouse porting tutorial | Import | Intermediate/Advanced | 1:00 |
- Getting started
- Installation: Download, Windows, Linux, Mac, Additional components, Docker, AppImage, Ubuntu Snap
- Basics: About FreeCAD, Interface, Mouse navigation, Selection methods, Object name, Preferences, Workbenches, Document structure, Properties, Help FreeCAD, Donate
- Help: Tutorials, Video tutorials
- Workbenches: Std Base, Arch, Assembly, CAM, Draft, FEM, Inspection, Mesh, OpenSCAD, Part, PartDesign, Points, Reverse Engineering, Robot, Sketcher, Spreadsheet, Surface, TechDraw, Test Framework
- Hubs: User hub, Power users hub, Developer hub
