PartDesign PolarPattern: Difference between revisions
(Removed V0.18 instructions. And references to V0.17.) |
(Description) |
||
| Line 22: | Line 22: | ||
<!--T:11--> |
<!--T:11--> |
||
The [[Image:PartDesign_PolarPattern.svg|24px]] '''PartDesign PolarPattern''' tool creates a polar pattern of one or more features. |
|||
The '''polar pattern''' tool takes a chosen feature and creates a set of copies rotated around a chosen axis. A list of features can be patterned. |
|||
</translate> |
</translate> |
||
[[File:PartDesign PolarPattern example.png|none]] |
[[File:PartDesign PolarPattern example.png|none]] |
||
<translate> |
<translate> |
||
<!--T:12--> |
<!--T:12--> |
||
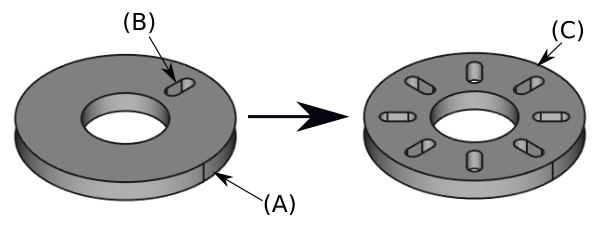
{{Caption|A slot-shaped pocket (B) made on top of a base solid (A, also referred to as support) is used for a polar pattern. The result (C) is shown on the right.}} |
|||
==Usage== <!--T:13--> |
==Usage== <!--T:13--> |
||
Revision as of 08:44, 9 June 2022
|
|
| Menu location |
|---|
| Part Design → Apply a pattern → PolarPattern |
| Workbenches |
| PartDesign |
| Default shortcut |
| None |
| Introduced in version |
| - |
| See also |
| None |
Description
The PartDesign PolarPattern tool creates a polar pattern of one or more features.

A slot-shaped pocket (B) made on top of a base solid (A, also referred to as support) is used for a polar pattern. The result (C) is shown on the right.
Usage
To create a pattern
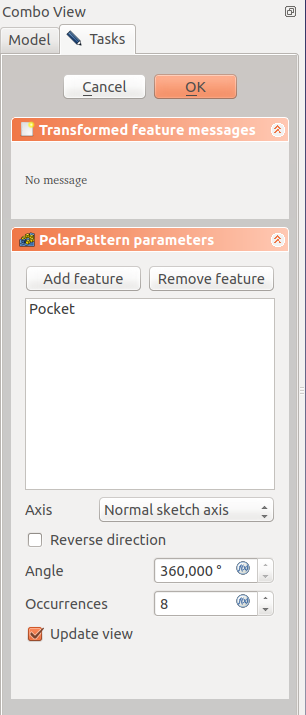
- (Optional) Select the feature (or introduced in version 0.19 several features) to be patterned.
- Press the
PolarPattern button.
- If you didn't initially select any features, you'll be able to select a single base feature
- Define the Axis. See Options.
- Define the Angle between the last copied occurrence and the original feature.
- Set the number of Occurrences.
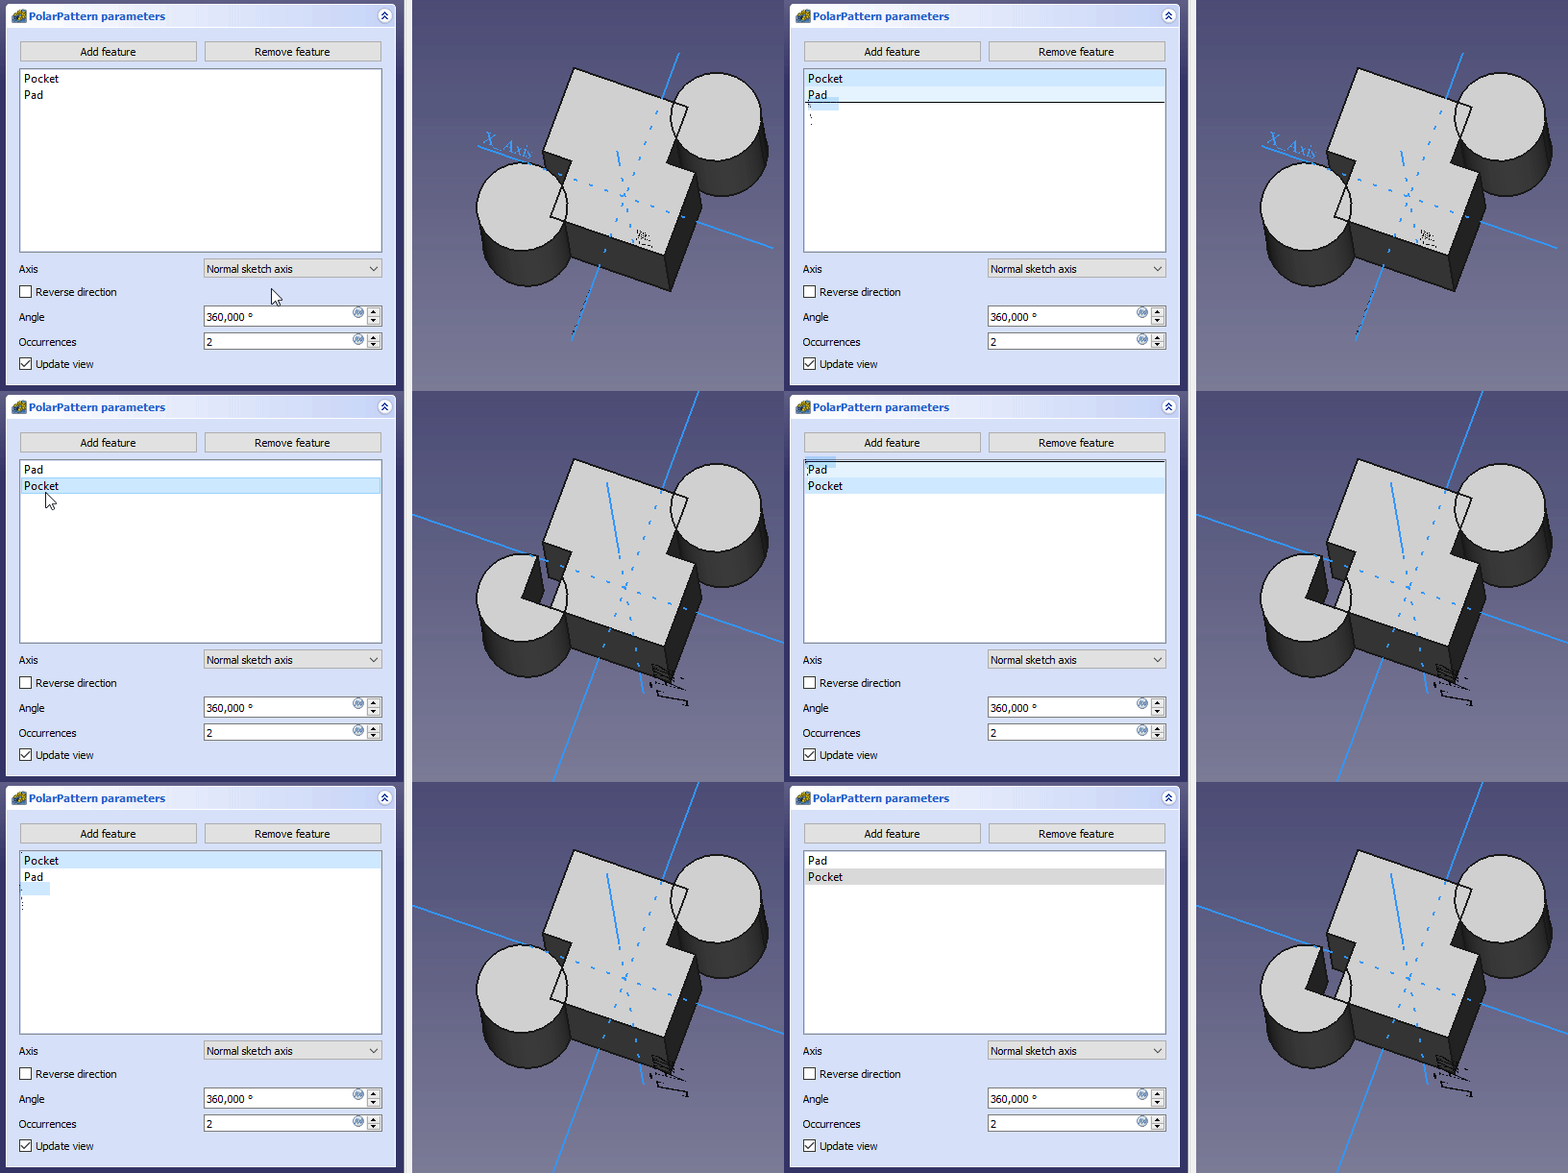
- If you have several features in the pattern, their order can be important, see the image below.
- Press OK.
Ordering features
Effect of the feature order
introduced in version 0.19 You can change the order by dragging the feature in the list and you will see the result immediately as preview.
Adding features
- Press Add feature to add a feature to be patterned.
- Switch to the Model tree;
- Select in the tree the feature to be added.
- Repeat to add other features.
Removing features
- Right-click on the feature in the list and select Remove.
or
- Press Remove feature to remove a feature from the list.
- Switch to the Model tree;
- Select in the tree the feature to be removed.
- Repeat to remove other features.
Options

Axis
When creating a polar pattern feature, the PolarPattern parameters dialogue offers different ways of specifying the pattern rotation axis.
Normal sketch axis
An axis being normal to the sketch and starting in the origin of the sketch of the feature being used is taken as axis for the polar pattern.
The pattern direction can be reversed by ticking 'Reverse direction'.
Horizontal sketch axis
Uses the horizontal axis of the sketch for axis.
Vertical sketch axis
Uses the vertical axis of the sketch for axis.
Custom Sketch Axis
If the sketch which defines the feature to be patterned also contains a construction line (or lines), then the drop down list will contain one custom sketch axis for each construction line. The first construction line will be labelled Sketch axis 0.
Base (X/Y/Z) axis
Select one of the Body Origin's standard axis (X, Y or Z) as axis.
Select reference...
Allows you to select either a DatumLine or an edge of an object or a line of a sketch to use for axis.
Angle and Occurrences
Specifies the angle to be covered by the pattern, and the total number of pattern shapes (including the original feature). For example, four occurrences in an angle of 180 degrees would give a spacing of 60 degrees between patterns. There is one exception: If the angle is 360 degrees, since first and last occurrence are identical, four occurrences will be spaced 90 degrees apart.
Limitations
- Structure tools: Part, Group
- Helper tools: Create body, Create sketch, Edit sketch, Map sketch to face
- Modeling tools
- Datum tools: Create a datum point, Create a datum line, Create a datum plane, Create a local coordinate system, Create a shape binder, Create a sub-object(s) shape binder, Create a clone
- Additive tools: Pad, Revolution, Additive loft, Additive pipe, Additive helix, Additive box, Additive cylinder, Additive sphere, Additive cone, Additive ellipsoid, Additive torus, Additive prism, Additive wedge
- Subtractive tools: Pocket, Hole, Groove, Subtractive loft, Subtractive pipe, Subtractive helix, Subtractive box, Subtractive cylinder, Subtractive sphere, Subtractive cone, Subtractive ellipsoid, Subtractive torus, Subtractive prism, Subtractive wedge
- Transformation tools: Mirrored, Linear Pattern, Polar Pattern, Create MultiTransform, Scaled
- Dress-up tools: Fillet, Chamfer, Draft, Thickness
- Boolean: Boolean operation
- Extras: Migrate, Sprocket, Involute gear, Shaft design wizard
- Context menu: Set tip, Move object to other body, Move object after other object, Appearance, Color per face
- Getting started
- Installation: Download, Windows, Linux, Mac, Additional components, Docker, AppImage, Ubuntu Snap
- Basics: About FreeCAD, Interface, Mouse navigation, Selection methods, Object name, Preferences, Workbenches, Document structure, Properties, Help FreeCAD, Donate
- Help: Tutorials, Video tutorials
- Workbenches: Std Base, Arch, Assembly, CAM, Draft, FEM, Inspection, Mesh, OpenSCAD, Part, PartDesign, Points, Reverse Engineering, Robot, Sketcher, Spreadsheet, Start, Surface, TechDraw, Test Framework, Web
- Hubs: User hub, Power users hub, Developer hub
