PartDesign Draft: Difference between revisions
No edit summary |
({{KEY|DEL}} -> {{KEY|Del}}: All caps for this key seems rare? Or is this a MacOS thing?) |
||
| Line 69: | Line 69: | ||
* {{MenuCommand|Add}}: Add faces to the selection by pressing the {{Button|Add}} button and selecting more faces. |
* {{MenuCommand|Add}}: Add faces to the selection by pressing the {{Button|Add}} button and selecting more faces. |
||
* {{MenuCommand|Remove}}: Choose a way to remove faces from the selection: |
* {{MenuCommand|Remove}}: Choose a way to remove faces from the selection: |
||
** Select each face in the list of the dialog and press the {{KEY| |
** Select each face in the list of the dialog and press the {{KEY|Del}} key or right-click in the list and select {{MenuCommand|Remove}} from the context menu. |
||
** Press the {{Button|Remove}} button. All faces being previously selected are highlighted in purple. Select each face to be removed. |
** Press the {{Button|Remove}} button. All faces being previously selected are highlighted in purple. Select each face to be removed. |
||
Revision as of 09:30, 4 June 2022
|
|
| Menu location |
|---|
| Part Design → Apply a dress-up feature → Draft |
| Workbenches |
| PartDesign |
| Default shortcut |
| None |
| Introduced in version |
| - |
| See also |
| None |
Description
The PartDesign Draft tool creates angular draft on the selected faces of an object. It adds a Draft object to the document with its corresponding representation in the Tree view.
Usage
Add a draft
- Optionally activate the Body to apply the Draft to.
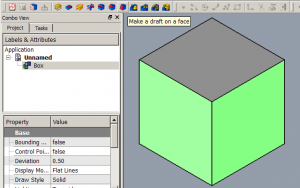
- Select one or more faces of the Body.
- There are several ways to invoke the tool:
- Press the
Draft button.
- Select the Part Design → Apply a dress-up feature →
Draft option from the menu.
- Press the
- If there is no active Body, and there are two or more Bodies in the document, the Active Body Required dialog will open and prompt you to activate one. If there is a single Body it will be activated automatically.
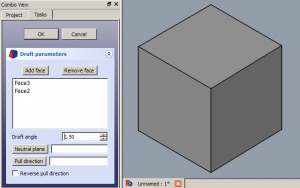
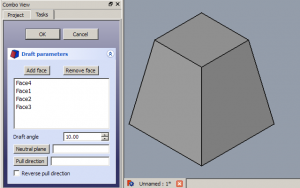
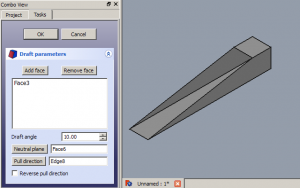
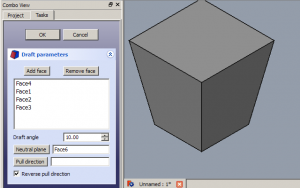
- The Draft parameters task panel opens. See Options for more information.
- Press the OK button to finish.
- Remember:
- Since there must be at least one face for the feature, the last remaining face in the list cannot be removed.
Edit a draft
- Do one of the following:
- The Draft parameters task panel opens. See Options for more information.
- Press the OK button to finish.
Options
- Draft angle: Set the Draft angle either by entering a value or by clicking on the up/down arrows.
- Add: Add faces to the selection by pressing the Add button and selecting more faces.
- Remove: Choose a way to remove faces from the selection:
- Select each face in the list of the dialog and press the Del key or right-click in the list and select Remove from the context menu.
- Press the Remove button. All faces being previously selected are highlighted in purple. Select each face to be removed.
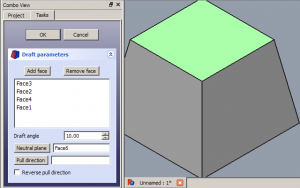
- Neutral plane: Set the the neutral plane by pressing the Neutral plane button and selecting the plane that must not change dimensionally. The change is made in real time.
- Pull direction: Set the the pull direction by pressing the Pull direction button, then select an edge. Pull Direction is only effective if the Neutral Plane has been set. Results can be unpredictable.
- Reverse pull direction: invert the pull direction by checking the Reverse pull direction checkbox. This will toggle the draft between positive and negative angles.
Notes
- The Draft tool will only function on faces that are normal to each other. If there are any tangential faces attached to the face you wish to apply draft to, it will fail. A common cause of failure is attempting to apply draft to a face that already has a fillet or chamfer applied to it. In this case, remove the tangential surface, apply the draft as need, then re-apply the fillet or chamfer.
Properties
See also: Property editor.
A PartDesign Draft object is derived from a Part Feature object and inherits all its properties. It also has the following additional properties:
Data
Base
- DataAngle (
Angle): Angle. Cannot be negative. Default:1.5 °. - DataReversed (
Bool): Reversed. Default:false. - DataBase (
LinkSub): Base. Sub-link to the parent feature's list of selected edges and faces. - DataSupportTransform (
Bool): Support Transform. "Include the base additive/subtractive shape when used in pattern features.
- If disabled, only the dressed part of the shape is used for patterning. Default:
false.
- Data (hidden)AddSubShape (
PartShape): Add Sub Shape. - Data (hidden)BaseFeature (
Link): Base Feature. Link to the parent feature. - Data (hidden)_Body (
LinkHidden): _Body. Hidden link to the parent body.
Draft
- DataNeutralPlane (
LinkSub): Neutral Plane. Sub-link to the parent feature's list containing the neutral plane. - DataPullDirection (
LinkSub): Pull Direction.
Part Design
- DataRefine (
Bool): "Refine shape (clean up redundant edges) after adding/subtracting". Default:true.
- Structure tools: Part, Group
- Helper tools: Create body, Create sketch, Edit sketch, Map sketch to face
- Modeling tools
- Datum tools: Create a datum point, Create a datum line, Create a datum plane, Create a local coordinate system, Create a shape binder, Create a sub-object(s) shape binder, Create a clone
- Additive tools: Pad, Revolution, Additive loft, Additive pipe, Additive helix, Additive box, Additive cylinder, Additive sphere, Additive cone, Additive ellipsoid, Additive torus, Additive prism, Additive wedge
- Subtractive tools: Pocket, Hole, Groove, Subtractive loft, Subtractive pipe, Subtractive helix, Subtractive box, Subtractive cylinder, Subtractive sphere, Subtractive cone, Subtractive ellipsoid, Subtractive torus, Subtractive prism, Subtractive wedge
- Transformation tools: Mirrored, Linear Pattern, Polar Pattern, Create MultiTransform, Scaled
- Dress-up tools: Fillet, Chamfer, Draft, Thickness
- Boolean: Boolean operation
- Extras: Migrate, Sprocket, Involute gear, Shaft design wizard
- Context menu: Set tip, Move object to other body, Move object after other object, Appearance, Color per face
- Getting started
- Installation: Download, Windows, Linux, Mac, Additional components, Docker, AppImage, Ubuntu Snap
- Basics: About FreeCAD, Interface, Mouse navigation, Selection methods, Object name, Preferences, Workbenches, Document structure, Properties, Help FreeCAD, Donate
- Help: Tutorials, Video tutorials
- Workbenches: Std Base, Arch, Assembly, CAM, Draft, FEM, Inspection, Mesh, OpenSCAD, Part, PartDesign, Points, Reverse Engineering, Robot, Sketcher, Spreadsheet, Surface, TechDraw, Test Framework
- Hubs: User hub, Power users hub, Developer hub
