PartDesign: Profilo ad evolvente
|
|
| Posizione nel menu |
|---|
| DisegnoPezzo → Ingranaggio Evolvente... |
| Ambiente |
| DisegnoPezzo |
| Avvio veloce |
| Nessuno |
| Introdotto nella versione |
| - |
| Vedere anche |
| Nessuno |
Description
Descrizione
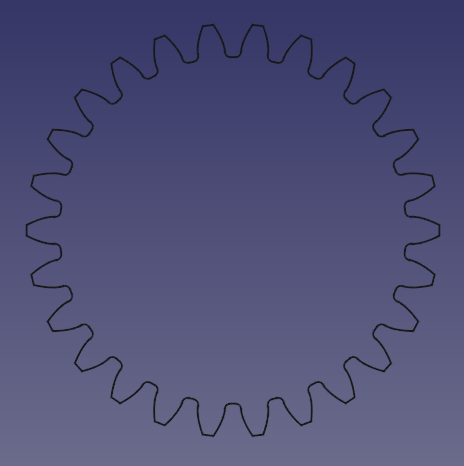
Questo strumento consente di creare un profilo 2D dell'evolvente di un ingranaggio. Questo profilo 2D è completamente parametrico, e può essere estruso con la funzione DisegnoPezzo Pad di PartDesign.
Per informazioni più dettagliate consultare le voci di Wikipedia per: Gear e Involute Gear
For more detailed information see Wikipedia's entries for: Gear and Involute Gear
Usage
Create the profile
Utilizzo
Create a spur gear
- Select the gear profile in the Tree view.
- Press the
PartDesign Pad button.
- Set the pad's DatiLength to the desired face width of the gear.
- Click OK
Create a helical gear
- Select the gear profile in the Tree view.
- Press the
PartDesign AdditiveHelix button.
- Choose as Axis the normal of the gear profile, that is Normal sketch axis introduced in version 0.20. (In earlier versions the Base Z axis can be used as long as the profile's plane has not been altered.)
- Choose a Height-Turns mode.
- Set the DatiHeight to the desired face width of the gear.
- To set the desired helical angle an Expression for the DatiTurns is required.
- Click the blue
icon at the right of the input field.
- Enter the following formula:
Height * tan(25°) / (InvoluteGear.NumberOfTeeth * InvoluteGear.Modules * pi), where25°is an example for the desired helical angle (also known as beta-value) andInvoluteGearis the DatiName of the profile. - Click OK to close the formula editor.
- Click the blue
- Click OK to close the task panel.
Hint: To make the helical angle an accessible parameter, use a dynamic property:
- Select the profile.
- In the Property editor activate the Show all option in the context menu.
- Again in the context menu, select Add Property. Note: this entry is only available when Show all is active.
- In the Add Property dialog:
- Choose
App::PropertyAngleas Type. - Set
Gearas Group. - Set
HelicalAngleas Name (without a space). - Click OK
- Choose
- Now a new property DatiHelical Angle (space added automatically), with an initial value of
0.0°, becomes available. - Assign the desired helical angle to the new property.
- In the formula of the DatiTurns property of the AdditiveHelix, you can now reference
InvoluteGear.HelicalAngleinstead of the hard coded value of e.g.25°; again assumingInvoluteGearis the DatiName of the profile.
Properties
- External gear: True o false
- Alta precisione: True o False
- Modulo: Diametro diviso per il numero di denti.
- Numero di denti: Impostare il numero di denti.
- Angolo di pressione: Angolo acuto tra la retta di pressione e la normale alla congiungente i centri degli ingranaggi. Di default è 20 gradi. (Altre info)
Limitations
- It is currently not possible to adjust the tooth thickness. Tooth and tooth space are distributed equally on the pitch circle. Thus the only way to control backlash is to adjust the center distance in a gear paring.
- There is currently no undercut in the generated gear profile. That means gears with a low number of teeth can interfere with the teeth of the mating gear. The lower limit depends on the DatiPressure Angle and is around 17 teeth for 20° and 32 for 14.5°. Most practical applications tolerate a missing undercut for gears a little smaller than this theoretical limit though.
Tutorials
Correlazioni
- Structure tools: Part, Group
- Helper tools: Create body, Create sketch, Attach sketch, Edit sketch, Validate sketch, Check geometry, Create a sub-object(s) shape binder, Create a clone, Create a datum plane, Create a datum line, Create a datum point, Create a local coordinate system
- Modeling tools:
- Additive tools: Pad, Revolution, Additive loft, Additive pipe, Additive helix, Additive box, Additive cylinder, Additive sphere, Additive cone, Additive ellipsoid, Additive torus, Additive prism, Additive wedge
- Subtractive tools: Pocket, Hole, Groove, Subtractive loft, Subtractive pipe, Subtractive helix, Subtractive box, Subtractive cylinder, Subtractive sphere, Subtractive cone, Subtractive ellipsoid, Subtractive torus, Subtractive prism, Subtractive wedge
- Boolean: Boolean operation
- Dress-up tools: Fillet, Chamfer, Draft, Thickness
- Transformation tools: Mirrored, Linear Pattern, Polar Pattern, Create MultiTransform, Scaled
- Extras: Migrate, Sprocket, Involute gear, Shaft design wizard
- Context menu: Set tip, Move object to other body, Move object after other object, Appearance, Color per face
- Preferences: Preferences, Fine tuning
- Getting started
- Installation: Download, Windows, Linux, Mac, Additional components, Docker, AppImage, Ubuntu Snap
- Basics: About FreeCAD, Interface, Mouse navigation, Selection methods, Object name, Preferences, Workbenches, Document structure, Properties, Help FreeCAD, Donate
- Help: Tutorials, Video tutorials
- Workbenches: Std Base, Assembly, BIM, CAM, Draft, FEM, Inspection, Mesh, OpenSCAD, Part, PartDesign, Points, Reverse Engineering, Robot, Sketcher, Spreadsheet, Surface, TechDraw, Test Framework
- Hubs: User hub, Power users hub, Developer hub


