Part Box/fr: Difference between revisions
(Updating to match new version of source page) |
No edit summary |
||
| (122 intermediate revisions by 7 users not shown) | |||
| Line 1: | Line 1: | ||
<languages/> |
|||
{{GuiCommand|Name=Part Box|MenuLocation=Part → Box||Workbenches=[[Part Module|Part]], Complete|SeeAlso=[[Part_CreatePrimitives|Part CreatePrimitives]]}} |
|||
{{Docnav/fr |
|||
==Description== |
|||
| |
|||
The Box command from the [[Part_Workbench|Part Workbench]] inserts a parametric, [http://en.wikipedia.org/wiki/Cuboid#Rectangular_cuboid rectangular cuboid], geometric primitive into the active document. By default, the Box command will insert a 10x10x10 mm cube, positioned at the origin, with the label "cube". These parameters may be modified after the object has been added. |
|||
|[[Part_Cylinder/fr|Cylindre]] |
|||
|[[Part_Workbench/fr|Atelier Part]] |
|||
|IconL= |
|||
|IconR=Part_Cylinder.svg |
|||
|IconC=Workbench_Part.svg |
|||
}} |
|||
{{GuiCommand/fr |
|||
[[Image:Part_Box.jpg|400px|Part_Box]] |
|||
|Name=Part Box |
|||
|Name/fr=Part Cube |
|||
|MenuLocation=Part → Primitives → Cube |
|||
|Workbenches=[[Part_Workbench/fr|Part]] |
|||
|SeeAlso=[[Part_Primitives/fr|Part Primitives]] |
|||
}} |
|||
== |
== Description == |
||
* Click the cube icon {{KEY|[[Image:Part Box.svg|30px]]}} from the Part Workbench. |
|||
* Alternatively, you can select {{MenuCommand|Part → Primitives → Cube}} from the menu bar. |
|||
La commande [[Image:Part_Box.svg|24px]] '''Part Cube''' crée un solide de type boîte paramétrique, un [https://fr.wikipedia.org/wiki/Pav%C3%A9_droit parallélépipède rectangle]. Dans le système de coordonnées défini par sa propriété {{PropertyData|Placement}}, la face inférieure de la boîte se trouve dans le plan XY, son coin avant gauche étant à l'origine et son bord avant étant parallèle à l'axe des X. |
|||
==Options== |
|||
* Via the [[Property_editor | Property Editor]]: |
|||
** '''Length:''' Set the length distance for your Box object (default is 10 mm). |
|||
** '''Width:''' Set the width distance for your Box object (default is 10 mm). |
|||
** '''Height:''' Set the height distance for your Box object (default is 10 mm). |
|||
** '''Placement:''' Specifies the orientation and position of the Box in the 3D space. See [[Placement | Placement]]. The reference point is the left front lower corner of the box. |
|||
** '''Label:''' The Label is the name given to the operation. This name can be changed at your convenience. |
|||
[[Image:Part_Box_Example.png|400px]] |
|||
==Properties== |
|||
{{Properties_Title|Base}} |
|||
*{{PropertyData|Placement}}: Specifies the orientation and position of the Box in the 3D space. See [[Placement | Placement]]. The reference point is the left front lower corner of the box. |
|||
*{{PropertyData|Label}}: Label given to the Box object. Change to suit your needs. |
|||
<span id="Usage"></span> |
|||
{{Properties_Title|Box}} |
|||
== Utilisation == |
|||
*{{PropertyData|Length}}: The length parameter is the Box's dimension in the x-direction. |
|||
*{{PropertyData|Width}}: The width parameter is the Box's dimension in the y-direction. |
|||
*{{PropertyData|Height}}: The height parameter is the Box's dimension in the z-direction. |
|||
# Il existe plusieurs façons de lancer la commande : |
|||
[[Image:Part_Box-Properties.jpg|Part_Box-Properties]] |
|||
#* Appuyez sur le bouton {{Button|[[Image:Part_Box.svg|16px]] [[Part_Box/fr|Cube]]}}. |
|||
#* Sélectionnez l'option {{MenuCommand|Part → Primitives → [[Image:Part_Box.svg|16px]] Cube}} dans le menu. |
|||
# La boîte est créée. |
|||
# Vous pouvez modifier les dimensions et le {{PropertyData|Placement}} de la boîte en effectuant l'une des opérations suivantes : |
|||
#* Double-cliquez sur l'objet dans la [[Tree_view/fr|vue en arborescence]] : |
|||
#*# Le panneau de tâches {{MenuCommand|Primitives géométriques}} s'ouvre. |
|||
#*# Modifiez une ou plusieurs propriétés. |
|||
#*# L'objet est mis à jour dynamiquement dans la [[3D_view/fr|vue 3D]]. |
|||
#*# Appuyez sur le bouton {{Button|OK}}. |
|||
#*# Modifiez les propriétés dans l'[[Property_editor/fr|éditeur de propriétés]]. |
|||
#* Changez le {{PropertyData|Placement}} avec la commande [[Image:Std_TransformManip.svg|16px]] [[Std_TransformManip/fr|Std Transformer]]. |
|||
<span id="Example"></span> |
|||
==Scripting== |
|||
== Exemple == |
|||
The Box command can by used in [[macros]] and from the python console using the following function: |
|||
<syntaxhighlight> |
|||
FreeCAD.ActiveDocument.addObject("Part::Box", "myBox") |
|||
</syntaxhighlight> |
|||
* Where "myBox" is the label for the Box object. |
|||
* Returns newly created object of type Box. |
|||
[[Image:Part_Box_Scripting_Example.png|thumb|Part Cube à partir de l'exemple du script]] |
|||
You can access and modify attributes of the Box object. For example, you may wish to modify the length, width and height parameters. |
|||
<syntaxhighlight> |
|||
FreeCAD.ActiveDocument.myBox.length = 25 |
|||
FreeCAD.ActiveDocument.myBox.width = 15 |
|||
FreeCAD.ActiveDocument.myBox.height = 30 |
|||
</syntaxhighlight> |
|||
Un objet Part Cube créé avec l'[[#Script|exemple du script]] ci-dessous. |
|||
You can change its placement with: |
|||
<syntaxhighlight> |
|||
FreeCAD.ActiveDocument.myBox.Placement = FreeCAD.Placement(FreeCAD.Vector(4, 6, 3), FreeCAD.Rotation(30, 45, 10)) |
|||
</syntaxhighlight> |
|||
<span id="Notes"></span> |
|||
==FreeCAD - Version== |
|||
== Remarques == |
|||
* Un Part Cube peut également être créé avec la commande [[Image:Part_Primitives.svg|16px]] [[Part_Primitives/fr|Part Primitives]]. Avec cette commande, vous pouvez spécifier les dimensions et le placement au moment de la création. |
|||
<span id="Properties"></span> |
|||
*{{Version|0.14}} |
|||
== Propriétés == |
|||
Beginning in FreeCAD version 0.14, a Part Box is referred to in the GUI elements as a Cube and the default label is "Cube". |
|||
Voir aussi: [[Property_editor/fr|Éditeur de propriétés]] |
|||
{{clear}} |
|||
<languages/> |
|||
Un objet Part Cube est dérivé d'un [[Part_Feature/fr|Part Feature]] et hérite de toutes ses propriétés. Il possède également les propriétés supplémentaires suivantes : |
|||
<span id="Data"></span> |
|||
=== Données === |
|||
{{TitleProperty|Attachment}} |
|||
L'objet a les mêmes propriétés d'attachement qu'un [[Part_Part2DObject/fr#Donn.C3.A9es|Part Part2DObject]]. |
|||
{{TitleProperty|Box}} |
|||
* {{PropertyData|Length|Length}} : longueur de la boîte. Il s'agit de la dimension dans sa direction X. La valeur par défaut est {{Value|10mm}}. |
|||
* {{PropertyData|Width|Length}} : largeur de la boîte. Il s'agit de la dimension dans sa direction Y. La valeur par défaut est {{Value|10mm}}. |
|||
* {{PropertyData|Height|Length}} : hauteur de la boîte. Il s'agit de la dimension dans sa direction Z. La valeur par défaut est {{Value|10mm}}. |
|||
<span id="Scripting"></span> |
|||
==Script== |
|||
Voir aussi : [https://freecad.github.io/SourceDoc/ Autogenerated API documentation], [[Part_scripting/fr|Part Ecrire un script]] et [[FreeCAD_Scripting_Basics/fr|Débuter avec les scripts FreeCAD]]. |
|||
Un Part Cube est créé avec la méthode {{incode|addObject()}} du document : |
|||
{{Code|code= |
|||
box = FreeCAD.ActiveDocument.addObject("Part::Box", "myBox") |
|||
}} |
|||
* Où {{Incode|"myBox"}} est le nom de l'objet. |
|||
* La fonction restitue l'objet juste créé. |
|||
Exemple : |
|||
{{Code|code= |
|||
import FreeCAD as App |
|||
doc = App.activeDocument() |
|||
box = doc.addObject("Part::Box", "myBox") |
|||
box.Length = 4 |
|||
box.Width = 8 |
|||
box.Height = 12 |
|||
box.Placement = App.Placement(App.Vector(1, 2, 3), App.Rotation(75, 60, 30)) |
|||
doc.recompute() |
|||
}} |
|||
{{Docnav/fr |
|||
| |
|||
|[[Part_Cylinder/fr|Cylindre]] |
|||
|[[Part_Workbench/fr|Atelier Part]] |
|||
|IconL= |
|||
|IconR=Part_Cylinder.svg |
|||
|IconC=Workbench_Part.svg |
|||
}} |
|||
{{Part_Tools_navi{{#translation:}}}} |
|||
{{Userdocnavi{{#translation:}}}} |
|||
Latest revision as of 21:22, 18 September 2023
|
|
| Emplacement du menu |
|---|
| Part → Primitives → Cube |
| Ateliers |
| Part |
| Raccourci par défaut |
| Aucun |
| Introduit dans la version |
| - |
| Voir aussi |
| Part Primitives |
Description
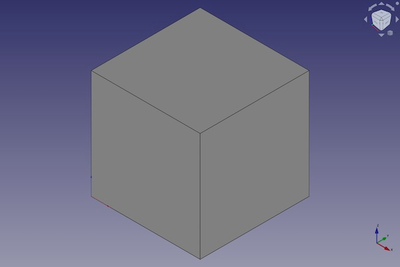
La commande Part Cube crée un solide de type boîte paramétrique, un parallélépipède rectangle. Dans le système de coordonnées défini par sa propriété DonnéesPlacement, la face inférieure de la boîte se trouve dans le plan XY, son coin avant gauche étant à l'origine et son bord avant étant parallèle à l'axe des X.
Utilisation
- Il existe plusieurs façons de lancer la commande :
- Appuyez sur le bouton
Cube.
- Sélectionnez l'option Part → Primitives →
Cube dans le menu.
- Appuyez sur le bouton
- La boîte est créée.
- Vous pouvez modifier les dimensions et le DonnéesPlacement de la boîte en effectuant l'une des opérations suivantes :
- Double-cliquez sur l'objet dans la vue en arborescence :
- Le panneau de tâches Primitives géométriques s'ouvre.
- Modifiez une ou plusieurs propriétés.
- L'objet est mis à jour dynamiquement dans la vue 3D.
- Appuyez sur le bouton OK.
- Modifiez les propriétés dans l'éditeur de propriétés.
- Changez le DonnéesPlacement avec la commande
Std Transformer.
- Double-cliquez sur l'objet dans la vue en arborescence :
Exemple

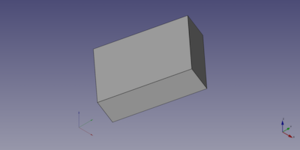
Un objet Part Cube créé avec l'exemple du script ci-dessous.
Remarques
- Un Part Cube peut également être créé avec la commande
Part Primitives. Avec cette commande, vous pouvez spécifier les dimensions et le placement au moment de la création.
Propriétés
Voir aussi: Éditeur de propriétés
Un objet Part Cube est dérivé d'un Part Feature et hérite de toutes ses propriétés. Il possède également les propriétés supplémentaires suivantes :
Données
Attachment
L'objet a les mêmes propriétés d'attachement qu'un Part Part2DObject.
Box
- DonnéesLength (
Length) : longueur de la boîte. Il s'agit de la dimension dans sa direction X. La valeur par défaut est10mm. - DonnéesWidth (
Length) : largeur de la boîte. Il s'agit de la dimension dans sa direction Y. La valeur par défaut est10mm. - DonnéesHeight (
Length) : hauteur de la boîte. Il s'agit de la dimension dans sa direction Z. La valeur par défaut est10mm.
Script
Voir aussi : Autogenerated API documentation, Part Ecrire un script et Débuter avec les scripts FreeCAD.
Un Part Cube est créé avec la méthode addObject() du document :
box = FreeCAD.ActiveDocument.addObject("Part::Box", "myBox")
- Où
"myBox"est le nom de l'objet. - La fonction restitue l'objet juste créé.
Exemple :
import FreeCAD as App

doc = App.activeDocument()

box = doc.addObject("Part::Box", "myBox")
box.Length = 4
box.Width = 8
box.Height = 12
box.Placement = App.Placement(App.Vector(1, 2, 3), App.Rotation(75, 60, 30))

doc.recompute()
- Primitives : Box, Cylindre, Sphère, Cône, Tore, Tube, Primitives, Générateur de formes
- Création et modification des objets : Extrusion, Révolution, Miroir, Congé, Chanfrein, Créer une face, Surface réglée, Lissage, Balayage, Section, Coupes, Décalage 3D, Décalage 2D, Évidement, Projection sur surface, Ancrage
---
- Booléen : Créé un composé, Éclater le composé, Filtre composé, Opération booléenne, Soustraction, Union, Intersection, Connecter, Intégrer, Découper, Fragments booléens, Séparer/exploser, Scinder, OU exclusif
- Mesure : Mesure linéaire, Mesure Angulaire, Rafraîchir les mesures, Effacer toute mesure, Tout basculer, Mesures dans la 3D, Mesures selon le repère global
- Autre outils : Importation, Exportation, Sélection par zone, Forme à partir d'un maillage, Points à partir d'un maillage, Convertir en solide, Inverser les formes, Copie simple, Copie transformée, Copie d'un élément, Affiner la forme, Vérifier la géométrie, Supprimer la fonctionnalité, Apparence, Définir les couleurs
- Démarrer avec FreeCAD
- Installation : Téléchargements, Windows, Linux, Mac, Logiciels supplémentaires, Docker, AppImage, Ubuntu Snap
- Bases : À propos de FreeCAD, Interface, Navigation par la souris, Méthodes de sélection, Objet name, Préférences, Ateliers, Structure du document, Propriétés, Contribuer à FreeCAD, Faire un don
- Aide : Tutoriels, Tutoriels vidéo
- Ateliers : Std Base, Arch, Assembly, CAM, Draft, FEM, Inspection, Mesh, OpenSCAD, Part, PartDesign, Points, Reverse Engineering, Robot, Sketcher, Spreadsheet, Surface, TechDraw, Test
