底图线段
|
|
| Menu location |
|---|
| Draft → Line |
| Workbenches |
| Draft, Arch |
| Default shortcut |
| L I |
| Introduced in version |
| 0.7 |
| See also |
| Draft Wire, Draft Point |
描述
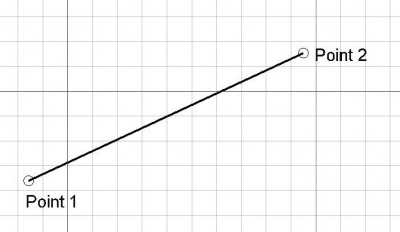
线段工具用于创建两点定义的线段。它根据底图工具栏中底图线型的设置来绘制线段。此工具与底线连线工具的行为基本相同,唯独线段工具在绘制完一条两点的线段即停止工作。
根据两点创建一条线段
如何使用
- 按下
Draft Line按钮, 或先按L再按I键。
- 在3D视图中单击第一个点,或输入坐标并按下
add point按钮。
- 在3D视图中单击第二个点,或输入 坐标并按下
add point键。
通过双击树状视图(tree view)中的元素或点击 Draft Edit按钮即可编辑对应线段。届时,您就可将构成线段的点拖动到预定的新位置。
Fusing single lines
If several connected Draft Lines are selected they can be fused into a wire by pressing the Draft Upgrade tool; however, this wire will not be editable. To create an editable wire, use
Draft Upgrade three more times on the new shapes (wire, closed wire, face). You can also fuse the original lines with the
Draft Wire tool.
A wire can also be created from a single line by adding another point anywhere along its length. To do this, press the add point button, and click anywhere on the line.
Options
- Press X, Y or Z after the first point to constrain the second point on the given axis.
- To enter coordinates manually, simply enter the numbers, then press Enter between each X, Y and Z component.
- You can also define the polar coordinates of the point by giving a value to "Length" and "Angle". Click on the checkbox next to "Angle" to constrain the pointer to the specified angle. You can press the
add point button when you have the desired values to insert the point.
- You can also define the polar coordinates of the point by giving a value to "Length" and "Angle". Click on the checkbox next to "Angle" to constrain the pointer to the specified angle. You can press the
- Press R or click the checkbox to toggle relative mode. If relative mode is on, the coordinates of the second point are relative to the first one; if not, they are absolute, taken from the origin (0,0,0).
- Press T or click the checkbox to toggle continue mode. If continue mode is on, the Line tool will restart after you give the second point, allowing you to draw another line segment without pressing the tool button again.
- Hold Ctrl while drawing to force snapping your point to the nearest snap location, independently of the distance.
- Hold Shift while drawing to constrain your second point horizontally or vertically in relation to the first one.
- Press Ctrl+Z or press the
 Undo button to undo the last point.
 - Press Esc or the Close button to abort the current command.
Properties
A Line object shares all properties from a Draft Wire, however, only some of these properties are applicable to the Line.
Data
- 数据Start: specifies the start point.
- 数据End: specifies the end point.
- 数据Subdivisions: specifies the number of interior nodes in the line. introduced in version 0.16
- 数据Length: (read-only) specifies the length of the segment.
View
- 视图End Arrow: if it is
trueit will display a symbol at the last point of the line, so it can be used as an annotation line. - 视图Arrow Size: specifies the size of the symbol displayed at the end of the line.
- 视图Arrow Type: specifies the type of symbol displayed at the end of the line, which can be "Dot", "Circle", "Arrow", or "Tick".
Scripting
See also: Draft API and FreeCAD Scripting Basics.
The Line tool can be used in macros and from the Python console by using the following function:
Line = makeLine(p1, p2)
Line = makeLine(LineSegment)
Line = makeLine(Shape)
- Creates a
Lineobject between pointsp1andp2, each defined by itsFreeCAD.Vector, with units in millimeters. - Creates a
Lineobject from aPart.LineSegment. - Creates a
Lineobject from the first vertex to the last vertex of the givenShape.
Example:
import FreeCAD, Draft

p1 = FreeCAD.Vector(0, 0, 0)
p2 = FreeCAD.Vector(1000, 500, 0)
p3 = FreeCAD.Vector(-250, -500, 0)
p4 = FreeCAD.Vector(500, 1000, 0)

Line1 = Draft.makeLine(p1, p2)
Line2 = Draft.makeLine(p3, p4)
- Drafting: Line, Polyline, Fillet, Arc, Arc by 3 points, Circle, Ellipse, Rectangle, Polygon, B-spline, Cubic Bézier curve, Bézier curve, Point, Facebinder, ShapeString, Hatch
- Annotation: Text, Dimension, Label, Annotation styles, Annotation scale
- Modification: Move, Rotate, Scale, Mirror, Offset, Trimex, Stretch, Clone, Array, Polar array, Circular array, Path array, Path link array, Point array, Point link array, Edit, Subelement highlight, Join, Split, Upgrade, Downgrade, Wire to B-spline, Draft to sketch, Set slope, Flip dimension, Shape 2D view
- Draft Tray: Select plane, Set style, Toggle construction mode, AutoGroup
- Snapping: Snap lock, Snap endpoint, Snap midpoint, Snap center, Snap angle, Snap intersection, Snap perpendicular, Snap extension, Snap parallel, Snap special, Snap near, Snap ortho, Snap grid, Snap working plane, Snap dimensions, Toggle grid
- Miscellaneous: Apply current style, Layer, Manage layers, Add a new named group, Move to group, Select group, Add to construction group, Toggle normal/wireframe display, Create working plane proxy, Heal, Show snap toolbar
- Additional: Constraining, Pattern, Preferences, Import Export Preferences, DXF/DWG, SVG, OCA, DAT
- Context menu:
- Layer container: Merge layer duplicates, Add new layer
- Layer: Activate this layer, Select layer contents
- Text: Open hyperlinks
- Wire: Flatten
- Working plane proxy: Write camera position, Write objects state
- Getting started
- Installation: Download, Windows, Linux, Mac, Additional components, Docker, AppImage, Ubuntu Snap
- Basics: About FreeCAD, Interface, Mouse navigation, Selection methods, Object name, Preferences, Workbenches, Document structure, Properties, Help FreeCAD, Donate
- Help: Tutorials, Video tutorials
- Workbenches: Std Base, Assembly, BIM, CAM, Draft, FEM, Inspection, Mesh, OpenSCAD, Part, PartDesign, Points, Reverse Engineering, Robot, Sketcher, Spreadsheet, Surface, TechDraw, Test Framework
- Hubs: User hub, Power users hub, Developer hub
