Manual:Navigating in the 3D view/es: Difference between revisions
(Created page with "=== La vista 3D de FreeCAD ===") |
(Updating to match new version of source page) |
||
| (14 intermediate revisions by 2 users not shown) | |||
| Line 1: | Line 1: | ||
<languages/> |
<languages/> |
||
{{Docnav |
{{Docnav/es |
||
|[[Manual:The_FreeCAD_Interface|Manual |
|[[Manual:The_FreeCAD_Interface/es|Manual La interfaz de FreeCAD]] |
||
|[[Manual:The_FreeCAD_document|Manual |
|[[Manual:The_FreeCAD_document/es|Manual El documento de FreeCAD]] |
||
|[[Manual:Introduction|Manual |
|[[Manual:Introduction/es|Manual inicio]] |
||
|IconC=Crystal_Clear_manual.png |
|IconC=Crystal_Clear_manual.png |
||
}} |
}} |
||
{{Manual:TOC |
{{Manual:TOC}} |
||
<span id="A_word_about_the_3D_space"></span> |
|||
=== A word about the 3D space === |
|||
=== Una palabra sobre el espacio 3D === |
|||
Si este es su primer contacto con una aplicación 3D, tendrá que familiarizarse primero con algunos conceptos. Si no es así, puedes saltarte esta sección sin problemas. |
|||
If this is your first contact with a 3D application, you will need to become familiar with some concepts first. If not, you can safely skip this section. |
|||
El espacio 3D de FreeCAD es un |
|||
[https:// |
[https://es.wikipedia.org/wiki/Espacio_eucl%C3%ADdeo Espacio euclídeo]. Tiene un punto de origen y tres ejes: X, Y y Z. Si miras tu escena desde arriba, convencionalmente, el eje X apunta hacia la derecha, el eje Y hacia atrás, y el eje Z hacia arriba. En la esquina inferior derecha de la vista de FreeCAD, siempre puedes ver desde dónde estás viendo la escena: |
||
[[Image:Axes_orientation.png]] |
[[Image:Axes_orientation.png]] |
||
El punto de encuentro de los tres ejes es el origen. Es el punto donde el valor de todas las coordenadas es cero. Para cualquier eje, el movimiento en una dirección aumentará el valor de la coordenada y el movimiento en la dirección opuesta disminuirá el valor de la coordenada. Cada punto de cada objeto que existe en el espacio 3D puede ser localizado por sus coordenadas (x,y,z). Por ejemplo, un punto con coordenadas (2,3,1) estará a +2 unidades en el eje X, +3 unidades en el eje Y y +1 unidad en el eje Z: |
|||
The point where the three axes meet is the origin. It is the point where the value of all coordinates is zero. For any given axis, moving in one direction will increase the coordinate value and moving in the opposite direction will decrease the coordinate value. Every point of every object that exists in the 3D space can be located by its (x,y,z) coordinates. For example, a point with coordinates (2,3,1) will lie at +2 units on the X axis, +3 units on the Y axis, and +1 unit on the Z axis: |
|||
[[Image:3dspace_coordinates.jpg]] |
[[Image:3dspace_coordinates.jpg]] |
||
Puedes mirar esa escena desde cualquier ángulo, como si estuvieras sosteniendo una cámara. Esa cámara puede moverse a la izquierda, a la derecha, hacia arriba y hacia abajo (panorámica), girar alrededor de lo que está apuntando (rotación) y acercarse o alejarse de la escena (zoom). |
|||
You can look at that scene from any angle, as if you were holding a camera. That camera can be moved left, right, up and down (pan), rotated around what it is pointing at (rotate) and brought closer to or further from the scene (zoom). |
|||
<span id="The_FreeCAD_3D_view"></span> |
|||
=== La vista 3D de FreeCAD === |
=== La vista 3D de FreeCAD === |
||
<span id="Mouse_Navigation"></span> |
|||
==== Mouse Navigation ==== |
|||
==== Navegación del ratón ==== |
|||
La navegación en la [[3D_view/es|vista 3D]] de FreeCAD puede hacerse con un ratón, un dispositivo de navegación espacial, el teclado, un panel táctil, o una combinación de ellos. FreeCAD implementa varios [[Mouse_navigation/es|modos de navegación]], que determinan cómo se realizan las tres operaciones básicas de manipulación de la vista (panorámica, rotativo, zoom), así como cómo se realiza la selección de objetos en la pantalla. A los modos de navegación se accede desde la pantalla de Preferencias, o directamente haciendo clic con el botón derecho del ratón en cualquier parte de la [[3D_view/es|vista 3D]]: |
|||
Navigating in the FreeCAD [[3D_view|3D view]] can be done with a mouse, a Space Navigator device, the keyboard, a touchpad, or a combination of those. FreeCAD implements several [[Mouse_navigation|navigation modes]], which determine how the three basic view manipulation operations (pan, rotate and zoom) are done, as well as how selection of objects on the screen is performed. Navigation modes are accessed from the Preferences screen, or directly by right-clicking anywhere on the [[3D_view|3D view]]: |
|||
[[Image:FreeCAD-v0-18-NavigationModePopup.png]] |
[[Image:FreeCAD-v0-18-NavigationModePopup.png]] |
||
Cada uno de estos modos asigna diferentes botones del ratón, o combinaciones de ratón y teclado, o gestos del ratón, a estas cuatro operaciones. La siguiente tabla muestra los principales modos disponibles: |
|||
Each of these modes allocates different mouse buttons, or mouse + keyboard combinations, or mouse gestures, to these four operations. The following table shows the principal available modes: |
|||
{| class="wikitable" style=" width: 100%;text-align:center;" |
{| class="wikitable" style=" width: 100%;text-align:center;" |
||
| Line 79: | Line 82: | ||
|} |
|} |
||
<span id="Keyboard_Navigation"></span> |
|||
==== Keyboard Navigation ==== |
|||
==== Navegación del teclado ==== |
|||
Alternatively, some keyboard controls are always available, no matter the navigation mode: |
Alternatively, some keyboard controls are always available, no matter the navigation mode: |
||
| Line 116: | Line 120: | ||
There is a smaller mini-cube in the lower right of the cluster which activates a drop-down menu allowing you to switch the viewing mode. |
There is a smaller mini-cube in the lower right of the cluster which activates a drop-down menu allowing you to switch the viewing mode. |
||
<span id="Selecting_objects"></span> |
|||
=== Selecting objects === |
|||
=== Seleccionar objetos === |
|||
Objects in the 3D view can be selected by clicking them with the corresponding mouse button, depending on the navigation mode (described above). A single click will select the object and one of its subcomponents (edge, face, vertex). Double-clicking will select the object and all its subcomponents. You can select more than one subcomponent, or even different subcomponents from different objects, by pressing the CTRL key. Clicking with the selection button on an empty portion of the 3D view will deselect everything. |
Objects in the 3D view can be selected by clicking them with the corresponding mouse button, depending on the navigation mode (described above). A single click will select the object and one of its subcomponents (edge, face, vertex). Double-clicking will select the object and all its subcomponents. You can select more than one subcomponent, or even different subcomponents from different objects, by pressing the CTRL key. Clicking with the selection button on an empty portion of the 3D view will deselect everything. |
||
| Line 126: | Line 131: | ||
You can also use the Selection View to select objects by searching for a particular object. |
You can also use the Selection View to select objects by searching for a particular object. |
||
''' |
'''Leer más''' |
||
* [[Mouse_navigation|The FreeCAD navigation modes]] |
* [[Mouse_navigation|The FreeCAD navigation modes]] |
||
| Line 132: | Line 137: | ||
{{Docnav |
{{Docnav/es |
||
|[[Manual:The_FreeCAD_Interface|Manual |
|[[Manual:The_FreeCAD_Interface/es|Manual La interfaz de FreeCAD]] |
||
|[[Manual:The_FreeCAD_document|Manual |
|[[Manual:The_FreeCAD_document/es|Manual El documento de FreeCAD]] |
||
|[[Manual:Introduction|Manual |
|[[Manual:Introduction/es|Manual inicio]] |
||
|IconC=Crystal_Clear_manual.png |
|IconC=Crystal_Clear_manual.png |
||
}} |
}} |
||
Latest revision as of 19:47, 4 November 2023
- Introducción
- Descubriendo FreeCAD
- Trabajar con FreeCAD
- Guiones en Python
- La comunidad
Una palabra sobre el espacio 3D
Si este es su primer contacto con una aplicación 3D, tendrá que familiarizarse primero con algunos conceptos. Si no es así, puedes saltarte esta sección sin problemas.
El espacio 3D de FreeCAD es un Espacio euclídeo. Tiene un punto de origen y tres ejes: X, Y y Z. Si miras tu escena desde arriba, convencionalmente, el eje X apunta hacia la derecha, el eje Y hacia atrás, y el eje Z hacia arriba. En la esquina inferior derecha de la vista de FreeCAD, siempre puedes ver desde dónde estás viendo la escena:
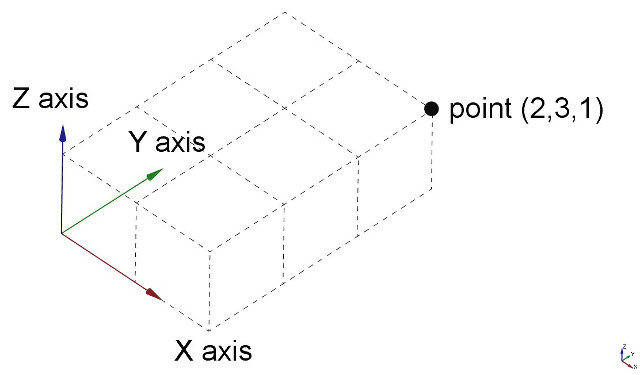
El punto de encuentro de los tres ejes es el origen. Es el punto donde el valor de todas las coordenadas es cero. Para cualquier eje, el movimiento en una dirección aumentará el valor de la coordenada y el movimiento en la dirección opuesta disminuirá el valor de la coordenada. Cada punto de cada objeto que existe en el espacio 3D puede ser localizado por sus coordenadas (x,y,z). Por ejemplo, un punto con coordenadas (2,3,1) estará a +2 unidades en el eje X, +3 unidades en el eje Y y +1 unidad en el eje Z:
Puedes mirar esa escena desde cualquier ángulo, como si estuvieras sosteniendo una cámara. Esa cámara puede moverse a la izquierda, a la derecha, hacia arriba y hacia abajo (panorámica), girar alrededor de lo que está apuntando (rotación) y acercarse o alejarse de la escena (zoom).
La vista 3D de FreeCAD
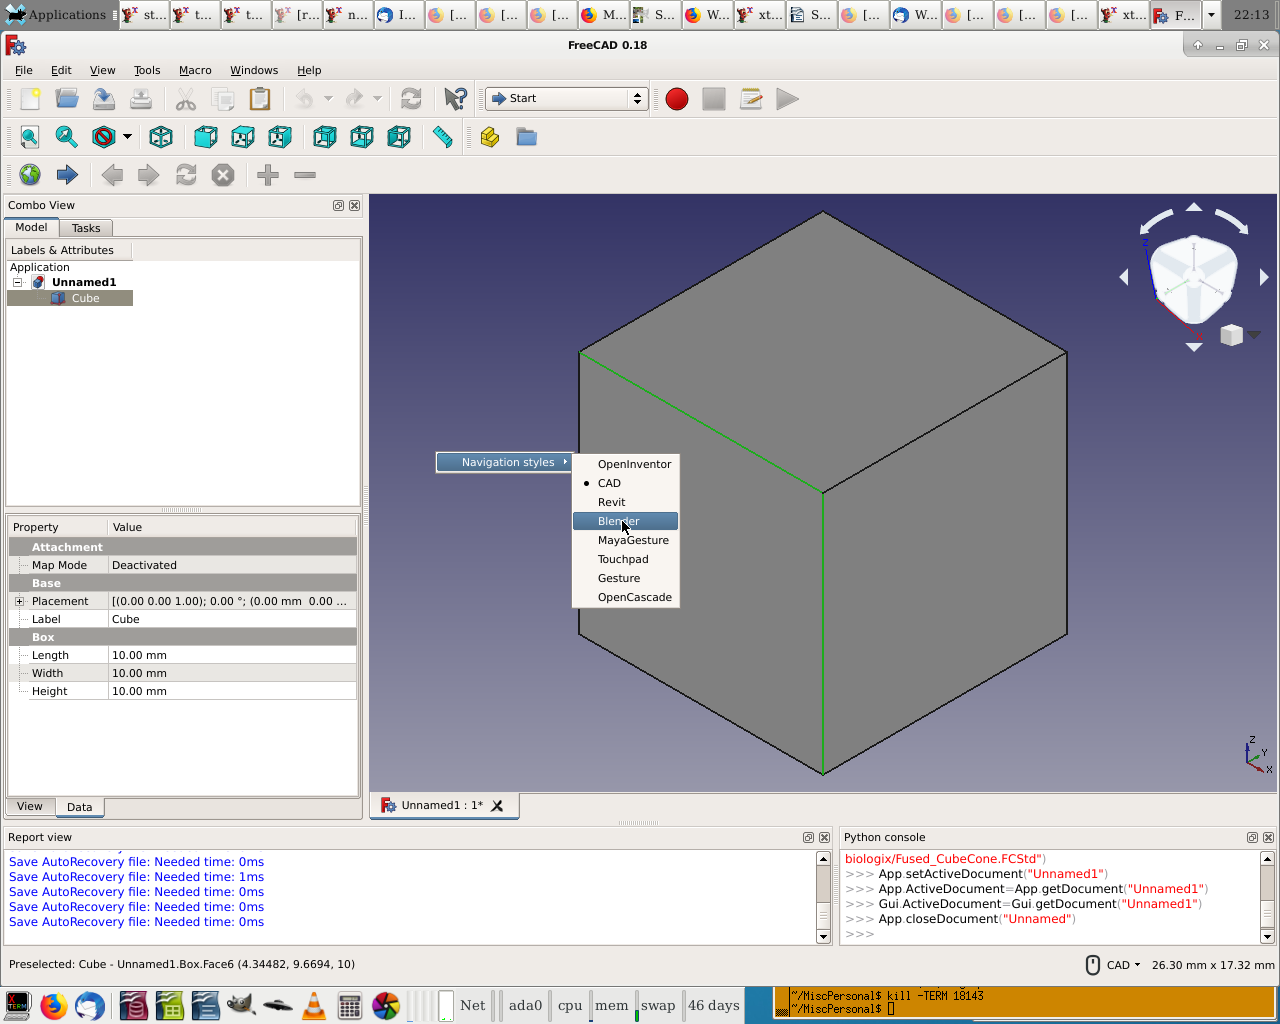
La navegación en la vista 3D de FreeCAD puede hacerse con un ratón, un dispositivo de navegación espacial, el teclado, un panel táctil, o una combinación de ellos. FreeCAD implementa varios modos de navegación, que determinan cómo se realizan las tres operaciones básicas de manipulación de la vista (panorámica, rotativo, zoom), así como cómo se realiza la selección de objetos en la pantalla. A los modos de navegación se accede desde la pantalla de Preferencias, o directamente haciendo clic con el botón derecho del ratón en cualquier parte de la vista 3D:
Cada uno de estos modos asigna diferentes botones del ratón, o combinaciones de ratón y teclado, o gestos del ratón, a estas cuatro operaciones. La siguiente tabla muestra los principales modos disponibles:
| Mode | Pan | Rotate | Zoom | Select |
|---|---|---|---|---|
| OpenInventor | 
|

|

|
Hold Ctrl + drag 
|
| CAD (default) |  or or 
|
 or or 
|
 or or 
|

|
| Blender | Hold Shift + drag  or drag or drag 
|

|

|

|
| Touchpad | Hold Shift + drag 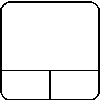
|
Alt + 
|
PgUp / PgDn | 
|
| Gesture | drag 
|
drag 
|

|

|
| OpenCascade | 
|

|

|

|
Alternatively, some keyboard controls are always available, no matter the navigation mode:
- Ctrl +
and Ctrl +
to zoom in and out, respectively.
- The arrow keys,
, to shift the view left/right and up/down
- Shift +
and Shift +
to rotate the view by 90 degrees
- The numeric keys,
, for the seven standard views:
Isometric,
Front,
Top,
Right,
Rear,
Bottom, and
Left
- VO will set the camera in
Orthographic view.
- While VP sets it in
Perspective view.
- Ctrl will allow you to select more than one object or element
These controls are also available from the View menu and some from the View toolbar.
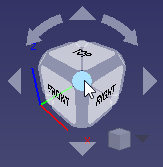
In the default setup, there is a Navigation Cluster in the upper right corner of the 3D display. This may be used to rotate the displayed object by a fixed amount, reset the display to one of several standard views, and change the display mode.
When using the navigation cluster, a control point will turn light blue when the pointer is hovering over a sensitive area. If the area below the pointer does not change color, clicking on it will have no affect. As of this writing (v0.18), there are some registration issues which prevent all parts of some control points from being active.
Clicking on a face will switch the view to that face; clicking on a corner will switch to a view with that corner pointing towards you.
Clicking one of the four triangles will rotate the view 45 degrees in the indicated direction. Clicking one of the two curved arrows at the top will rotate the view 45 degrees in the indicated direction around a line pointing towards you.
The navigation cluster may be moved to any part of the 3D display by dragging. The drag (left) mouse button must be pressed inside the cube itself to initiate a drag. The structure will not begin moving until the pointer is dragged outside the cube.
There is a smaller mini-cube in the lower right of the cluster which activates a drop-down menu allowing you to switch the viewing mode.
Seleccionar objetos
Objects in the 3D view can be selected by clicking them with the corresponding mouse button, depending on the navigation mode (described above). A single click will select the object and one of its subcomponents (edge, face, vertex). Double-clicking will select the object and all its subcomponents. You can select more than one subcomponent, or even different subcomponents from different objects, by pressing the CTRL key. Clicking with the selection button on an empty portion of the 3D view will deselect everything.
A panel called "Selection view", available from the View menu, can also be turned on, which shows you what is currently selected:
You can also use the Selection View to select objects by searching for a particular object.
Leer más
