SheetMetal AddWall: Difference between revisions
No edit summary |
(V1.0 -> V0.21) Tag: Manual revert |
||
| (25 intermediate revisions by 2 users not shown) | |||
| Line 5: | Line 5: | ||
<!--T:1--> |
<!--T:1--> |
||
{{Docnav |
{{Docnav |
||
|[[SheetMetal_AddBase|AddBase]] |
|||
| |
|||
|[[SheetMetal_Extrude|Extrude]] |
|||
| |
|||
|[[SheetMetal_Workbench|SheetMetal Workbench]] |
|[[SheetMetal_Workbench|SheetMetal Workbench]] |
||
|IconL= |
|IconL=SheetMetal_AddBase.svg |
||
|IconR= |
|IconR=SheetMetal_Extrude.svg |
||
|IconC=Sheetmetal_workbench_icon.svg |
|IconC=Sheetmetal_workbench_icon.svg |
||
}} |
}} |
||
| Line 18: | Line 18: | ||
|MenuLocation=SheetMetal → Make Wall |
|MenuLocation=SheetMetal → Make Wall |
||
|Workbenches=[[SheetMetal Workbench|SheetMetal]] |
|Workbenches=[[SheetMetal Workbench|SheetMetal]] |
||
|Shortcut= |
|Shortcut={{KEY|W}} |
||
|Version= |
|||
|SeeAlso= |
|||
}} |
}} |
||
==Description== <!--T:3--> |
==Description== <!--T:3--> |
||
<!--T:4--> |
<!--T:4--> |
||
The [[Image:SheetMetal_AddWall.svg|24px]] '''SheetMetal AddWall''' command creates flanges on selected edges of a base plate. By changing the {{PropertyData|angle}} property a flange it can be turned into a hem. |
|||
:The SheetMetal workbench Bend tool [[Image:SheetMetal_Bend.svg|24px]] creates a bend on the selected edge. |
|||
[[File:PostBend.png|320px]] |
|||
<!--T:36--> |
|||
A '''flange''' consists of a 90° cylindrical bend and a planar strip (wall). |
|||
</translate> |
|||
[[Image:SheetMetal_AddWall-12.png|200px]] [[Image:Button_right.svg|16px|link=]] |
|||
[[Image:SheetMetal_AddWall-13.png|200px]] |
|||
<translate> |
|||
<!--T:37--> |
|||
{{Caption|Two selected edges → two flanges}} |
|||
<!--T:38--> |
|||
Resetting the {{PropertyData|angle}} property to about 180° in a second step will create a '''hem''' instead. |
|||
</translate> |
|||
[[Image:SheetMetal_AddWall-14.png|200px]] [[Image:Button_right.svg|16px|link=]] |
|||
[[Image:SheetMetal_AddWall-15.png|200px]] |
|||
<translate> |
|||
<!--T:39--> |
|||
{{Caption|Two selected edges → two hems}} |
|||
==Usage== <!--T:5--> |
|||
<!--T:6--> |
<!--T:6--> |
||
# Select one or more edge(s) of a base plate. |
|||
To add a Bend: |
|||
# |
# Activate the [[Image:SheetMetal_AddWall.svg|16px]] '''SheetMetal AddWall''' command using one of the following: |
||
#* The {{Button|[[Image:SheetMetal_AddWall.svg|16px]] [[SheetMetal_AddWall|Make Wall]]}} button. |
|||
# Start with a base plate or sheet, select one or more edges to receive a bend. |
|||
# |
#* The {{MenuCommand|SheetMetal → [[Image:SheetMetal_AddWall.svg|16px]] Make Wall}} menu option. |
||
#* The keyboard shortcut: {{KEY|W}}. |
|||
==Notes== <!--T:40--> |
|||
<!--T:7--> |
<!--T:7--> |
||
To create a base plate use a closed 2D outline - preferably a [[File:Sketcher_NewSketch.svg|16px]] [[Sketcher NewSketch|Sketch]] - with the [[Image:SheetMetal_AddBase.svg|16px]] [[SheetMetal_AddBase|Make Base Wall]] command. |
|||
{{Emphasis|Note}}: The workbench does not have a tool to create a base plate, so you need to start your model with one of the following methods: |
|||
:* Method 1: [[File:Part_Box.svg|24px]] [[Part Box|Part Cube]] |
|||
<!--T:41--> |
|||
:* Method 2: An extruded solid made with [[File:Part_Extrude.svg|24px]] [[Part Extrude]] from either a: |
|||
Alternatively a base plate (blank) can be created with commands from the [[Image:Workbench_Part.svg|16px]] [[Part_Workbench|Part Workbench]] or [[Image:Workbench_PartDesign.svg|16px]] [[PartDesign_Workbench|PartDesign Workbench]]. |
|||
::* [[File:Draft_Rectangle.svg|24px]] [[Draft Rectangle]] or a |
|||
::* [[File:Draft_Wire.svg|24px]] [[Draft Wire]] or a |
|||
<!--T:42--> |
|||
::* [[File:Sketcher_NewSketch.svg|24px]] [[Sketcher NewSketch|Sketch]] |
|||
To create a blank with the [[Part_Workbench|Part Workbench]]: |
|||
::* Use [[Image:Part_Thickness.svg|24px]] [[Part Thickness]] to create shell ({{Emphasis|Typically with the thickness value of the sheet metal.}}) |
|||
# Create a solid using either: |
|||
:* Method 3: [[File:PartDesign_Body.svg|24px]] [[PartDesign Body]] containing either an |
|||
#* [[File:Part_Box.svg|16px]] [[Part_Box|Part Box]]. |
|||
#* [[File:Part_Extrude.svg|16px]] [[Part_Extrude|Part Extrude]] from: |
|||
::* [[File:PartDesign_Pad.svg|24px]] [[PartDesign Pad]] made from a [[File:Sketcher_NewSketch.svg|24px]] [[Sketcher NewSketch|Sketch]]. |
|||
#** A [[File:Draft_Rectangle.svg|16px]] [[Draft_Rectangle|Draft Rectangle]]. |
|||
::* Use [[File:PartDesign Thickness.svg|24px]] [[PartDesign Thickness]] to create shell ({{Emphasis|Typically with the thickness value of the sheet metal.}}) |
|||
#** A [[File:Draft_Wire.svg|16px]] [[Draft_Wire|Draft Wire]]. |
|||
#** A [[File:Sketcher_NewSketch.svg|16px]] [[Sketcher_NewSketch|Sketch]]. |
|||
# Make sure one the dimensions of the Box or the extrusion distance equals the sheet metal thickness. |
|||
<!--T:43--> |
|||
To create a blank with the [[PartDesign_Workbench|PartDesign Workbench]]: |
|||
# Create a solid using either: |
|||
#* [[File:PartDesign_AdditiveBox.svg|16px]] [[PartDesign_AdditiveBox|Additive Box]]. |
|||
#* [[File:PartDesign_Pad.svg|16px]] [[PartDesign Pad]] from a [[File:Sketcher_NewSketch.svg|16px]] [[Sketcher NewSketch|Sketch]]. |
|||
# Make sure one the dimensions of the Box or the {{PropertyData|Length}} property of the Pad equals the sheet metal thickness. |
|||
<!--T:8--> |
<!--T:8--> |
||
If you start with a [[File:PartDesign_Body.svg|16px]] [[PartDesign_Body|PartDesign Body]], you can mix SheetMetal features with PartDesign features such as [[File:PartDesign_Pocket.svg|16px]] [[PartDesign_Pocket|PartDesign Pocket]] or [[File:PartDesign_Hole.svg|16px]] [[PartDesign_Hole|PartDesign Hole]]. |
|||
==Properties== <!--T:9--> |
==Properties== <!--T:9--> |
||
<!--T:26--> |
|||
See also: [[Property_editor|Property editor]]. |
|||
<!--T:27--> |
|||
A SheetMetal Bend object is derived from a [[Part_Feature|Part Feature]] object and inherits all its properties. It also has the following additional properties and its label has a default value: |
|||
===Data=== <!--T:10--> |
|||
<!--T:11--> |
<!--T:11--> |
||
| Line 63: | Line 97: | ||
<!--T:12--> |
<!--T:12--> |
||
* {{PropertyData|Label}}: |
* {{PropertyData|Label|String}}: Default value: {{value|Bend}} (+ a sequential number for second and following items). </br>The user editable name of this object, it may be any arbitrary UTF8 string. |
||
* {{PropertyData|Base Feature|Link|hidden}}: Base Feature. Link to the parent feature. |
|||
* {{PropertyData|_Body|LinkHidden|hidden}}: Hidden link to the parent body. |
|||
<!--T:13--> |
<!--T:13--> |
||
| Line 69: | Line 105: | ||
<!--T:14--> |
<!--T:14--> |
||
* {{PropertyData|Bend Type|Enumeration}}: "Bend Type". {{value|Material Outside}} (default), {{value|Material Inside}}, {{value|Thickness Outside}}, {{value|Offset}}. |
|||
* {{PropertyData|angle}}: Bend angle. |
|||
* {{PropertyData|Length Spec|Enumeration}}: "Type of Length Specification". {{value|Leg}} (default), {{value|Outer Sharp}}, {{value|Inner Sharp}}, {{value|Tangential}}. {{Version|0.21}} |
|||
* {{PropertyData|extend1}}: Extends the wall on the left side. |
|||
* {{PropertyData| |
* {{PropertyData|angle|Angle}}: "Bend Angle". Default angle: {{value|90,00°}}. |
||
* {{PropertyData| |
* {{PropertyData|base Object|LinkSub}}: "Base Object". Link to the planar face to receive a bend. |
||
* {{PropertyData| |
* {{PropertyData|gap1|Distance}}: "Gap from Left side". Default: {{value|0,00 mm}}. |
||
* {{PropertyData| |
* {{PropertyData|gap2|Distance}}: "Gap from Right side". Default: {{value|0,00 mm}}. |
||
* {{PropertyData| |
* {{PropertyData|invert|Bool}}: "Invert Bend Direction". Default: {{FALSE}}. |
||
* {{PropertyData| |
* {{PropertyData|length|Length}}: "Length of Wall". Default: {{value|10,00 mm}}. |
||
* {{PropertyData| |
* {{PropertyData|radius|Length}}: "Bend Radius". Default: {{value|1,00 mm}}. |
||
* {{PropertyData|radius}}: Bend radius. |
|||
<!--T:28--> |
|||
* {{PropertyData|relief Type}}: Rectangle or Round. Enabled only when a gap value is set. |
|||
{{Properties_Title|Parameters Ex}} |
|||
* {{PropertyData|reliefd}}: Relief depth. Enabled only when a gap value is set. |
|||
* {{PropertyData|reliefw}}: Relief width. Enabled only when a gap value is set. |
|||
<!--T:29--> |
|||
* {{PropertyData|kfactor}}: K factor (also known as neutral factor) for the bend. Used to calculate bend allowance when unfolding. |
|||
* {{PropertyData| |
* {{PropertyData|Auto Miter|Bool}}: "Enable Auto Miter". Default: {{TRUE}}. |
||
* {{PropertyData|extend1|Distance}}: "Extend from Left Side". Default: {{value|0,00 mm}}. |
|||
* {{PropertyData|extend2|Distance}}: "Extend from Right Side". Default: {{value|0,00 mm}}. |
|||
* {{PropertyData|kfactor|FloatConstraint}}: "Location of Neutral Line. Caution: Using ANSI standards, not DIN.". </br> Default: {{value|0,50}}. K factor (also known as neutral factor) for the bend. Used to calculate bend allowance when unfolding. |
|||
* {{PropertyData|max Extend Dist|Length}}: "Auto Miter maximum Extend Distance". Default: {{value|5,00 mm}}. |
|||
* {{PropertyData|min Gap|Length}}: "Auto Miter Minimum Gap". Default: {{value|5,00 mm}}. |
|||
* {{PropertyData|miterangle1|Angle}}: "Bend Miter Angle from Left Side". Default angle: {{value|0,00°}}. |
|||
* {{PropertyData|miterangle2|Angle}}: "Bend Miter Angle from Right Side". Default angle: {{value|0,00°}}. |
|||
* {{PropertyData|offset|Distance}}: "Offset Bend". Default: {{value|0,00 mm}}. |
|||
* {{PropertyData|unfold|Bool}}: "Shows Unfold View of Current Bend". Default: {{FALSE}} </br> {{TRUE}} unfolds the bend. |
|||
<!--T:30--> |
|||
{{Properties_Title|Parameters Ex2}} |
|||
<!--T:31--> |
|||
* {{PropertyData|Sketch|Link}}: "Sketch Object". |
|||
* {{PropertyData|sketchflip|Bool}}: "Flip Sketch Direction". Default: {{FALSE}}. |
|||
* {{PropertyData|sketchinvert|Bool}}: "Invert Sketch Start". Default: {{FALSE}}. |
|||
<!--T:32--> |
|||
{{Properties_Title|Parameters Ex3}} |
|||
<!--T:33--> |
|||
* {{PropertyData|Length List|FloatList}}: "Length of Wall List". Default: {{value|[10,00]}}. |
|||
* {{PropertyData|bend AList|FloatList}}: "Bend Angle List". Default: {{value|[90,00]}}. |
|||
<!--T:34--> |
|||
{{Properties_Title|Parameters Relief}} |
|||
<!--T:35--> |
|||
* {{PropertyData|Relief Factor|Float}}: "Relief Factor". Default: {{value|0,70}}. |
|||
* {{PropertyData|Use Relief Factor|Bool}}: "Use Relief Factor". Default: {{FALSE}}. |
|||
* {{PropertyData|min Relief Gap|Length}}: "Minimum Gap to Relief Cut". Default: {{value|1,00 mm}}. |
|||
* {{PropertyData|relief Type|Enumeration}}: "Relief Type". {{value|Rectangle}} (default), {{value|Round}}. Enabled only when a gap value is set. |
|||
* {{PropertyData|reliefd|Length}}: "Relief Depth". Default: {{value|1,00 mm}}. Enabled only when a gap value is set. |
|||
* {{PropertyData|reliefw|Length}}: "Relief Width". Default: {{value|0,80 mm}}. Enabled only when a gap value is set. |
|||
== Example == <!--T:18--> |
|||
</translate> |
|||
[[Image:SheetMetal_AddWall-01.png|300px]] |
|||
<translate> |
|||
<!--T:19--> |
|||
{{Caption|A simple tray}} |
|||
<div class="mw-collapsible mw-collapsed"> |
|||
<div class="mw-collapsible-content"> |
|||
=== Preparation === <!--T:20--> |
|||
<!--T:21--> |
|||
This tray is made of a rectangular blank with walls added to its outline edges. |
|||
And so one outline sketch for the blank has to be prepared in advance. |
|||
</translate> |
|||
[[Image:SheetMetal_AddWall-02.png|200px]] |
|||
<translate> |
|||
<!--T:22--> |
|||
{{Caption|Just a rectangular outline}} |
|||
=== Workflow === <!--T:23--> |
|||
<!--T:24--> |
|||
# Create a blank |
|||
## Select the outline sketch </br> [[Image:SheetMetal_AddWall-03.png|240px]] |
|||
## Press the {{Button|[[Image:SheetMetal_AddBase.svg|16px]] [[SheetMetal_AddBase|Make Base Wall]]}} button </br> or use the keyboard shortcut: {{KEY|C}} then {{KEY|F}} </br> [[Image:SheetMetal_AddWall-04.png|240px]] </br> (The blank is padded in z direction </br> </br> |
|||
# Add walls to the outline edges |
|||
## Select the blank's '''outline edges''' </br> [[Image:SheetMetal_AddWall-05.png|240px]] |
|||
## Press the {{Button|[[Image:SheetMetal_AddWall.svg|16px]] [[SheetMetal_AddWall|Make Wall]]}} button </br> or use the keyboard shortcut: {{KEY|W}} </br> [[Image:SheetMetal_AddWall-06.png|240px]] |
|||
## If the fold is 90° down set the value of '''invert''' property to true to reverse the direction (and '''length''' to a lower value for smaller walls) </br> [[Image:SheetMetal_AddWall-01.png|240px]] </br> </br> |
|||
# Add some more walls |
|||
## Select the tray's '''upper outside edges''' </br> [[Image:SheetMetal_AddWall-08.png|240px]] |
|||
## Press the {{Button|[[Image:SheetMetal_AddWall.svg|16px]] [[SheetMetal_AddWall|Make Wall]]}} button </br> or use the keyboard shortcut: {{KEY|W}} </br> [[Image:SheetMetal_AddWall-09.png|240px]] </br> |
|||
## The walls are a bit too long (but nicely trimmed) and so the '''length''' property has to be set to a lower value </br> [[Image:SheetMetal_AddWall-10.png|240px]] |
|||
## If you like the folds swing outward set the '''invert''' value to true </br> [[Image:SheetMetal_AddWall-11.png|240px]] |
|||
<!--T: |
<!--T:25--> |
||
Done! |
|||
Limitation are not known yet. |
|||
</div> <!-- End of collapsible element for content section. Do not remove! --> |
|||
</div> <!-- End of collapsible element for ... section. Do not remove! --> |
|||
<!--T:17--> |
<!--T:17--> |
||
{{Docnav |
{{Docnav |
||
|[[SheetMetal_AddBase|AddBase]] |
|||
| |
|||
|[[SheetMetal_Extrude|Extrude]] |
|||
| |
|||
|[[SheetMetal_Workbench|SheetMetal Workbench]] |
|[[SheetMetal_Workbench|SheetMetal Workbench]] |
||
|IconL= |
|IconL=SheetMetal_AddBase.svg |
||
|IconR=SheetMetal_Extrude.svg |
|||
|IconC=Sheetmetal_workbench_icon.svg |
|IconC=Sheetmetal_workbench_icon.svg |
||
|IconR= |
|||
}} |
}} |
||
Latest revision as of 20:29, 29 April 2023
This documentation is not finished. Please help and contribute documentation.
GuiCommand model explains how commands should be documented. Browse Category:UnfinishedDocu to see more incomplete pages like this one. See Category:Command Reference for all commands.
See WikiPages to learn about editing the wiki pages, and go to Help FreeCAD to learn about other ways in which you can contribute.
|
|
| Menu location |
|---|
| SheetMetal → Make Wall |
| Workbenches |
| SheetMetal |
| Default shortcut |
| W |
| Introduced in version |
| - |
| See also |
| None |
Description
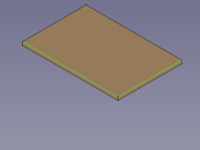
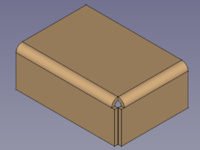
The SheetMetal AddWall command creates flanges on selected edges of a base plate. By changing the Dataangle property a flange it can be turned into a hem.
A flange consists of a 90° cylindrical bend and a planar strip (wall).
Two selected edges → two flanges
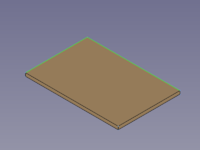
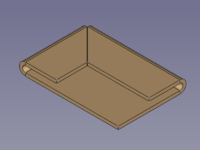
Resetting the Dataangle property to about 180° in a second step will create a hem instead.
Two selected edges → two hems
Usage
- Select one or more edge(s) of a base plate.
- Activate the
SheetMetal AddWall command using one of the following:
- The
Make Wall button.
- The SheetMetal →
Make Wall menu option.
- The keyboard shortcut: W.
- The
Notes
To create a base plate use a closed 2D outline - preferably a Sketch - with the
Make Base Wall command.
Alternatively a base plate (blank) can be created with commands from the Part Workbench or
PartDesign Workbench.
To create a blank with the Part Workbench:
- Create a solid using either:
Part Box.
Part Extrude from:
- A
Draft Rectangle.
- A
Draft Wire.
- A
Sketch.
- A
- Make sure one the dimensions of the Box or the extrusion distance equals the sheet metal thickness.
To create a blank with the PartDesign Workbench:
- Create a solid using either:
Additive Box.
PartDesign Pad from a
Sketch.
- Make sure one the dimensions of the Box or the DataLength property of the Pad equals the sheet metal thickness.
If you start with a PartDesign Body, you can mix SheetMetal features with PartDesign features such as
PartDesign Pocket or
PartDesign Hole.
Properties
See also: Property editor.
A SheetMetal Bend object is derived from a Part Feature object and inherits all its properties. It also has the following additional properties and its label has a default value:
Data
Base
- DataLabel (
String): Default value:Bend(+ a sequential number for second and following items).
The user editable name of this object, it may be any arbitrary UTF8 string. - Data (hidden)Base Feature (
Link): Base Feature. Link to the parent feature. - Data (hidden)_Body (
LinkHidden): Hidden link to the parent body.
Parameters
- DataBend Type (
Enumeration): "Bend Type".Material Outside(default),Material Inside,Thickness Outside,Offset. - DataLength Spec (
Enumeration): "Type of Length Specification".Leg(default),Outer Sharp,Inner Sharp,Tangential. introduced in version 0.21 - Dataangle (
Angle): "Bend Angle". Default angle:90,00°. - Database Object (
LinkSub): "Base Object". Link to the planar face to receive a bend. - Datagap1 (
Distance): "Gap from Left side". Default:0,00 mm. - Datagap2 (
Distance): "Gap from Right side". Default:0,00 mm. - Datainvert (
Bool): "Invert Bend Direction". Default:false. - Datalength (
Length): "Length of Wall". Default:10,00 mm. - Dataradius (
Length): "Bend Radius". Default:1,00 mm.
Parameters Ex
- DataAuto Miter (
Bool): "Enable Auto Miter". Default:true. - Dataextend1 (
Distance): "Extend from Left Side". Default:0,00 mm. - Dataextend2 (
Distance): "Extend from Right Side". Default:0,00 mm. - Datakfactor (
FloatConstraint): "Location of Neutral Line. Caution: Using ANSI standards, not DIN.".
Default:0,50. K factor (also known as neutral factor) for the bend. Used to calculate bend allowance when unfolding. - Datamax Extend Dist (
Length): "Auto Miter maximum Extend Distance". Default:5,00 mm. - Datamin Gap (
Length): "Auto Miter Minimum Gap". Default:5,00 mm. - Datamiterangle1 (
Angle): "Bend Miter Angle from Left Side". Default angle:0,00°. - Datamiterangle2 (
Angle): "Bend Miter Angle from Right Side". Default angle:0,00°. - Dataoffset (
Distance): "Offset Bend". Default:0,00 mm. - Dataunfold (
Bool): "Shows Unfold View of Current Bend". Default:false
trueunfolds the bend.
Parameters Ex2
- DataSketch (
Link): "Sketch Object". - Datasketchflip (
Bool): "Flip Sketch Direction". Default:false. - Datasketchinvert (
Bool): "Invert Sketch Start". Default:false.
Parameters Ex3
- DataLength List (
FloatList): "Length of Wall List". Default:[10,00]. - Databend AList (
FloatList): "Bend Angle List". Default:[90,00].
Parameters Relief
- DataRelief Factor (
Float): "Relief Factor". Default:0,70. - DataUse Relief Factor (
Bool): "Use Relief Factor". Default:false. - Datamin Relief Gap (
Length): "Minimum Gap to Relief Cut". Default:1,00 mm. - Datarelief Type (
Enumeration): "Relief Type".Rectangle(default),Round. Enabled only when a gap value is set. - Datareliefd (
Length): "Relief Depth". Default:1,00 mm. Enabled only when a gap value is set. - Datareliefw (
Length): "Relief Width". Default:0,80 mm. Enabled only when a gap value is set.
Example
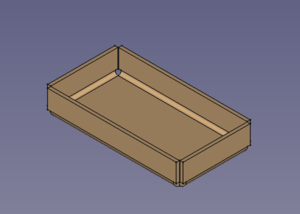
A simple tray
Preparation
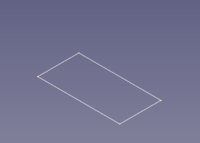
This tray is made of a rectangular blank with walls added to its outline edges. And so one outline sketch for the blank has to be prepared in advance.
Just a rectangular outline
Workflow
- Create a blank
- Select the outline sketch
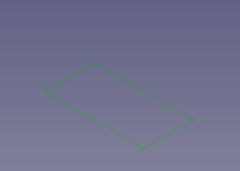
- Press the
Make Base Wall button
or use the keyboard shortcut: C then F
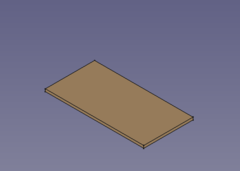
(The blank is padded in z direction
- Select the outline sketch
- Add walls to the outline edges
- Select the blank's outline edges
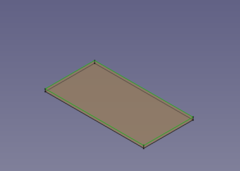
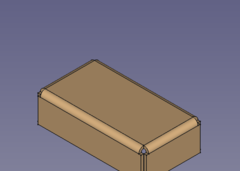
- Press the
Make Wall button
or use the keyboard shortcut: W
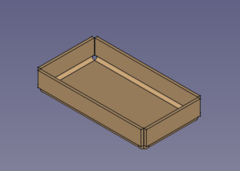
- If the fold is 90° down set the value of invert property to true to reverse the direction (and length to a lower value for smaller walls)
- Select the blank's outline edges
- Add some more walls
- Select the tray's upper outside edges
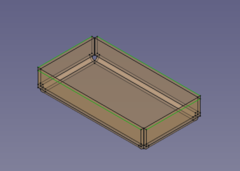
- Press the
Make Wall button
or use the keyboard shortcut: W
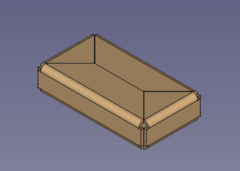
- The walls are a bit too long (but nicely trimmed) and so the length property has to be set to a lower value
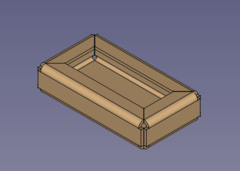
- If you like the folds swing outward set the invert value to true
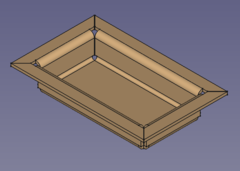
- Select the tray's upper outside edges
Done!
