Sketcher ConstrainHorizontal/ja: Difference between revisions
(Updating to match new version of source page) |
No edit summary |
||
| Line 72: | Line 72: | ||
{{Docnav |
|||
<div class="mw-translate-fuzzy"> |
|||
|[[Sketcher_ConstrainHorVer|Horizontal/vertical]] |
|||
[[Category:Sketcher]] |
|||
|[[Sketcher_ConstrainVertical|Vertical]] |
|||
</div> |
|||
|[[Sketcher_Workbench|Sketcher]] |
|||
|IconL=Sketcher_ConstrainHorVer.svg |
|||
|IconR=Sketcher_ConstrainVertical.svg |
|||
|IconC=Workbench_Sketcher.svg |
|||
}} |
|||
{{Sketcher_Tools_navi{{#translation:}}}} |
{{Sketcher_Tools_navi{{#translation:}}}} |
||
Latest revision as of 16:31, 13 May 2024
|
|
| メニューの場所 |
|---|
| Sketch → Sketcher constraints → Constrain horizontally |
| ワークベンチ |
| スケッチャー, パートデザイン |
| デフォルトのショートカット |
| None |
| バージョンで導入 |
| - |
| も参照してください |
| Constraint Vertical |
説明
HorizontalConstraintは選択された線または画像の辺がスケッチの水平軸と平行なるように拘束を行います。
introduced in version 1.0: In most cases it is advisable to use the combined Sketcher ConstrainHorVer tool instead.
使用方法
See also: Drawing aids.
Continue mode

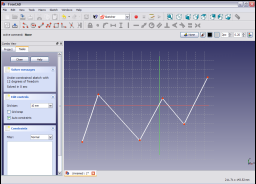
スケッチ上の線をクリックして選択します。

線が暗緑色に変わります。

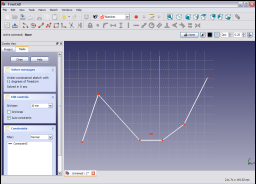
Sketcher ConstraintsツールバーのHorizontalConstraintアイコン![]() をクリックするか、スケッチャーワークベンチのSketcherメニューアイテム(あるいはパートデザインワークベンチのPart Designメニューアイテム)にあるSketcher constraintsサブメニューのConstrain horizontallyメニューアイテムを選択してHorizontalConstraintを適用します。すると選択された線がスケッチの水平軸に平行になるように拘束されます。
をクリックするか、スケッチャーワークベンチのSketcherメニューアイテム(あるいはパートデザインワークベンチのPart Designメニューアイテム)にあるSketcher constraintsサブメニューのConstrain horizontallyメニューアイテムを選択してHorizontalConstraintを適用します。すると選択された線がスケッチの水平軸に平行になるように拘束されます。

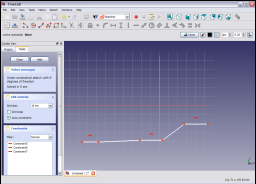
複数の線を選択することもできます。

上で示したように線を選択して拘束を適用すると、それらがスケッチの水平軸に平行になるように拘束されます。
Run-once mode
- Do one of the following:
- Select two or more points.
- Select one or more lines. Points can be included in the selection, but will be ignored.
- Invoke the tool as explained above, or with the following additional option:
- introduced in version 1.0: Right-click in the 3D view and select the
Constrain horizontal option from the context menu.
- introduced in version 1.0: Right-click in the 3D view and select the
- Depending on the selection one or more constraints are added.
Scripting
Sketch.addConstraint(Sketcher.Constraint('Horizontal', Line))
The Sketcher scripting page explains the values which can be used for Line and contains further examples on how to create constraints from Python scripts.
- General: Create sketch, Edit sketch, Map sketch to face, Reorient sketch, Validate sketch, Merge sketches, Mirror sketch, Leave sketch, View sketch, View section, Toggle grid, Toggle snap, Configure rendering order, Stop operation
- Sketcher geometries: Point, Line, Arc, Arc by 3 points, Circle, Circle by 3 points, Ellipse, Ellipse by 3 points, Arc of ellipse, Arc of hyperbola, Arc of parabola, B-spline by control points, Periodic B-spline by control points, B-spline by knots, Periodic B-spline by knots, Polyline, Rectangle, Centered rectangle, Rounded rectangle, Triangle, Square, Pentagon, Hexagon, Heptagon, Octagon, Regular polygon, Slot, Fillet, Corner-preserving fillet, Trim, Extend, Split, External geometry, Carbon copy, Toggle construction geometry
- Sketcher constraints:
- Geometric constraints: Coincident, Point on object, Vertical, Horizontal, Parallel, Perpendicular, Tangent, Equal, Symmetric, Block
- Dimensional constraints: Lock, Horizontal distance, Vertical distance, Distance, Radius or weight, Diameter, Auto radius/diameter, Angle, Refraction (Snell's law)
- Constraint tools: Toggle driving/reference constraint, Activate/deactivate constraint
- Sketcher tools: Select unconstrained DoF, Select associated constraints, Select associated geometry, Select redundant constraints, Select conflicting constraints, Show/hide internal geometry, Select origin, Select horizontal axis, Select vertical axis, Symmetry, Clone, Copy, Move, Rectangular array, Remove axes alignment, Delete all geometry, Delete all constraints
- Sketcher B-spline tools: Show/hide B-spline degree, Show/hide B-spline control polygon, Show/hide B-spline curvature comb, Show/hide B-spline knot multiplicity, Show/hide B-spline control point weight, Convert geometry to B-spline, Increase B-spline degree, Decrease B-spline degree, Increase knot multiplicity, Decrease knot multiplicity, Insert knot, Join curves
- Sketcher virtual space: Switch virtual space
- Additional: Sketcher Dialog, Preferences, Sketcher scripting
- Getting started
- Installation: Download, Windows, Linux, Mac, Additional components, Docker, AppImage, Ubuntu Snap
- Basics: About FreeCAD, Interface, Mouse navigation, Selection methods, Object name, Preferences, Workbenches, Document structure, Properties, Help FreeCAD, Donate
- Help: Tutorials, Video tutorials
- Workbenches: Std Base, Assembly, BIM, CAM, Draft, FEM, Inspection, Mesh, OpenSCAD, Part, PartDesign, Points, Reverse Engineering, Robot, Sketcher, Spreadsheet, Surface, TechDraw, Test Framework
- Hubs: User hub, Power users hub, Developer hub