Sketcher ConstrainRadius/es: Difference between revisions
(Updating to match new version of source page) |
(Updating to match new version of source page) |
||
| Line 1: | Line 1: | ||
<languages/> |
<languages/> |
||
<div class="mw-translate-fuzzy"> |
|||
{{GuiCommand/es|Name=Constraint Radius|Workbenches=[[Sketcher Workbench/es|Croquizador]], [[PartDesign Workbench/es|Diseño de Piezas]]|MenuLocation=Croquizador → Restricciones del Croquizador → Radio|SeeAlso=[[Constraint Length/es|Distancia]], [[Constraint Horizontal/es|Horizontal]], [[Constraint Vertical/es|Vertical]]}} |
{{GuiCommand/es|Name=Constraint Radius|Workbenches=[[Sketcher Workbench/es|Croquizador]], [[PartDesign Workbench/es|Diseño de Piezas]]|MenuLocation=Croquizador → Restricciones del Croquizador → Radio|SeeAlso=[[Constraint Length/es|Distancia]], [[Constraint Horizontal/es|Horizontal]], [[Constraint Vertical/es|Vertical]]}} |
||
</div> |
|||
<div class="mw-translate-fuzzy"> |
|||
====Descripción==== |
====Descripción==== |
||
Esta restricción restringe el valor del radio de una circunferencia o un arco a un valor específico. Sólo se puede restringir un arco o una circunferencia de cada vez. |
Esta restricción restringe el valor del radio de una circunferencia o un arco a un valor específico. Sólo se puede restringir un arco o una circunferencia de cada vez. |
||
</div> |
|||
[[File:Sketcher ConstrainRadius example.png|none]] |
|||
<div class="mw-translate-fuzzy"> |
|||
====Funcionamiento==== |
====Funcionamiento==== |
||
| Line 30: | Line 36: | ||
El valor de la restricción se establecerá al valor indicado en la ventana. |
El valor de la restricción se establecerá al valor indicado en la ventana. |
||
{{clear}} |
|||
</div> |
|||
# Pick one or more circles or arcs. |
|||
# Press the {{KEY|[[File:Sketcher ConstrainRadius.png|24px]] '''Constrain radius'''}} button. |
|||
# A pop up dialog opens to edit or confirm the value. Press {{KEY|OK}} to validate. In case multiple circles/arcs were selected, all constraints will adopt this value. Edit their separate values by double-clicking on the dimension label in the 3D view; or in the Constraints list, double-click on the constraint or right-click and select '''Change value'''. |
|||
# Optionally the dimension label and line can be moved and rotated in the 3D view by clicking on the value and dragging while keeping the left mouse button pressed. |
|||
'''Note:''' the constraint tool can also be started with no prior selection. By default the command will be in continue mode to create new constraints; press the right mouse button or {{KEY|ESC}} once to quit the command. |
|||
{{clear}} |
{{clear}} |
||
Revision as of 04:10, 7 October 2018
|
|
| Ubicación en el Menú |
|---|
| Croquizador → Restricciones del Croquizador → Radio |
| Entornos de trabajo |
| Croquizador, Diseño de Piezas |
| Atajo de teclado por defecto |
| Ninguno |
| Introducido en versión |
| - |
| Ver también |
| Distancia, Horizontal, Vertical |
Descripción
Esta restricción restringe el valor del radio de una circunferencia o un arco a un valor específico. Sólo se puede restringir un arco o una circunferencia de cada vez.

Funcionamiento
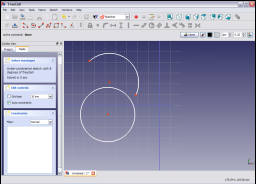
Selecciona un arco o una circunferencia en el croquis pulsando encima (se volverá de color verde oscuro).
Aplica la restricción pulsando el icono de la Restricción de Radio ![]() en la barra de herramientas del Croquizador o selecciona la Restricción de Radio en el submenú de Restricciones del módulo del Croquizador (o Diseño de Piezas dependiendo de que entorno esté seleccionado).
en la barra de herramientas del Croquizador o selecciona la Restricción de Radio en el submenú de Restricciones del módulo del Croquizador (o Diseño de Piezas dependiendo de que entorno esté seleccionado).
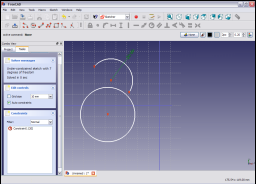
El radio se restringe a su valor actual al aplicar la restricción.
Para cambiar el valor de la restricción haz doble clic sobre ella en la vista 3D o en la pestaña de Tareas. Esto abrirá una ventana en la que se puede modificar el valor asignado.
Introduce el valor deseado para el radio y pulsa OK para establecer el valor a la restricción.
El valor de la restricción se establecerá al valor indicado en la ventana.
- Pick one or more circles or arcs.
- Press the
 Constrain radius button.
 - A pop up dialog opens to edit or confirm the value. Press OK to validate. In case multiple circles/arcs were selected, all constraints will adopt this value. Edit their separate values by double-clicking on the dimension label in the 3D view; or in the Constraints list, double-click on the constraint or right-click and select Change value.
- Optionally the dimension label and line can be moved and rotated in the 3D view by clicking on the value and dragging while keeping the left mouse button pressed.
Note: the constraint tool can also be started with no prior selection. By default the command will be in continue mode to create new constraints; press the right mouse button or ESC once to quit the command.


