Sketcher ConstrainCoincident/ro: Difference between revisions
No edit summary |
No edit summary |
||
| Line 11: | Line 11: | ||
Creați o constrângere de coincidență asupra elementului selectat |
Creați o constrângere de coincidență asupra elementului selectat |
||
Acest instrument de constrângere ia două puncte ca argument pentru a face cele două puncte să ''coincident''. ( |
Acest instrument de constrângere ia două puncte ca argument pentru a face ca cele două puncte să ''coincident''. (Însemnând să le faceți să devină ca un singur punct). |
||
În termeni practici, acest instrument de constrângere este util atunci când există o ruptură într-un profil, de exemplu - unde mergeți? - o constrângere coincidență asupra punctelor lor finale va închide spațiul. |
În termeni practici, acest instrument de constrângere este util atunci când există o ruptură într-un profil, de exemplu - unde mergeți? - o constrângere coincidență asupra punctelor lor finale va închide spațiul. |
||
Revision as of 09:10, 6 October 2018
|
|
| Menu location |
|---|
| Sketch → Sketcher constraints → Constrain coincident |
| Workbenches |
| Sketcher |
| Default shortcut |
| C |
| Introduced in version |
| - |
| See also |
| Constrain Lock, Constrain Point onto Object |
Descriere
Creați o constrângere de coincidență asupra elementului selectat
Acest instrument de constrângere ia două puncte ca argument pentru a face ca cele două puncte să coincident. (Însemnând să le faceți să devină ca un singur punct).
În termeni practici, acest instrument de constrângere este util atunci când există o ruptură într-un profil, de exemplu - unde mergeți? - o constrângere coincidență asupra punctelor lor finale va închide spațiul.
Cum se folosește
As stated above, this tool takes two arguments - both are points.
- Firstly it is necessary to highlight two distinct points. (Note this will not work if, for example, you attempt to select the start and end point of the same line).
- Highlighting of a drawing item is achieved by moving the mouse over the item and clicking the left-mouse-button.
- A highlighted item will change colour to green.
- Subsequent items can be highlighted by repeating the above procedure(s) NOTE: There is no-need to hold-down any special key like Ctrl to achieve multiple item selection in a drawing.
- Once you have two points highlighted, left-clicking on the 'PointOnPoint'
 constraint will cause the two points to become coincident and be replaced by a single point.
Acest instrument de constrângere ia două puncte ca argumente și servește pentru a face două puncte să coincidă (ceea ce înseamnă să le suprapuneți). În practică, acest instrument de constrângere este util atunci când există o ruptură într-un profil, de exemplu:
- cele două linii sunt aproape unul de altul și trebuie să fie unite
- o constrângere coincidență asupra punctelor lor finale de a umple un spațiu, un spațiu, o distanță.
NOTE: In order to make two points coincident, FreeCAD must necessarily move one, or both, of the original points.
Script
General scripting
The constraint can be created from macros and from the python console by using the following command:
Sketch.addConstraint(Sketcher.Constraint('Coincident',LineFixed,PointOfLineFixed,LineMoving,PointOfLineMoving))
where :
- Sketch is a sketch object
- LineFixed is the number of the line, that will not move by applying the constraint
- PointOfLineFixed is the number of the vertex of the line LineFixed that has to fulfilled the constraint
- LineMoving is the number of the line, that will move by applying the constraint
- PointOfLineMoving is the number of the line LineMoving, that has to fulfilled the constraint
The main issue by using this function is to identify correctly the line number and the vertex number of the lines you want to process.
The next paragraph will explain you how to identify the numbering of a line and of a vertex of a line.
Identificați numărul liniei
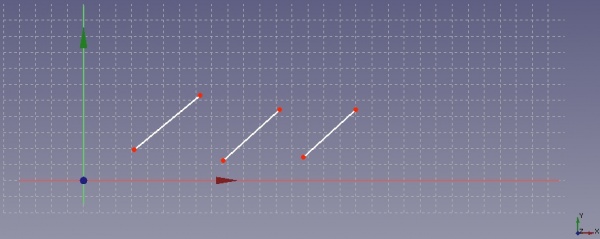
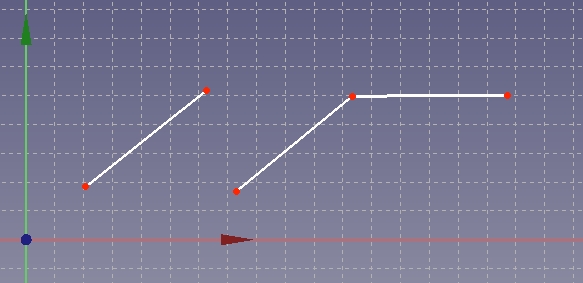
Am desenat trei linii, după cum se arată în figura următoare.
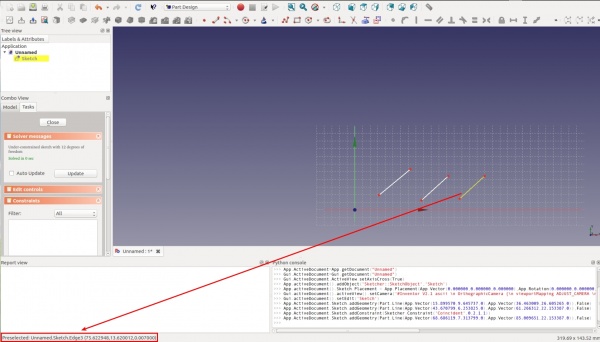
By moving the cursor of the mouse above the line you can see the line number at the bottom left of the FreeCAD windows, see next figure.
Unfortunately the numbering displayed on the FreeCAD windows start from 1 whereas the numbering of the line used to script start from 0: this means that you have to retrieve one each time you want to refer to a line.
Identifying the numbering of the vertices of a line
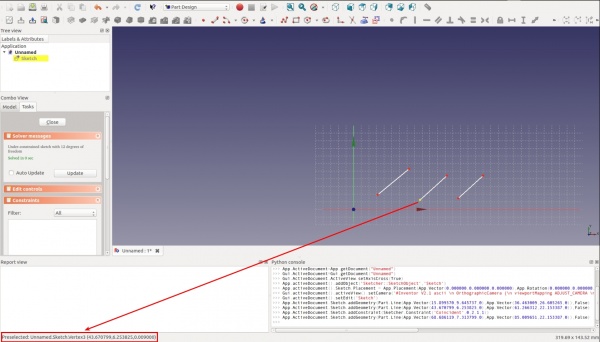
The vertices of one line can only have the value 1 or 2. (Don’t ask me, why the vertices numbering does not start from 0 …) The vertices are numbered according to their order of creation. To find out the order of their creation (If you have a lot of lines, you cannot remember which vertex you have created first), you just have to move the cursor of your mouse above the two vertices of one line, see following figure.
If you read e.g. 4 and 5, it means that the vertex 4 will be referenced by using the number 1 in the script command and the vertex 5 will be referenced by using the number 2 in the script command. Etc.
Examplu
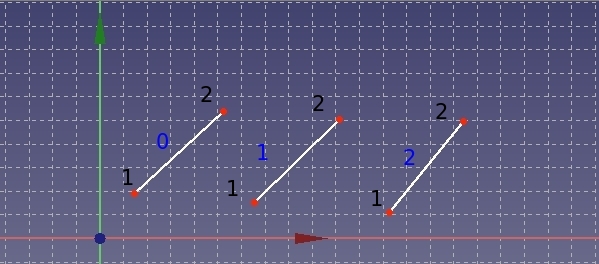
Let us take the previous example of the three lines. The subsequent figure indicates the numbering of each line and their vertices according to the convention for scripting.
blue text = numbering of line, black text = numbering of vertices
The command
Sketch.addConstraint(Sketcher.Constraint('Coincident',1,2,2,1))
yields following result:
The command
Sketch.addConstraint(Sketcher.Constraint('Coincident',0,2,2,2))
yields following result:
