Draft Line/ro: Difference between revisions
(Created page with "== Descriere == Instrumentul Linie creează o linie dreaptă, în două puncte, în linewidth and color . Este nevoie de Draft Linestyle|linewidth and co...") |
(Created page with "== Cum se utilizează == # Apăsați butonul {{KEY|16px Draft Line}} sau apăsați {{KEY|L}} apoi tastele {{KEY|I}} # Faceți clic pe un prim punc...") |
||
| Line 7: | Line 7: | ||
[[Image:Draft_Line_example.jpg|400px]] |
[[Image:Draft_Line_example.jpg|400px]] |
||
== Cum se utilizează == |
|||
==How to use== |
|||
# |
# Apăsați butonul {{KEY|[[Image:Draft Line.png|16px]] [[Draft Line]]}} sau apăsați {{KEY|L}} apoi tastele {{KEY|I}} |
||
# |
# Faceți clic pe un prim punct din vizualizarea 3D sau tastați un [[Draft_Coordinates | coordinate]] |
||
# |
# Faceți clic pe un al doilea punct din vizualizarea 3D sau tastați un [[Draft_Coordinates | coordinate]] |
||
==Options== |
==Options== |
||
Revision as of 12:36, 7 August 2018
|
|
| Menu location |
|---|
| Draft → Line |
| Workbenches |
| Draft, Arch |
| Default shortcut |
| L I |
| Introduced in version |
| - |
| See also |
| Draft Wire |
Descriere
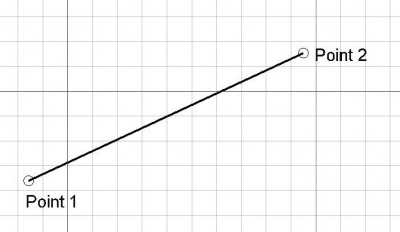
Instrumentul Linie creează o linie dreaptă, în două puncte, în linewidth and color . Este nevoie de linewidth and colorsetată anterior pe fila Activități. Instrumentul Line se comportă exact ca instrumentul Fir/Polilinie Draft Wire, cu excepția faptului că se oprește după două puncte.
Cum se utilizează
- Apăsați butonul
 Draft Line sau apăsați L apoi tastele I
 - Faceți clic pe un prim punct din vizualizarea 3D sau tastați un coordinate
- Faceți clic pe un al doilea punct din vizualizarea 3D sau tastați un coordinate
Options
- Press X, Y or Z after the first point to constrain the second point on the given axis.
- To enter coordinates manually, simply enter the numbers, then press ENTER between each X, Y and Z component.
- Press R or click the checkbox to check/uncheck the Relative button. If relative mode is on, the coordinates of the second point are relative to the first one. If not, they are absolute, taken from the (0,0,0) origin point.
- Press T or click the checkbox to check/uncheck the Continue button. If continue mode is on, the Line tool will restart after you give the second point, allowing you to draw another line segment without pressing the Line button again.
- Press CTRL while drawing to force snapping your point to the nearest snap location, independently of the distance.
- Press SHIFT while drawing to constrain your second point horizontally or vertically in relation to the first one.
- Press CTRL+Z or press the
 Undo button to undo the last point.
 - Press ESC or the Cancel button to abort the current Line command.
- If several connected Draft Lines are selected they can be transformed into a wire by pressing the Draft Upgrade Button.
Properties
- DATEStart: Punctul de pornire
- DATEEnd: Punctul final
- DATESubdivisions: Împarte linia cu numărul de subdiviziuni dat introduced in version 0.16
Scripting
The Line tool can by used in macros and from the python console by using the following function:
makeLine (Vector, Vector)
- Creates a line between the two given vectors. The current draft linewidth and color will be used.
- Returns the newly created object.
Example:
import FreeCAD, Draft
Draft.makeLine(FreeCAD.Vector(0,0,0),FreeCAD.Vector(2,0,0))
