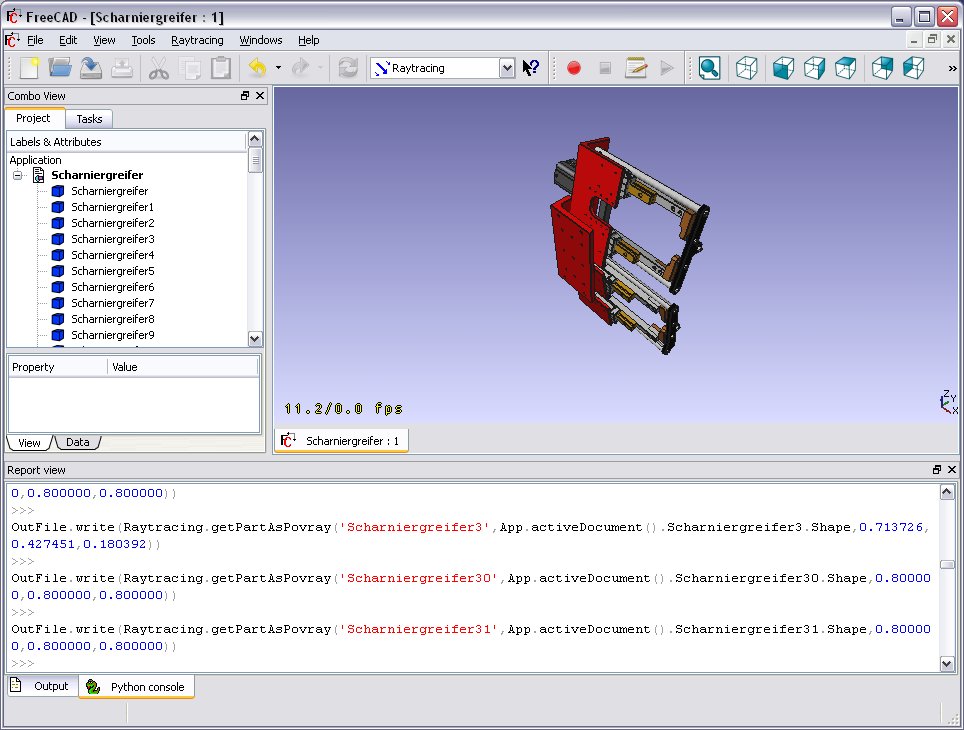
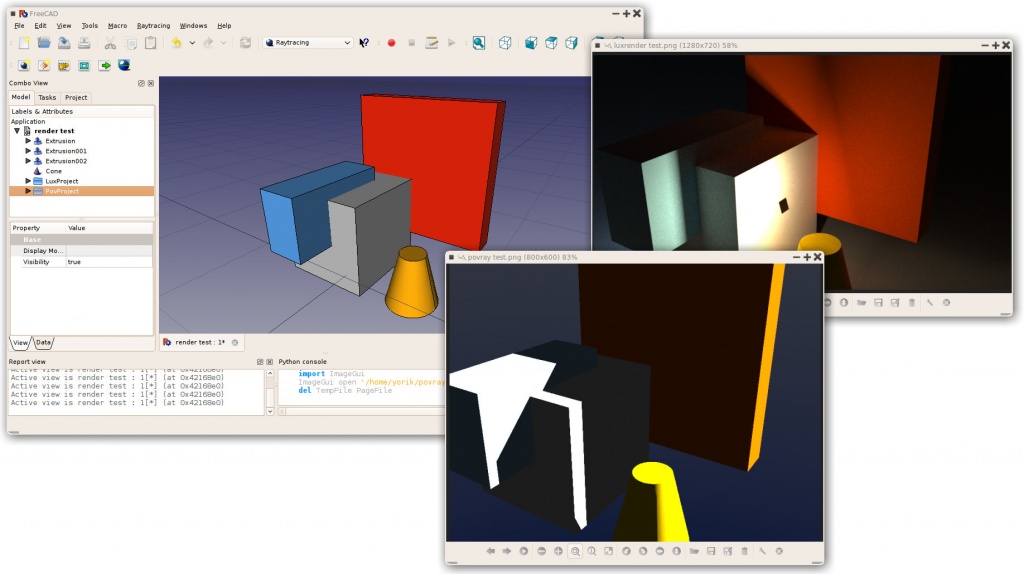
Ambiente Raytracing
Il modulo Raytracing ha la funzione di inviare il contenuto della scena presente sul monitor a un motore di rendering esterno, per produrre immagini fotorealistiche del progetto. Il modulo Raytracing lavora con dei modelli, nello stesso modo del modulo Drawing, e consente di creare un progetto di raytracing, in cui inserire una vista degli oggetti. Il progetto può essere esportato in un file ready-to-render, o essere trattato direttamente.
Attualmente sono supportati due renderizzatori: povray e luxrender. Per poter eseguire il rendering direttamente da FreeCAD, sul sistema deve essere installato almeno uno di questi renderer, e deve essere configurato il suo percorso nelle preferenze di FreeCAD per Raytracing. Senza alcun renderer installato, si può comunque esportare un file della scena e utilizzarlo successivamente in uno di questi renderer, o su una macchina diversa.
Il modulo Raytracing lavora con dei modelli, che sono dei file della scena completati per un dato renderer esterno, comprese le luci e eventuali geometrie aggiuntive, come i piani di appoggio. Questi file di scena contengono dei segnaposto, dove FreeCAD inserisce le informazioni per la posizione della fotocamera, la geometria e il materiale di ogni oggetto del progetto. Questo file di scena modificato è il file che viene poi esportato verso il renderer esterno.
Strumenti
Flusso di lavoro tipico
- Creare o aprire un progetto di FreeCAD, aggiungere alcuni oggetti basati sul modulo Part (i mesh non sono ancora supportati)
- Creare un progetto Raytracing (luxrender o povray)
- Selezionare gli oggetti che si desidera aggiungere al progetto raytracing e aggiungerli con lo strumento "Inserisci Parte"
- Esportare o elaborare direttamente
Creare manualmente un file povray
Gli strumenti di utilità descritti prima consentono di esportare la corrente vista 3D e tutto il suo contenuto in un file Povray. In primo luogo, è necessario caricare un documento o crearne uno e poi orientare la vista 3D come si desidera. Dopo, scegliere Esporta la vista ... nel menu di Raytracing.

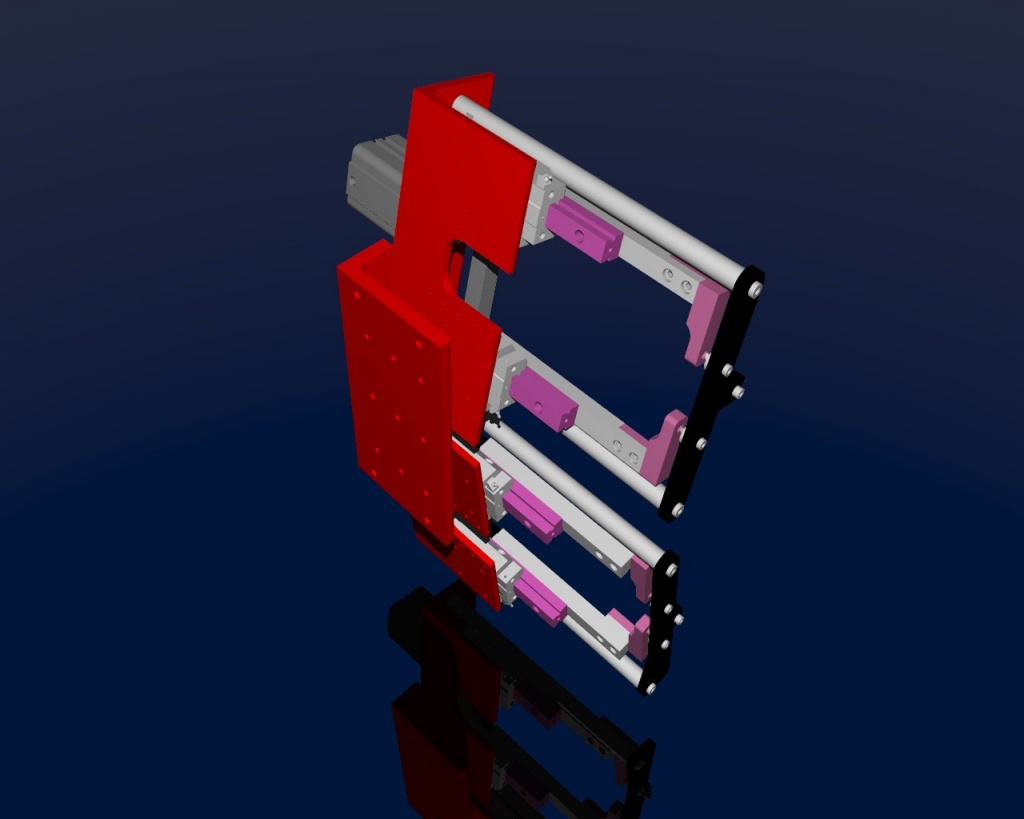
Nella finestra di dialogo Esporta pagina, selezionare la destinazione per salvare il file *.pov. Successivamente aprire il file in Povray e generare la renderizzazione:

Come è noto, le applicazioni di renderizzazione possono produrre immagini di grandi dimensioni e ottima qualità:
Script
Outputting render files
The Raytracing and RaytracingGui modules provide several methods to write scene contents as povray or luxrender data. The most useful are Raytracing.getPartAsPovray() and Raytracing.getPartAsLux() to render a FreeCAD Part object into a povray or luxrender definition, and RaytracingGui.povViewCamera() and RaytracinGui.luxViewCamera() to get the current point of view of the FreeCAD 3D window into povray or luxrender format.
Here is how to write a povray file from python, assuming your document contains a "Box" object:
 import Raytracing,RaytracingGui
 OutFile = open('C:/Documents and Settings/jriegel/Desktop/test.pov','w')
 OutFile.write(open(App.getResourceDir()+'Mod/Raytracing/Templates/ProjectStd.pov').read())
 OutFile.write(RaytracingGui.povViewCamera())
 OutFile.write(Raytracing.getPartAsPovray('Box',App.activeDocument().Box.Shape,0.800000,0.800000,0.800000))
 OutFile.close()
 del OutFile
And the same for luxrender:
 import Raytracing,RaytracingGui
 OutFile = open('C:/Documents and Settings/jriegel/Desktop/test.lxs','w')
 OutFile.write(open(App.getResourceDir()+'Mod/Raytracing/Templates/LuxClassic.lxs').read())
 OutFile.write(RaytracingGui.luxViewCamera())
 OutFile.write(Raytracing.getPartAsLux('Box',App.activeDocument().Box.Shape,0.800000,0.800000,0.800000))
 OutFile.close()
 del OutFile
Creating a custom render object
Apart from standard povray and luxrender view objects, that provide a view of an existing Part object, and that can be inserted in povray and luxrender projects respectively, a third object exist, called RaySegment, that can be inserted either in povray or luxrender projects. That RaySegment object is not linked to any of the FreeCAD objects, and can contain custom povray or luxrender code, that you might wish to insert into your raytracing project. You can also use it, for example, to output your FreeCAD objects a certain way, if you are not happy with the standard way. You can create and use it like this from the python console:
 myRaytracingProject = FreeCAD.ActiveDocument.PovProject
 myCustomRenderObject = FreeCAD.ActiveDocument.addObject("Raytracing::RaySegment","myRenderObject")
 myRaytracingProject.addObject(myCustomRenderObject)
 myCustomRenderObject.Result = "// Hello from python!"
Links
POVRay
- http://www.spiritone.com/~english/cyclopedia/
- http://www.povray.org/
- http://en.wikipedia.org/wiki/POV-Ray
Luxrender
Future possible renderers to implement
Currently there is a new Renderer Workbench in development to support multiple back-ends such as Lux Renderer and Yafaray. Information for using the development version can be viewed at Render_project
For Development status of the Render Module look here Raytracing_project
Templates
FreeCAD comes with a couple of default templates for povray and luxrender, but you can easily create your own. All you need to do is to create a scene file for the given renderer, then edit it manually with a text editor to insert special tags that FreeCAD will recognize and where it will insert its contents (camera and objects data)
Povray
Povray scene files (with extension .pov) can be created manually with a text editor (povray is made primarily to be used as a scripting language), but also with a wide range of 3D applications, such as blender. On the povray website you can find further information and a list of applications able to produce .pov files.
When you have a .pov file ready, you need to open it with a text editor, and do two operations:
- Strip out the camera information, because FreeCAD will place its own camera data. To do so, locate a text block like this: camera { ... }, which describes the camera parameters, and delete it (or put "//" in front of each line to comment them out).
- Insert the following line somewhere: //RaytracingContent. This is where FreeCAD will insert its contents (camera and objects data). You can, for example, put this line at the very end of the file.
Note that FreeCAD will also add some declarations, that you can use in your template, after the //RaytracingContent tag. These are:
- cam_location: the location of the camera
- cam_look_at: the location of the target point of the camera
- cam_sky: the up vector of the camera.
- cam_angle: the angle of the camera
If you want, for example, to place a lamp above the camera, you can use this:
 light_source {
  cam_location + cam_angle * 100
  color rgb <10, 10, 10>
 }
Luxrender
Luxrender scene files (with extension.lxs) can either be single files, or a master .lxs file that includes world definition (.lxw), material definition (.lxm) and geometry definition (.lxo) files. You can work with both styles, but it is also easy to transform a group of 4 files in a single .lxs file, by copying the contents of each .lxw, .lxm and .lxo file and pasting it at the point where that file is inserted in the master .lxs file.
Luxrender scene files are hard to produce by hand, but are easy to produce with many 3D applications such as blender. On the luxrender website, you'll find more information and plugins for the main 3D applications out there.
If you will work with separated .lxw, .lxm and .lxo files, beware that the final .lxs exported by FreeCAD might be at a different location than the template file, and therefore these files might not be found by Luxrender at render time. In this case you should or copy these files to the location of your final file, or edit their paths in the exported .lxs file.
If you are exporting a scene file from blender, and wish to merge everything into one single file, you will need to perform one step before exporting: By default, the luxrender exporter in blender exports all mesh geometry as separate .ply files, instead of placing the mesh geometry directly inside the .lxo file. To change that behaviour, you need to select each of your meshes in blender, go to the "mesh" tab and set the option "export as" to "luxrender mesh" for each one of them.
After you have your scene file ready, to turn it into a FreeCAD template, you need to perform the following steps:
- Locate the camera position, a single line that begins with LookAt, and delete it (or place a "#" at the beginning of the line to comment it out)
- At that place, insert the following line: #RaytracingCamera
- At a desired point (for example just after the end of the materials definition, before the geometry information, or at the very end, just before the final WorldEnd line, insert the following line: #RaytracingContent. That is where FreeCAD will insert its own objects.
Note that in luxrender, the objects stored in a scene file can define transformation matrixes, that perform location, rotation or scaling operations. These matrixes can stack and affect everything that come after them, so, by placing your #RaytracingContent tag at the end of the file, you might see your FreeCAD objects affected by a transformation matrix placed earlier in the template. To make sure that this doesn't happen, place your #RaytracingContent tag before any other geometry object present in the template. FreeCAD itself won't define any of those transformation matrixes.

