Example Combined Footing: Difference between revisions
(Wiki code.) |
Tag: Undo |
||
| (7 intermediate revisions by the same user not shown) | |||
| Line 2: | Line 2: | ||
<translate> |
<translate> |
||
<!--T:1--> |
|||
{{TutorialInfo |
{{TutorialInfo |
||
|Topic=Example Combined Footing |
|Topic=Example Combined Footing |
||
| Line 11: | Line 12: | ||
}} |
}} |
||
==Description== |
==Description== <!--T:2--> |
||
<!--T:3--> |
|||
The [[ |
The [[Image:Reinforcement_FootingRebars.svg|24px]] [[Reinforcement_FootingRebars|Reinforcement FootingRebars]] tool allows the user to create reinforcing bars inside a Footing [[Arch_Structure|Arch Structure]] object. |
||
<!--T:4--> |
|||
This |
This tool is part of the [[Image:Reinforcement_Workbench.svg|24px]] [[Reinforcement_Workbench|Reinforcement Workbench]], an [[External_workbenches|external workbench]] that can be installed with the [[Image:Std_AddonMgr.svg|24px]] [[Std_AddonMgr|Addon Manager]]. |
||
<!--T:5--> |
|||
In this example we will create Combined Footing Reinforcement as shown in below figure. |
In this example we will create Combined Footing Reinforcement as shown in below figure. |
||
| Line 22: | Line 26: | ||
[[File:Combined_Footing_reinforcement.png]] |
[[File:Combined_Footing_reinforcement.png]] |
||
<translate> |
<translate> |
||
<!--T:6--> |
|||
{{Caption|A Example of Combined Footing reinforcement in Footing [[Arch_Structure|Arch Structure]]}} |
{{Caption|A Example of Combined Footing reinforcement in Footing [[Arch_Structure|Arch Structure]]}} |
||
| Line 27: | Line 32: | ||
[[File:Side_view_of_combined_footing_of_footing_reinforcement.png]] |
[[File:Side_view_of_combined_footing_of_footing_reinforcement.png]] |
||
<translate> |
<translate> |
||
<!--T:7--> |
|||
{{Caption|Right view of given Footing Reinforcement example}} |
{{Caption|Right view of given Footing Reinforcement example}} |
||
| Line 32: | Line 38: | ||
[[File:Combined_footing_front_view_.png]] |
[[File:Combined_footing_front_view_.png]] |
||
<translate> |
<translate> |
||
<!--T:8--> |
|||
{{Caption|Front view of given Footing Reinforcement example}} |
{{Caption|Front view of given Footing Reinforcement example}} |
||
==Usage== |
==Usage== <!--T:9--> |
||
<!--T:10--> |
|||
1. Select vertical face of a previously created Footing {{Button|[[Image:Arch_Structure.svg|16px]] [[Arch_Structure|Arch Structure]]}} object. as shown in below image. |
1. Select vertical face of a previously created Footing {{Button|[[Image:Arch_Structure.svg|16px]] [[Arch_Structure|Arch Structure]]}} object. as shown in below image. |
||
</translate> |
</translate> |
||
[[File:FootingSelectedFace.png]] |
: [[File:FootingSelectedFace.png]] |
||
<translate> |
<translate> |
||
<!--T:11--> |
|||
{{Caption|Selected face for Footing Arch Structure}} |
: {{Caption|Selected face for Footing Arch Structure}} |
||
<!--T:12--> |
|||
2. Then select {{Button|[[ |
2. Then select {{Button|[[Image:Reinforcement_FootingRebars.svg|16px]] [[Reinforcement_FootingRebars|Footing Reinforcement]]}} from the rebar tools. |
||
<!--T:13--> |
|||
3. A footing reinforcement dialog box will pop-out on screen as shown below. |
3. A footing reinforcement dialog box will pop-out on screen as shown below. |
||
</translate> |
</translate> |
||
[[File:Footing_Reinforcement_GUI_.png]] |
: [[File:Footing_Reinforcement_GUI_.png]] |
||
<translate> |
<translate> |
||
<!--T:14--> |
|||
{{Caption|Dialog Box for the Footing Reinforcement}} |
: {{Caption|Dialog Box for the Footing Reinforcement}} |
||
<!--T:15--> |
|||
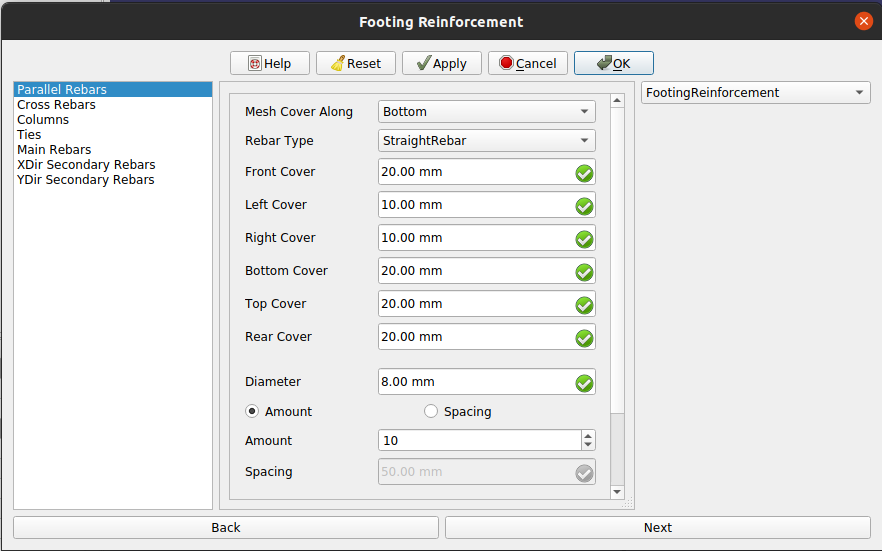
4. Select the desired rebar type and other input data for rebars in parallel direction of selected face in footing reinforcement mesh as show in below image. |
4. Select the desired rebar type and other input data for rebars in parallel direction of selected face in footing reinforcement mesh as show in below image. |
||
<!--T:16--> |
|||
5. Now click on Next button or select Cross Rebars in list view and desired data for input data for rebars in cross direction of selected face in footing reinforcement mesh as show in below image. |
5. Now click on Next button or select Cross Rebars in list view and desired data for input data for rebars in cross direction of selected face in footing reinforcement mesh as show in below image. |
||
<!--T:17--> |
|||
6. click next or click on Columns in list view and fill desired input for columns in footing reinforcement. |
6. click next or click on Columns in list view and fill desired input for columns in footing reinforcement. |
||
Here you can select to add secondary rebars in columns or not. |
Here you can select to add secondary rebars in columns or not. |
||
<!--T:18--> |
|||
7. click next or click on Ties in list view and fill desired input for Ties in columns of footing reinforcement. |
7. click next or click on Ties in list view and fill desired input for Ties in columns of footing reinforcement. |
||
<!--T:19--> |
|||
8. click next or click on Main rebars in list view and fill desired input for main rebars in columns of footing reinforcement. |
8. click next or click on Main rebars in list view and fill desired input for main rebars in columns of footing reinforcement. |
||
<!--T:20--> |
|||
Only if secondary rebars check is enable then: |
Only if secondary rebars check is enable then: |
||
<!--T:21--> |
|||
9. click next or click on XDir Secondary rebar in list view and fill desired input for secondary rebars in X direction in a column in footing reinforcement. |
9. click next or click on XDir Secondary rebar in list view and fill desired input for secondary rebars in X direction in a column in footing reinforcement. |
||
<!--T:22--> |
|||
10. click next or click on YDir Secondary rebar in list view and fill desired input for secondary rebars in Y direction in a column in footing reinforcement. |
10. click next or click on YDir Secondary rebar in list view and fill desired input for secondary rebars in Y direction in a column in footing reinforcement. |
||
<!--T:23--> |
|||
11. Click {{Button|OK}} or {{Button|Apply}} or {{Button|Finish}} to generate Footing reinforcement. |
11. Click {{Button|OK}} or {{Button|Apply}} or {{Button|Finish}} to generate Footing reinforcement. |
||
<!--T:24--> |
|||
12. Click {{Button|Cancel}} to exit the dialog box. |
12. Click {{Button|Cancel}} to exit the dialog box. |
||
</translate> |
</translate> |
||
[[Category:External_Command_Reference{{#translation:}}]] |
|||
{{Userdocnavi{{#translation:}}}} |
|||
[[Category:Reinforcement{{#translation:}}]] |
[[Category:Reinforcement{{#translation:}}]] |
||
Latest revision as of 21:00, 9 March 2024
| Topic |
|---|
| Example Combined Footing |
| Level |
| Intermediate |
| Time to complete |
| Authors |
| Shiv Charan |
| FreeCAD version |
| 0.20 |
| Example files |
| See also |
| None |
Description
The Reinforcement FootingRebars tool allows the user to create reinforcing bars inside a Footing Arch Structure object.
This tool is part of the Reinforcement Workbench, an external workbench that can be installed with the
Addon Manager.
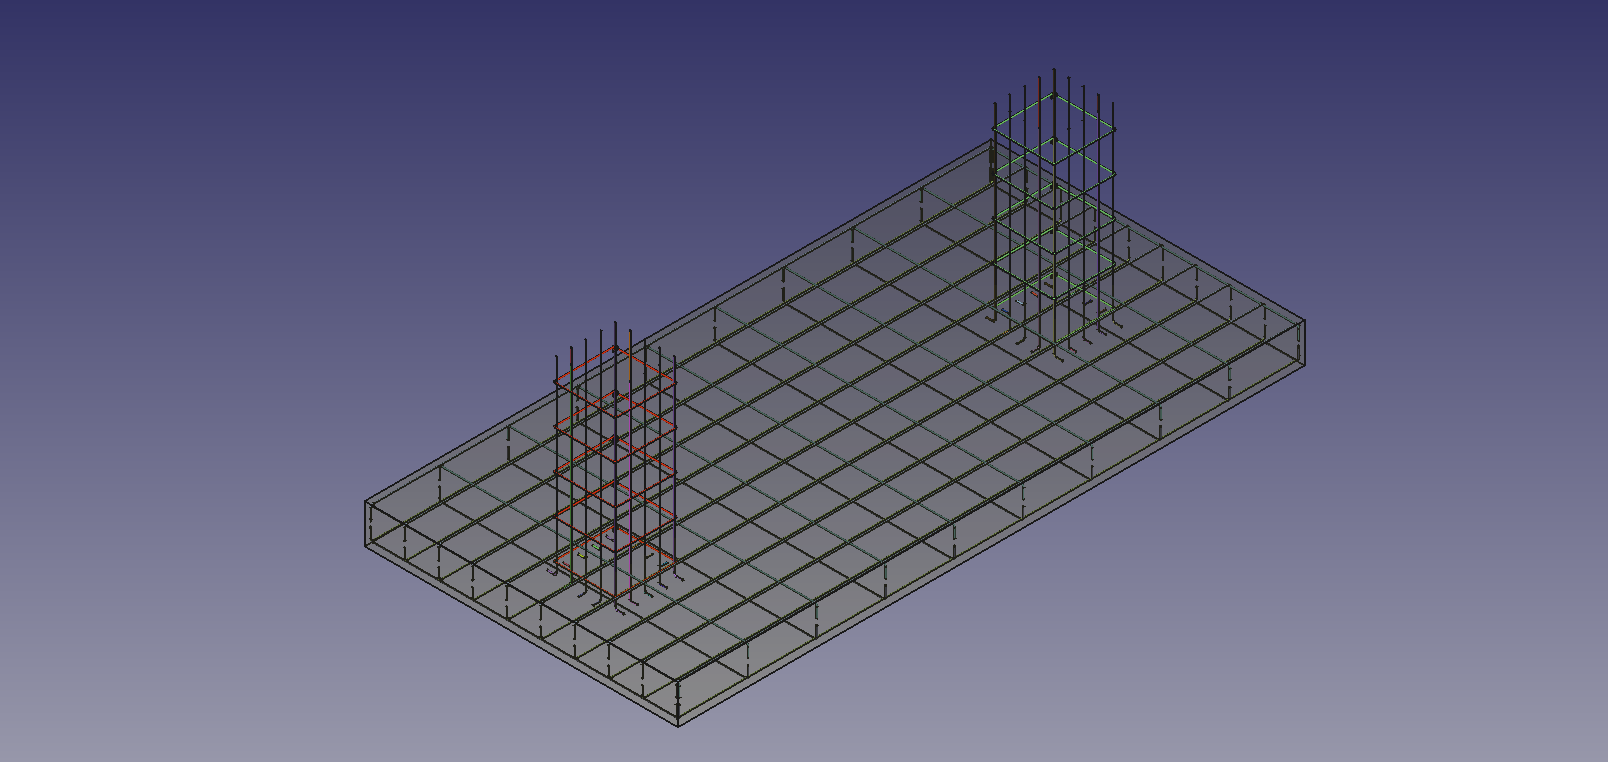
In this example we will create Combined Footing Reinforcement as shown in below figure.
A Example of Combined Footing reinforcement in Footing Arch Structure
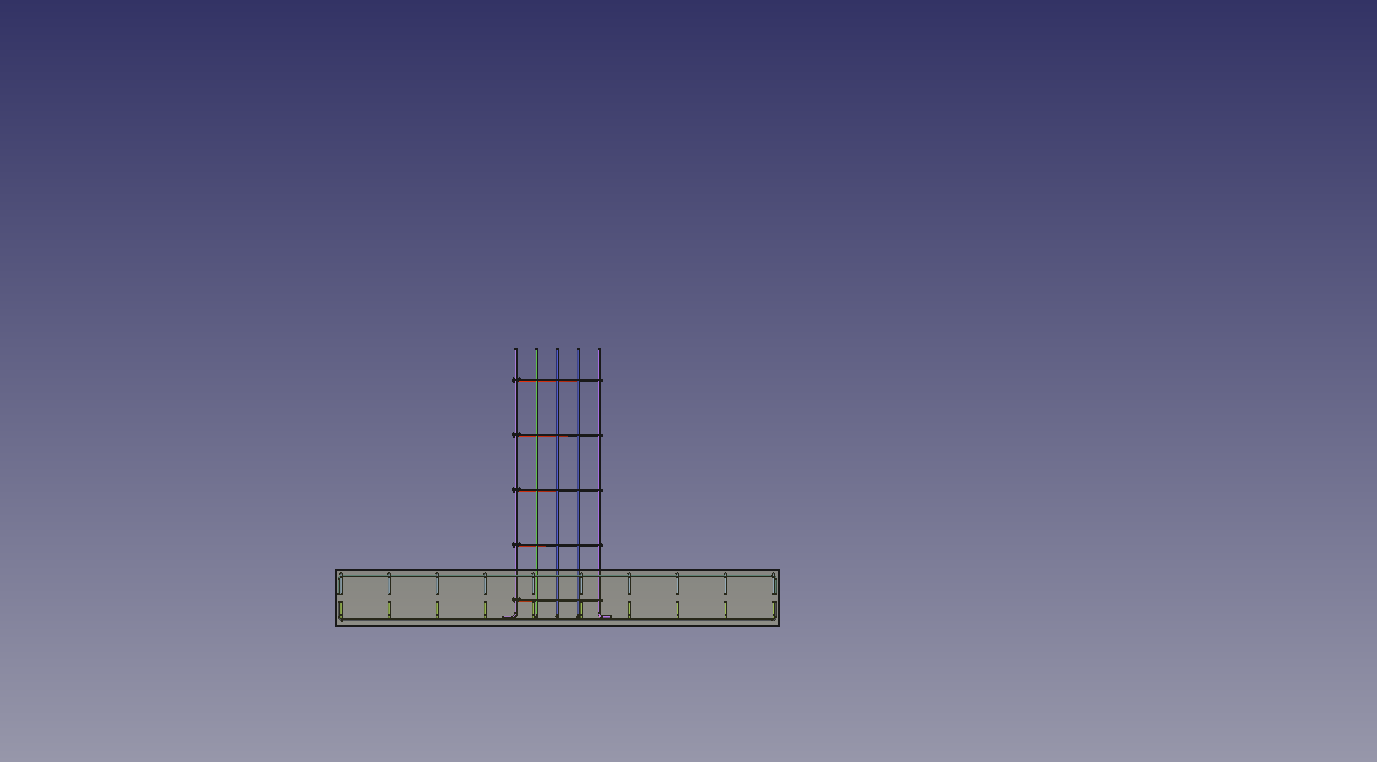
Right view of given Footing Reinforcement example
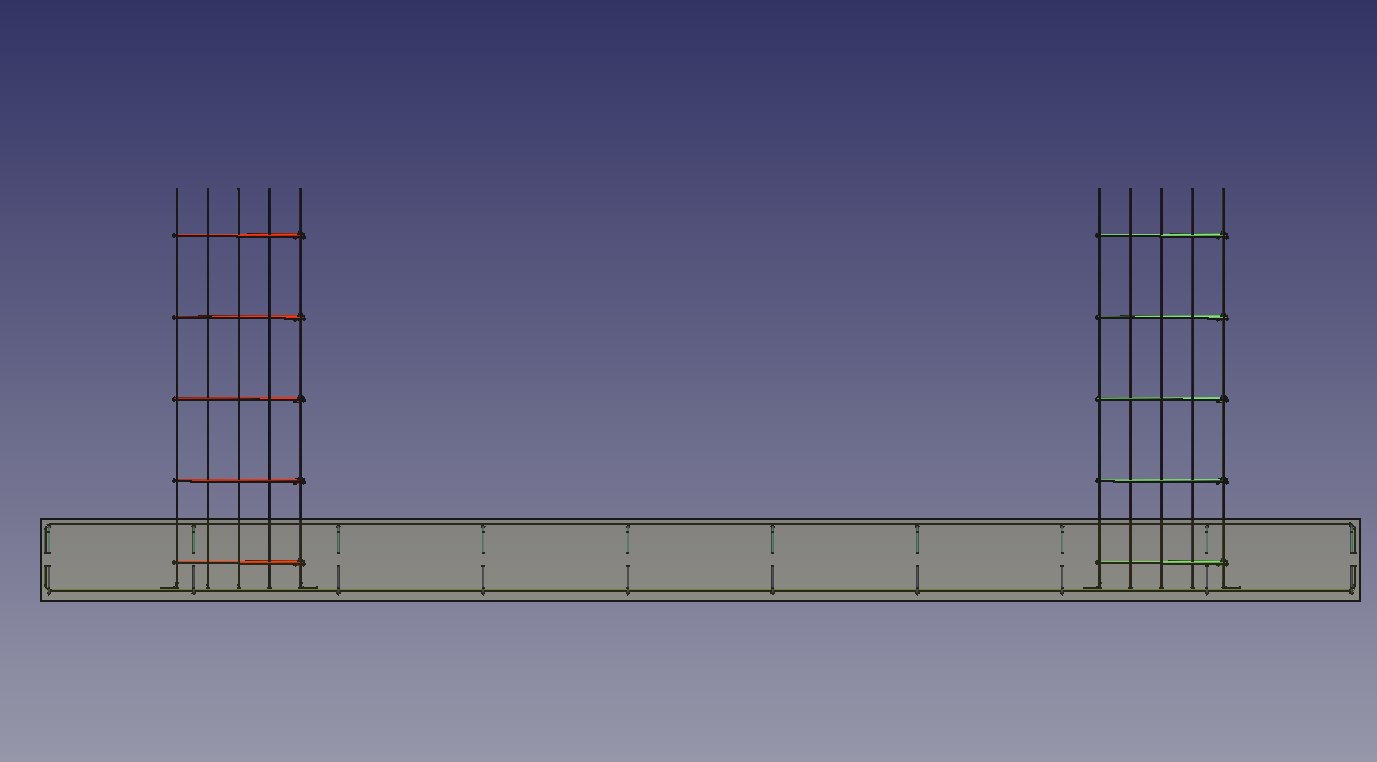
Front view of given Footing Reinforcement example
Usage
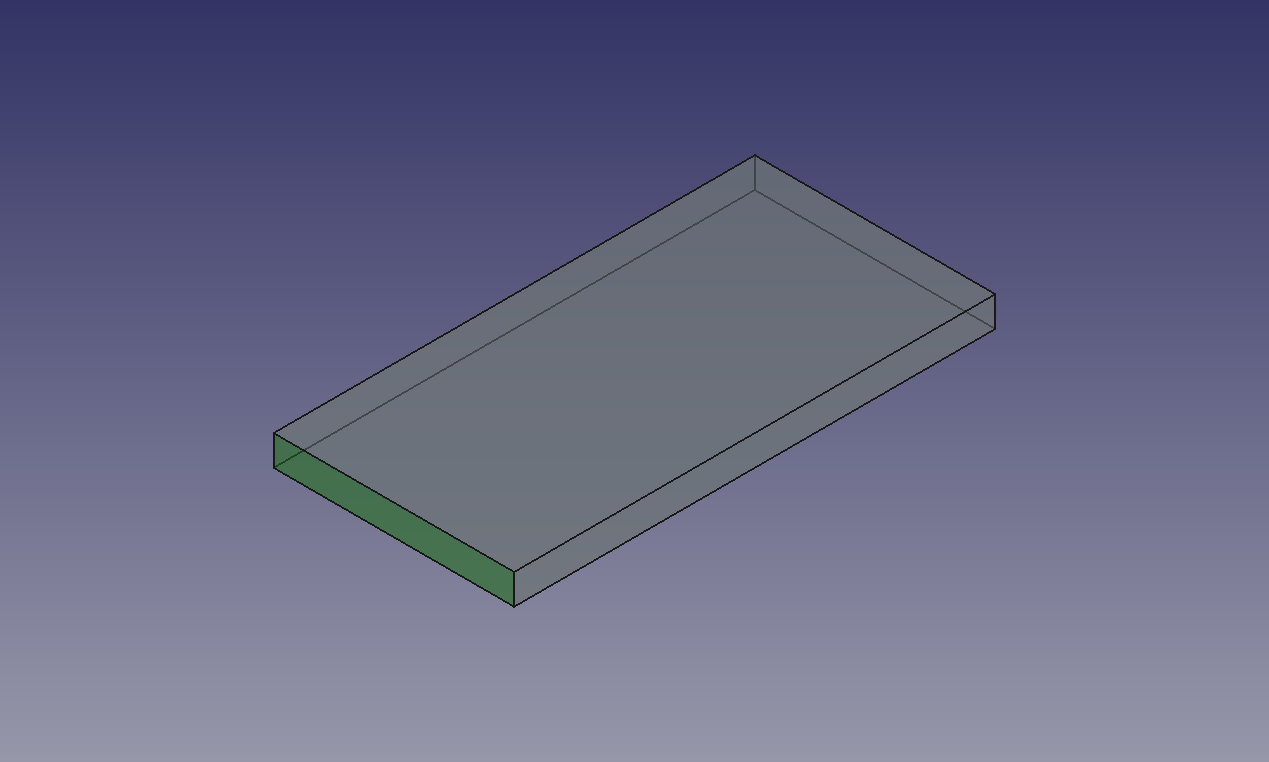
1. Select vertical face of a previously created Footing Arch Structure object. as shown in below image.
2. Then select Footing Reinforcement from the rebar tools.
3. A footing reinforcement dialog box will pop-out on screen as shown below.
4. Select the desired rebar type and other input data for rebars in parallel direction of selected face in footing reinforcement mesh as show in below image.
5. Now click on Next button or select Cross Rebars in list view and desired data for input data for rebars in cross direction of selected face in footing reinforcement mesh as show in below image.
6. click next or click on Columns in list view and fill desired input for columns in footing reinforcement. Here you can select to add secondary rebars in columns or not.
7. click next or click on Ties in list view and fill desired input for Ties in columns of footing reinforcement.
8. click next or click on Main rebars in list view and fill desired input for main rebars in columns of footing reinforcement.
Only if secondary rebars check is enable then:
9. click next or click on XDir Secondary rebar in list view and fill desired input for secondary rebars in X direction in a column in footing reinforcement.
10. click next or click on YDir Secondary rebar in list view and fill desired input for secondary rebars in Y direction in a column in footing reinforcement.
11. Click OK or Apply or Finish to generate Footing reinforcement.
12. Click Cancel to exit the dialog box.
