Borrador BSpline
|
|
| Ubicación en el Menú |
|---|
| Croquis → BSpline |
| Entornos de trabajo |
| Croquis, Arquitectura |
| Atajo de teclado por defecto |
| B S |
| Introducido en versión |
| - |
| Ver también |
| Contorno |
Descripción
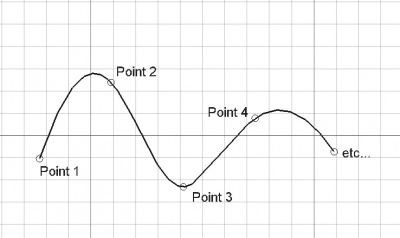
La herramienta BSpline crea una curva B-Spline a partir de varios puntos en el plano de trabajo actual. Toma el espesor de línea y color previamente establecidos en la pestaña de tareas. La herramienta BSpline se comporta exactamente como la herramienta Contorno.
Utilización
- Presiona el botón
 BSpline, o presiona las teclas B y S
 - Designa un primer punto en la vista 3D, o escribe unas coordenadas
- Designa un punto adicional en la vista 3D, o escribe unas coordenadas
- Presiona F o C, o haz doble clic en el último punto, o clic en el primer punto para terminar o cerrar la BSpline. Si la spline está cerrada, será también una cara, incluso aunque se muestre en estructura alámbrica.
Options
- Press F or the
 Finish button to finish the spline, leaving it open
 - Press C or the
 Close button or click on the first point to finish the spline, but making it closed by adding a last segment between the last point and the first one.
 - Press X, Y or Z after a point to constrain the next point on the given axis.
- To enter coordinates manually, simply enter the numbers, then press ENTER between each X, Y and Z component.
- Press R or click the checkbox to check/uncheck the Relative button. If relative mode is on, the coordinates of the next point are relative to the last one. If not, they are absolute, taken from the (0,0,0) origin point.
- Press T or click the checkbox to check/uncheck the Continue button. If continue mode is on, the BSpline tool will restart after you finish or close it, allowing you to draw another one without pressing the BSpline button again.
- Press CTRL while drawing to force snapping your point to the nearest snap location, independently of the distance.
- Press SHIFT while drawing to constrain your next point horizontally or vertically in relation to the last one.
- Press W or press the
 Wipe button to remove the existing segments and start the spline from the last point.
 - Press CTRL+Z or press the
 Undo button to undo the last point.
 - Press I or the Filled button to have the spline to appear as a face after it has been closed. This simply sets the View->Property of the Wire to "Flat lines" or "Wireframe", so it can easily be changed later.
- Press ESC or the Cancel button to abort the current BSpline command.
- BSplines, when in "Flat Lines" display mode, can display a hatch pattern, by setting their "Pattern" property below.
Properties
- DatosClosed: Specifies if the spline is closed or not
- VistaEnd Arrow: Shows an arrow symbol at the last point of the spline, so it can be used as an annotation leader line
- VistaPattern: Specifies a hatch pattern to fill the wire with
- VistaPattern Size: Specifies the size of the hatch pattern
Archivos de guión
La herramienta BSpline puede utilizarse en macros y desde la consola de Python utilizando la siguiente función:
makeBSpline (pointslist,[closed],[placement])- Crea un objeto B-Spline a partir de la lista de vectores dada.
- Si closed es True o si el primer y último punto son idénticos, el contorno es cerrado.
- Si face es true (y la BSpline está cerrada), la BSpline se mostrará rellena.
- En lugar de una lista de puntos, también puedes pasar un contorno de pieza.
- Devuelve el objeto recién creado.
Ejemplo:
 import FreeCAD,Draft
 p1 = FreeCAD.Vector(0,0,0)
 p2 = FreeCAD.Vector(1,1,0)
 p3 = FreeCAD.Vector(2,0,0)
 Draft.makeBSpline([p1,p2,p3],closed=True)