Basic TechDraw Tutorial
| Topic |
|---|
| Modeling |
| Level |
| Beginner |
| Time to complete |
| Less than an hour |
| Authors |
| WandererFan (WandererFan) |
| FreeCAD version |
| 0.17 or higher |
| Example files |
| Basic Part Design for v0.17 Sample |
| See also |
| None |
This tutorial introduces the new user to some of the tools and techniques used in the Technical Drawing (TechDraw) Workbench. This tutorial is not a complete and comprehensive guide to the TechDraw Workbench and many of the tools and capabilities are not covered. This tutorial will take user through the steps needed to produce technical drawings of the part from the Basic Part Design Tutorial.
Before You Begin
Download the sample file from the Part Design tutorial.
The Task
In this tutorial, you will be using the TechDraw Workbench to create a 2D drawings of the 3D part below. We will create multiple Views of the part and add key dimensions. This Tutorial will not use every feature and tool available within the TechDraw Workbench, but should use enough to give the user of this tutorial a basic foundation upon which to build their knowledge and skills.
The Part
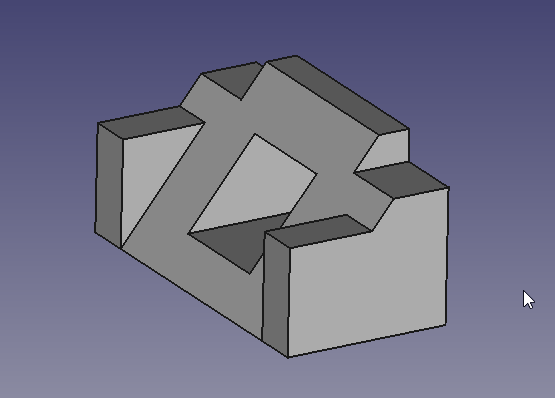
Creating a Drawing
Startup
First open the file containing our 3D part . Then make sure you are in the TechDraw Workbench.
All work in TechDraw begins with a Page. Pages are based on Templates and contain Views.
- Click on File:TechDraw New Default.png New Page from default Template to create a new Page.
- Click on Body in the 3D window or in the Combo view.
- Click on File:Techdraw-view.png Create new View. This will add the View to the page we just created.
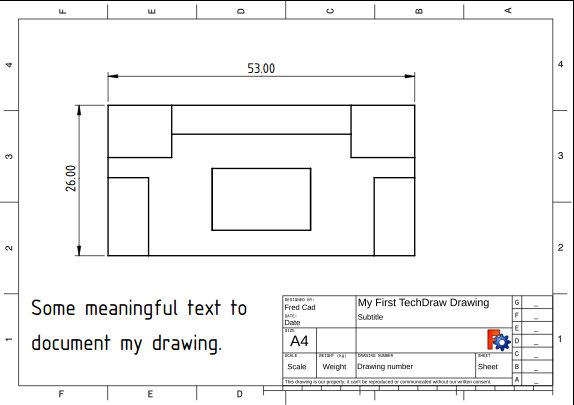
Now we have a View on the Page looking down at the top of the Body. It is a little small, though.
- Click on Page in the Combo view and scroll to the Scale property on the Data tab. Change the Scale to 3 and press Enter. The View will get bigger. Drag the View away from the documentation block in the bottom right of the page.
Better, but a little boring. Let's add some Dimensions.
- Click on the top-left Vertex (small dot), then Ctl-Click on the bottom-left vertex.
- Click on File:TechDraw Dimension Vertical.png New Vertical Dimension. Drag the dimension text away from the Body.
- Try that again with the top-left and top-right Vertices and File:TechDraw Dimension Horizontal.png New Horizontal Dimension.
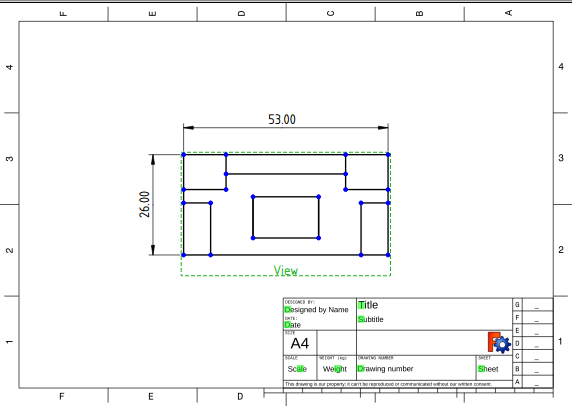
We should add some documentation to our drawing.
- Click on the small green square beside Title in the documentation block. You'll get a pop-up window where you can change Title to something more meaningful. Just for practice, put your name in the Designed by Name field the same way.
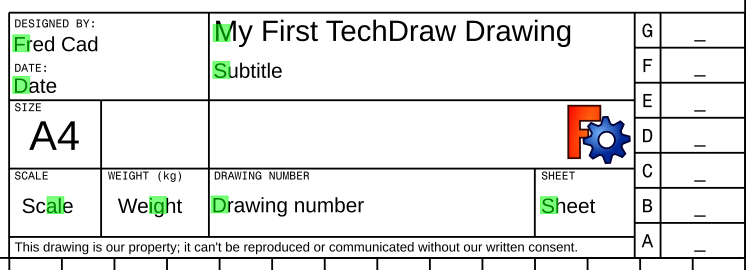
Getting better. Let's add some text to the page.
- Click on File:TechDraw New Annotation.png New Annotation. A text block will appear in teh middle of the page. Drag the text block away from the main View.
- Click on Annotation in the Combo view and scroll to the Text property on the Data tab. Click in the data area, the click on the ellipsis at the right of the field. You'll get a pop-up window where you can change the text to something more meaningful.
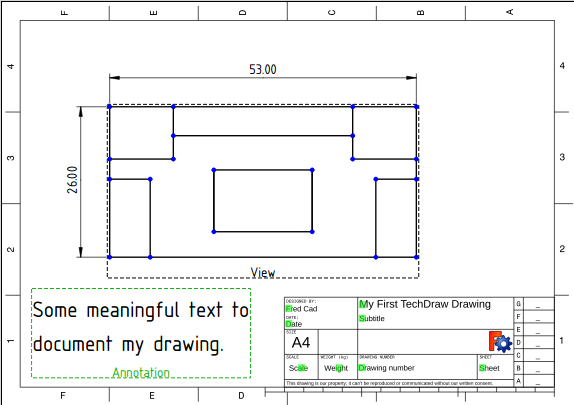
Before we leave this Page, let's see what it will look like when we print it.
- Click on File:TechDraw Toggle.png Toggle Frames. The Vertices and View frames will disappear. You can get them back by clicking Toggle again.
Additional Resources
- FreeCAD file for comparison (made with 0.17) Download