TechDraw Pitch Circle Tutorial: Difference between revisions
(Created page with "{{TutorialInfo |Topic=TechDraw |Level=Base |Time=5 minute |Author=Andergrin |FCVersion=0.19 }} == Introduction == This tutorial explains how to create pitch circle in Imag...") |
|||
| Line 17: | Line 17: | ||
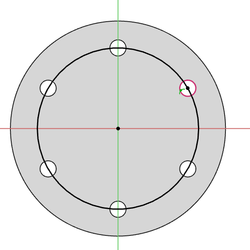
In 3D-View, create a new sketch on the surface, select one (or three, depending on the shape of the part) of the existing circle, and apply [[File:Sketcher_External.svg|24px]] [[Sketcher_External|External Geometry]] |
In 3D-View, create a new sketch on the surface, select one (or three, depending on the shape of the part) of the existing circle, and apply [[File:Sketcher_External.svg|24px]] [[Sketcher_External|External Geometry]] |
||
<br> |
<br> |
||
Draw a circle and constraint it to the center point (points) of external geometry you created. |
Draw a circle and constraint it to the center point (points) of external geometry you have created. |
||
[[Image:Circle.png|250px|left]] |
[[Image:Circle.png|250px|left]] |
||
<br> |
<br> |
||
Revision as of 12:52, 17 November 2020
| Topic |
|---|
| TechDraw |
| Level |
| Base |
| Time to complete |
| 5 minute |
| Authors |
| Andergrin |
| FreeCAD version |
| 0.19 |
| Example files |
| None |
| See also |
| None |
Introduction
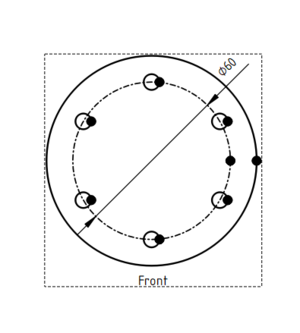
This tutorial explains how to create pitch circle in TechDraw Workbench.
Proceeding
1. Create a circle, that will represent Pitch Circle in TechDraw:
In 3D-View, create a new sketch on the surface, select one (or three, depending on the shape of the part) of the existing circle, and apply External Geometry
Draw a circle and constraint it to the center point (points) of external geometry you have created.

2. In TechDraw, create page, if you don't already have one
3. Holding Ctrl, in the 3D-View or Combo View, select feature of the body and sketch, that you created in step 1
4. Insert new view by pressing the Insert View button
5. Select circle, and change it Style and Weight by pressing the Change Appearance of Line(s) button
