PartDesign AdditiveEllipsoid/ro: Difference between revisions
No edit summary |
No edit summary |
||
| Line 13: | Line 13: | ||
== Cum se folosește == |
== Cum se folosește == |
||
# Apăsați mai întâi butonul {{KEY|[[Image:PartDesign AdditiveEllipsoid.png|24px]] '''Additive Ellipsoid'''}}. '''Notă''': |
# Apăsați mai întâi butonul {{KEY|[[Image:PartDesign AdditiveEllipsoid.png|24px]] '''Additive Ellipsoid'''}}. '''Notă''': Elipsoidul Aditiv parte dintr-un meniu cu pictograme etichetat ''Create an additive primitive''. După lansarea FreeCAD, Additive Box este printe cele afișate în toolbar. Pentru a obține butonul Ellipsoid, click pe săgeata în jos alături de iconița vizibilă și selectați Ellipsoid in meniu. |
||
# |
# Definiți parametrii Primitivei geometrice și [[Part_Attachment|Attachment]]. |
||
# Click {{KEY|OK}}. |
# Click pe {{KEY|OK}}. |
||
# |
# O funcție(onalitate) Ellipsoid apare sub Copul activ. |
||
== Opţiuni == |
== Opţiuni == |
||
Revision as of 09:35, 31 October 2018
|
|
| Menu location |
|---|
| Part Design → Create an additive primitive → Additive Ellipsoid |
| Workbenches |
| PartDesign |
| Default shortcut |
| None |
| Introduced in version |
| - |
| See also |
| PartDesign CompPrimitiveAdditive |
Descriere
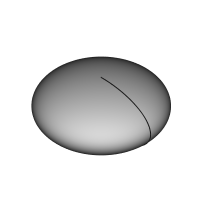
Introduceți un elipsoid primitiv în Corpul activ ca o funcție de bază sau îmbinați-l cu o funcție(onalitate) existentă.
Cum se folosește
- Apăsați mai întâi butonul
 Additive Ellipsoid. Notă: Elipsoidul Aditiv parte dintr-un meniu cu pictograme etichetat Create an additive primitive. După lansarea FreeCAD, Additive Box este printe cele afișate în toolbar. Pentru a obține butonul Ellipsoid, click pe săgeata în jos alături de iconița vizibilă și selectați Ellipsoid in meniu.
 - Definiți parametrii Primitivei geometrice și Attachment.
- Click pe OK.
- O funcție(onalitate) Ellipsoid apare sub Copul activ.
Opţiuni
Elipsoidul poate fi editat după crearea sa în două moduri:
- Double-clicking it in the Model tree, or by right-clicking and selecting Edit primitive in the contextual menu; this brings up the Primitive parameters.
- Via the Property editor.
Proprietăți
- DateAttachment: definește modul de atașare, precum și decalajul atașamentului. See Part Attachment.
- DateLabel: label given to the Ellipsoid object. Change to suit your needs.
- DateRadius1: the radius value along the ellipsoid's vertical axis; by default, parallel to the Z-axis.
- DateRadius2: the radius value along the ellipsoid's length; by default, parallel to the X-axis.
- DateRadius3: the radius value along the ellipsoid's width; by default, parallel to the Y-axis. At the default value of zero, the ellipsoid forms an oblate spheroid. This has the same form as if Radius3 is identical to Radius2.
- DateAngle1: (labelled V parameter in the Primitive parameters) lower truncation of the ellipsoid, parallel to the circular cross section (-90 degrees in a full spheroid)
- DateAngle2: (unlabelled in the Primitive parameters) upper truncation of the ellipsoid, parallel to the circular cross section (90 degrees in a full spheroid).
- DateAngle3: (numit U parameter în parametrii Primitivei) unghiul de rotație a secțiunii eliptice (360 de grade într-un sferoid complet).
