Macro Alias For Table For Object: Difference between revisions
(→Usage) |
|||
| Line 39: | Line 39: | ||
<br>Here for example, use "posy" for property "Placement.Base.y" |
<br>Here for example, use "posy" for property "Placement.Base.y" |
||
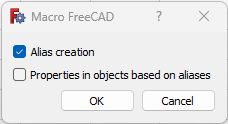
Run the Macro and check the first option : |
Run the Macro and check the first option :<br> |
||
[[File:Capture d'écran 2024-02-22 02.png]] |
[[File:Capture d'écran 2024-02-22 02.png]]<br> |
||
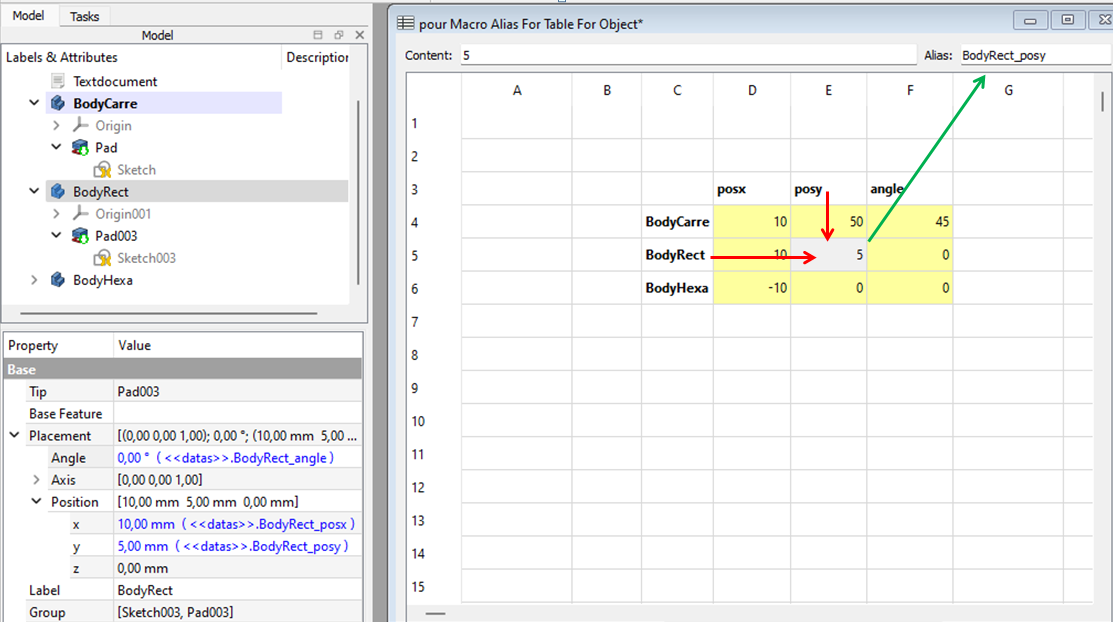
The macro will create alias with this syntaxe : "LabelObject_Property" |
The macro will create alias with this syntaxe : "LabelObject_Property" |
||
Here : BodyRect_posy |
Here : BodyRect_posy |
||
Revision as of 13:12, 21 February 2024
| Description |
|---|
| The macro automatically creates aliases in a two-dimensional table using the names of the rows and columns.
|
| Author |
| 2cv001 |
| Download |
| [https:......svg ToolBar icon] |
| Links |
| Macros recipes How to install macros How to customize toolbars |
| Macro Version |
| béta |
| Date last modified |
| 2024-02-20 |
| FreeCAD Version(s) |
| All |
| Default shortcut |
| None |
| See also |
| None |
Description
The macro automatically creates aliases in a two-dimensional table using the names of the rows and columns.
To use the "Table to Object" function, place the name of the relevant object in the column and the name of the property in the row.
The syntax for the alias is: "LabelObject_Property"

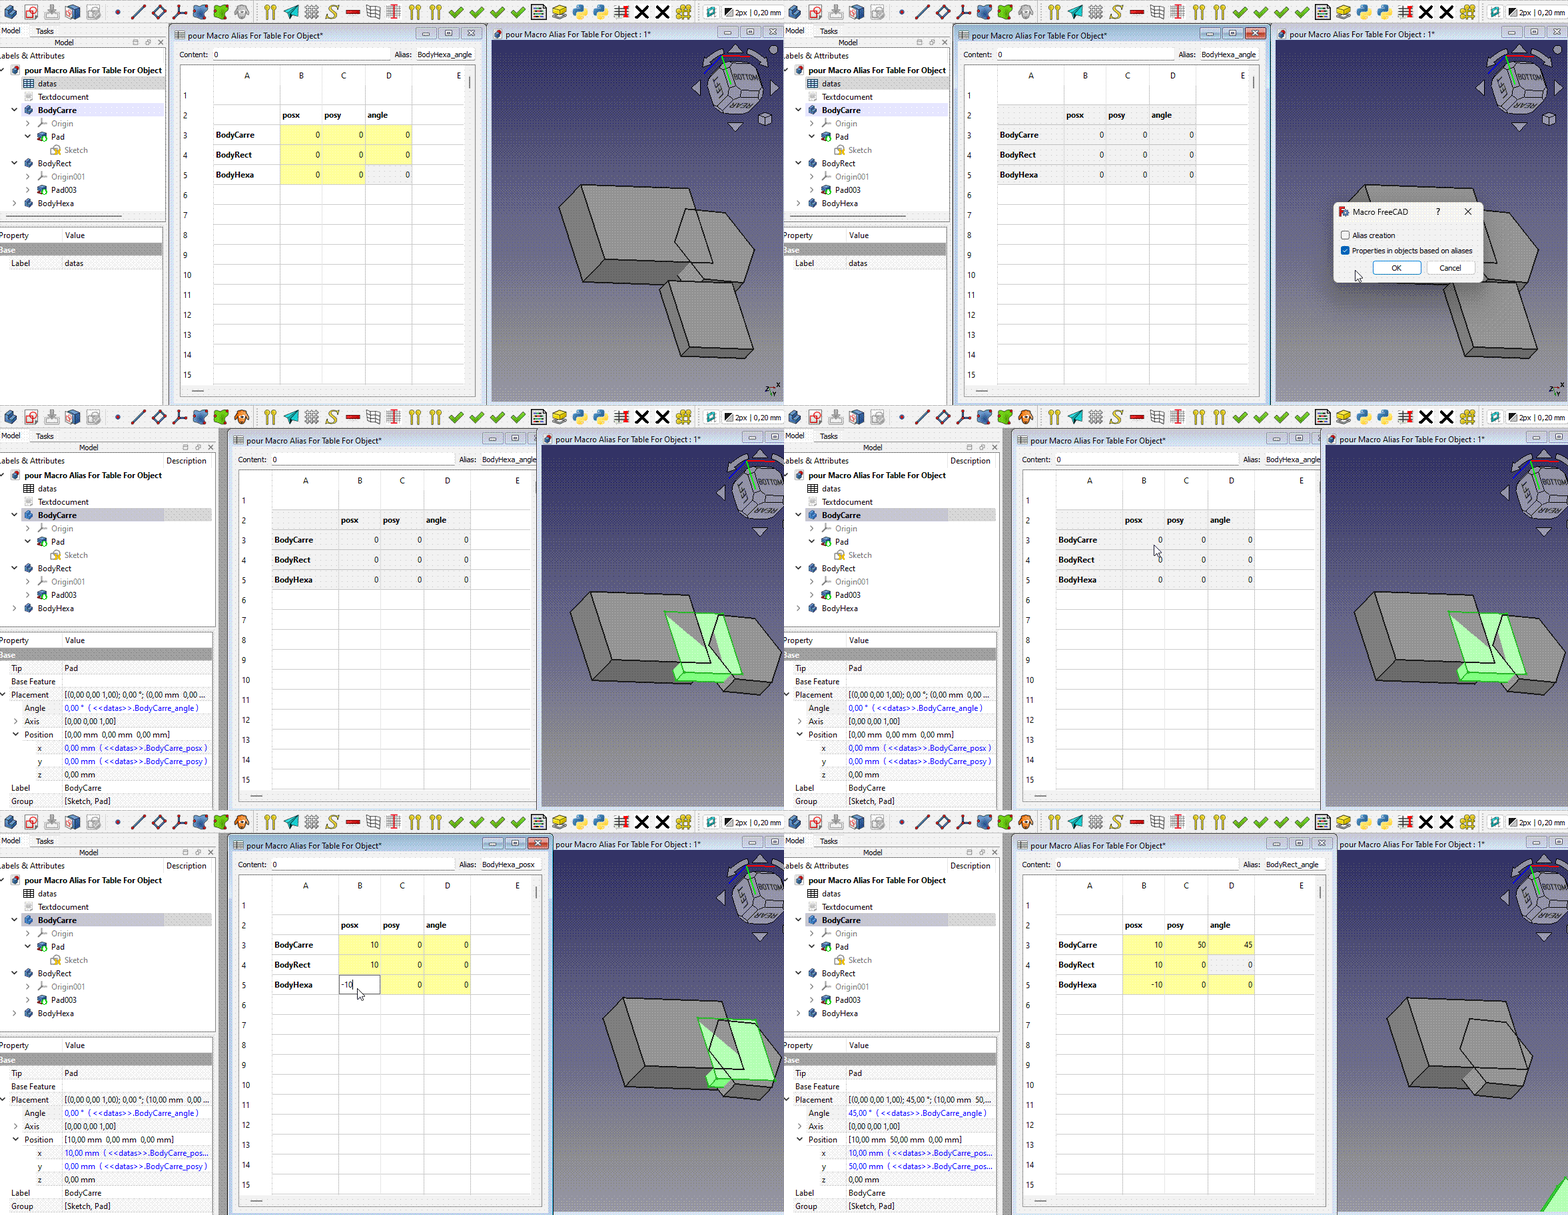
The macro can also automatically create the properties of objects (such as body, sketch, etc.) based on these aliases.
Usage
Automatic Alias creation
Fill a spreadsheet with a column containing object labels (Body, sketch,Pad, ....) and a row corresponding to properties.
You will find in the code the correspondence between the properties and what to put in this line. (at dico={........
Here for example, use "posy" for property "Placement.Base.y"
Run the Macro and check the first option :

The macro will create alias with this syntaxe : "LabelObject_Property"
Here : BodyRect_posy
part of the dico : dico={
       "posx" : "Placement.Base.x",
       "posy" : "Placement.Base.y",
       "posz" : "Placement.Base.z",
       "posX" : "Placement.Base.x",
       "posY" : "Placement.Base.y",
       "posZ" : "Placement.Base.z",
       "angle": "Placement.Rotation.Angle",
       "ang": "Placement.Rotation.Angle",
       "axisx": "Placement.Rotation.Axis.x",
       "axisy": "Placement.Rotation.Axis.y",
       "axisz": "Placement.Rotation.Axis.z",
       "axeX": "Placement.Rotation.Axis.x",
       "axeY": "Placement.Rotation.Axis.y",
       "axeZ": "Placement.Rotation.Axis.z",
       "attachementX" : "AttachmentOffset.Base.x",
       "attachementY" : "AttachmentOffset.Base.y",
       "attachementZ" : "AttachmentOffset.Base.z",
       "attachementAngle" : "AttachmentOffset.Rotation.Angle",
       "attachementAxisX" : "AttachmentOffset.Rotation.Axis.x",
       "attachementAxisY" : "AttachmentOffset.Rotation.Axis.y",
       "attachementAxisZ" : "AttachmentOffset.Rotation.Axis.z",
       "Length" : "Length",
       "Length2" : "Length2",
       "Radius" : "Radius",
       "Height" : "Height",
       "FirstAngle" : "FirstAngle",
       "SecondAngle" : "SecondAngle",
       "Angle1" : "Angle1",
       "Angle2" : "Angle2",
       "Angle3" : "Angle3",

