Std Group/ru: Difference between revisions
(Updating to match new version of source page) |
(Updating to match new version of source page) |
||
| Line 1: | Line 1: | ||
<languages/> |
<languages/> |
||
{{Docnav |
|||
{{Docnav|[[Std Part|Part]]|[[PartDesign Body|Create body]]|[[PartDesign_Workbench|PartDesign]]|IconL=Std_Part.png|IconC=Workbench_PartDesign.svg|IconR=PartDesign Body.png}} |
|||
|[[Std Part|Part]] |
|||
|[[PartDesign Body|Create body]] |
|||
|[[PartDesign_Workbench|PartDesign]] |
|||
|IconL=Std_Part.png |
|||
|IconC=Workbench_PartDesign.svg |
|||
|IconR=PartDesign Body.png |
|||
}} |
|||
{{GuiCommand |
|||
| ⚫ | |||
|Name=Std Group |
|||
|MenuLocation=Tree View → Right click on the document name |
|||
|Workbenches=All |
|||
|Shortcut= |
|||
| ⚫ | |||
]}} |
|||
==Description== |
==Description== |
||
This command lets you create a group in the tree view. |
This command lets you create a group in the tree view. |
||
| Line 12: | Line 24: | ||
==Use== |
==Use== |
||
Right-click on the name of your FreeCAD-document in the tree-view and choose "create group". |
Right-click on the name of your FreeCAD-document in the tree-view and choose "create group". |
||
| Line 41: | Line 52: | ||
==Properties== |
==Properties== |
||
* |
* {{PropertyData|Label}}: Name of the group |
||
==Scripting== |
==Scripting== |
||
| Line 64: | Line 75: | ||
{{Docnav |
|||
{{Docnav|[[Std Part|Part]]|[[PartDesign Body|Create body]]|[[PartDesign_Workbench|PartDesign]]|IconL=Std_Part.png|IconC=Workbench_PartDesign.svg|IconR=PartDesign Body.png}} |
|||
|[[Std Part|Part]] |
|||
|[[PartDesign Body|Create body]] |
|||
|[[PartDesign_Workbench|PartDesign]] |
|||
|IconL=Std_Part.png |
|||
|IconC=Workbench_PartDesign.svg |
|||
|IconR=PartDesign Body.png |
|||
}} |
|||
{{Std Base}} |
|||
{{PartDesign Tools navi}} |
|||
{{Userdocnavi}} |
{{Userdocnavi}} |
||
Revision as of 11:37, 21 October 2019
{{GuiCommand |Name=Std Group |MenuLocation=Tree View → Right click on the document name |Workbenches=All |Shortcut= |SeeAlso=Draft SelectGroup, [[Draft_AddToGroup|Draft AddToGroup] ]}}
Description
This command lets you create a group in the tree view.
It can be used for organizing the structure of your model.
Use
Right-click on the name of your FreeCAD-document in the tree-view and choose "create group".
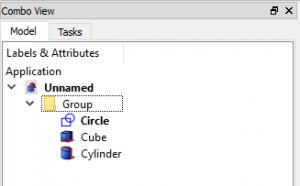
A group will be created automatically and give the icon of a directory and an automatically chosen name.
You can rename the group by right-clicking on the group and choosing "rename" or using "F2" on your keyboard.
Push FreeCAD-objects into the group or pull them out of the group by clicking on the desired object,
keep left-mouse button pressed and using drag&drop-style to drag the object to desired new location.
As long as there is a "circle with a diagonal line"-sign below the cursor you can't drop your object here.
As soon as the sign changes to a "plus"-symbol it is possible to drop your object here.
- Right click on active document or on existing group in the Tree View and select Create Group...
- Drag-n-drop objects into the group
Options
- To rename the group select a group and press F2, or right click a group and select Rename
Properties
- ДанныеLabel: Name of the group
Scripting
Following command adds new group to the active document:
App.ActiveDocument.addObject("App::DocumentObjectGroup","Group")
Limitations
Command needs an open FreeCAD-document to work.
Links
Notes
- File: New, Open, Close, Close All, Save, Save As, Save a Copy, Save All, Revert, Import, Export,Merge project, Project information, Print, Print preview, Export PDF, Recent files, Exit
- Edit: Undo, Redo, Cut, Copy, Paste, Duplicate selection, Refresh, Box selection, Box element selection, Select All, Delete, Send to Python Console, Placement, Transform, Alignment, Toggle Edit mode, Edit mode, Preferences
- View:
- Miscellaneous: Create new view, Orthographic view, Perspective view, Fullscreen, Bounding box, Toggle axis cross, Clipping plane, Texture mapping, Toggle navigation/Edit mode, Appearance, Random color, Workbench, Status bar
- Standard views: Fit all, Fit selection, Isometric, Dimetric, Trimetric, Home, Front, Top, Right, Rear, Bottom, Left, Rotate Left, Rotate Right
- Freeze display: Save views, Load views, Freeze view, Clear views
- Draw style: As is, Points, Wireframe, Hidden line, No shading, Shaded, Flat lines
- Stereo: Stereo red/cyan, Stereo quad buffer, Stereo Interleaved Rows, Stereo Interleaved Columns, Stereo Off, Issue camera position
- Zoom: Zoom In, Zoom Out, Box zoom
- Document window: Docked, Undocked, Fullscreen
- Visibility: Toggle visibility, Show selection, Hide selection, Select visible objects, Toggle all objects, Show all objects, Hide all objects, Toggle selectability
- Toolbars: File, Edit, Clipboard, Workbench, Macro, View, Structure, Help
- Panels: Tree view, Property view, Selection view, Tasks, Python console, DAG view, Model, Report view
- Link navigation: Go to linked object, Go to the deepest linked object, Select all links
- Tree view actions: Sync view, Sync selection, Sync placement, Pre-selection, Record selection, Single document, Multi document, Collapse/Expand, Initiate dragging, Go to selection, Selection Back, Selection Forward
- Tools: Edit parameters, Save image, Load image, Scene inspector, Dependency graph, Project utility, Measure distance, Add text document, View turntable, Units calculator, Customize, Addon manager
- Macro: Macro recording, Macros, Recent macros, Execute macro, Attach to remote debugger, Debug macro, Stop debugging, Step over, Step into, Toggle breakpoint
- Help: Help, FreeCAD Website, Donate, Users documentation, Python scripting documentation, Automatic Python modules documentation, FreeCAD Forum, FreeCAD FAQ, Report a bug, About FreeCAD, What's This
- Getting started
- Installation: Download, Windows, Linux, Mac, Additional components, Docker, AppImage, Ubuntu Snap
- Basics: About FreeCAD, Interface, Mouse navigation, Selection methods, Object name, Preferences, Workbenches, Document structure, Properties, Help FreeCAD, Donate
- Help: Tutorials, Video tutorials
- Workbenches: Std Base, Assembly, BIM, CAM, Draft, FEM, Inspection, Mesh, OpenSCAD, Part, PartDesign, Points, Reverse Engineering, Robot, Sketcher, Spreadsheet, Surface, TechDraw, Test Framework
- Hubs: User hub, Power users hub, Developer hub


