Atelier Raytracing
L'atelier Lancer de rayons (Raytracing) a pour but d'envoyer le contenu d'une scène vers un moteur de rendu externe, afin de produire des images photoréalistes de votre projet. L'atelier Raytracing module est encore peu développé, et peu d'options sont donc disponibles pour le moment. À l'heure actuelle, seul un ensemble d'outils de base pour l'exportation d'objets pièces en fichiers POV-ray est implémenté. Ces fichiers peuvent ensuite être chargés dans POV-ray afin de générer des rendus.
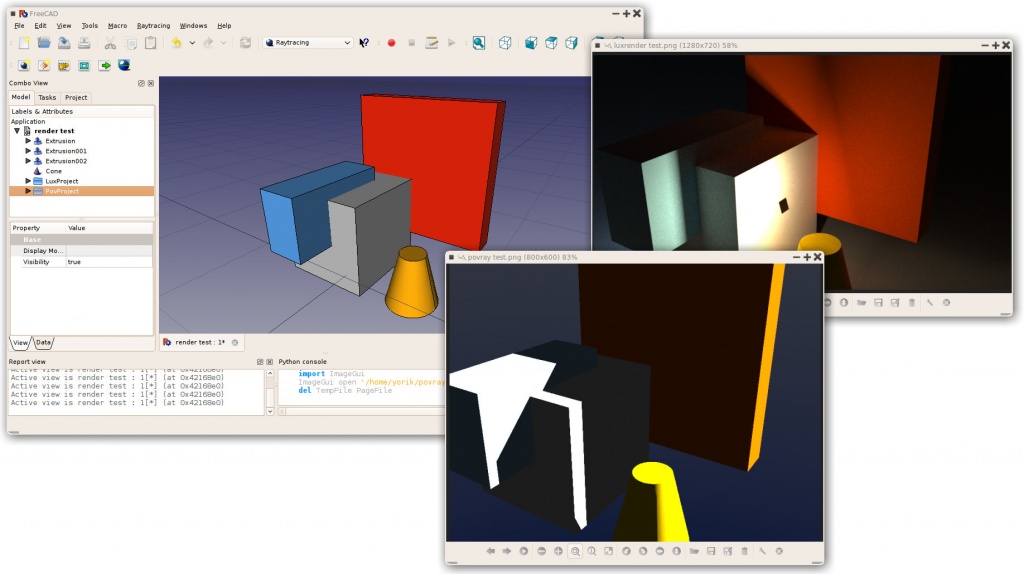
Actuellement, deux moteurs de rendu sont pris en charge: povray et luxrender. Pour être en mesure d'utiliser un mode de rendu directement dans FreeCAD, il faut au moins que l'un de ces convertisseurs soit installé sur votre système et son chemin d'accès configuré dans les préférences de FreeCAD Raytracing. S'il n'y a aucun convertisseur installé sur votre système, vous êtes toujours en mesure d'exporter un fichier de rendu qui peut être utilisé plus tard dans n'importe quel de ces convertisseurs, ou sur une autre machine.
L'atelier raytracing travaille avec le module templates, qui sont des fichiers de scène complète pour le moteur de rendu externe, y compris les rayons et éventuellement les géométries supplémentaires tels que les plans au sol. Ces fichiers de scène contiennent des emplacements réservés, où FreeCAD insérera la position des caméras et d'informations géométriques des matériaux constituant chacun des objets que vous insérez dans le projet. Ce fichier étant mis à jour, la scène est ensuite exportée vers le moteur de rendu externe.
Outils
Travail typique
- Créez ou ouvrez un projet dans FreeCAD, ajouter quelques objets Part-based (le maillage n'est actuellement pas pris en charge)
- Créer un projet de Raytracing (luxrender ou povray)
- Sélectionnez les objets que vous souhaitez ajouter au projet raytracing et ajoutez-les au projet avec l'outil "Insert Part"
- Export ou de rendre directement
Création manuelle d'un fichier povray
Les outils utilitaires décrits ci-dessus vous permettent d'exporter l'affichage 3D actuel et tout son contenu dans un fichier Povray. Tout d'abord, vous devez charger ou créer vos données CAO et positionner l'orientation de la vue 3D que vous le souhaitez. Puis choisissez "Utilities->Export View..." dans le menu de raytracing.

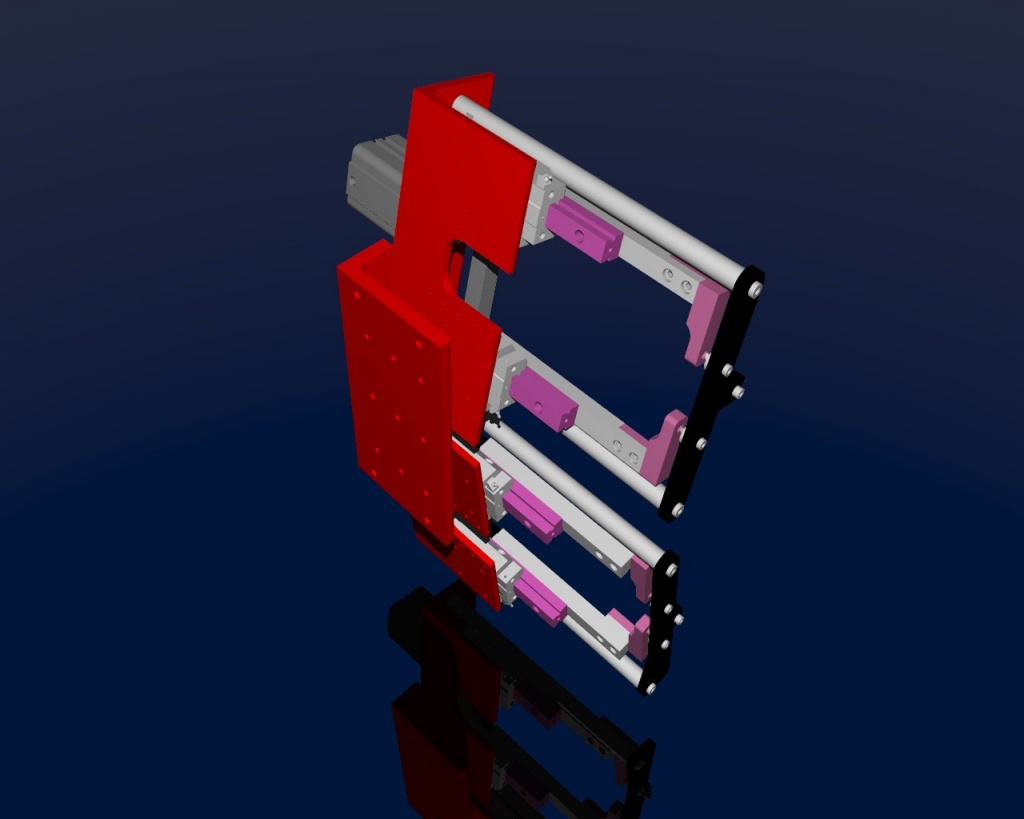
Donnez un emplacement pour enregistrer le fichier *.pov. Après cela vous pouvez l'ouvrir dans Povray et obtenir le rendu :

Comme d'habitude dans un rendererer vous pouvez faire de grandes et belles photos :
Script
Outputting render files
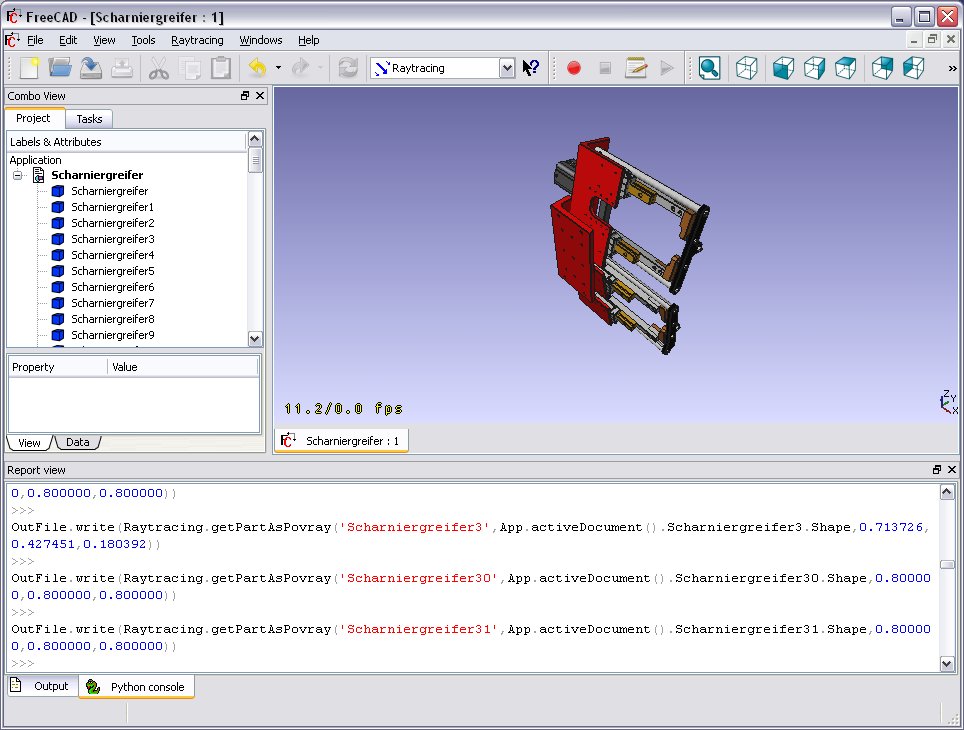
The Raytracing and RaytracingGui modules provide several methods to write scene contents as povray or luxrender data. The most useful are Raytracing.getPartAsPovray() and Raytracing.getPartAsLux() to render a FreeCAD Part object into a povray or luxrender definition, and RaytracingGui.povViewCamera() and RaytracinGui.luxViewCamera() to get the current point of view of the FreeCAD 3D window into povray or luxrender format.
Voici comment utiliser ces fonctions depuis l'interface Python :
 import Raytracing,RaytracingGui
 OutFile = open('C:/Documents and Settings/jriegel/Desktop/test.pov','w')
 OutFile.write(open(App.getResourceDir()+'Mod/Raytracing/Templates/ProjectStd.pov').read())
 OutFile.write(RaytracingGui.povViewCamera())
 OutFile.write(Raytracing.getPartAsPovray('Box',App.activeDocument().Box.Shape,0.800000,0.800000,0.800000))
 OutFile.close()
 del OutFile
And the same for luxrender:
 import Raytracing,RaytracingGui
 OutFile = open('C:/Documents and Settings/jriegel/Desktop/test.lxs','w')
 OutFile.write(open(App.getResourceDir()+'Mod/Raytracing/Templates/LuxClassic.lxs').read())
 OutFile.write(RaytracingGui.luxViewCamera())
 OutFile.write(Raytracing.getPartAsLux('Box',App.activeDocument().Box.Shape,0.800000,0.800000,0.800000))
 OutFile.close()
 del OutFile
Creating a custom render object
Apart from standard povray and luxrender view objects, that provide a view of an existing Part object, and that can be inserted in povray and luxrender projects respectively, a third object exist, called RaySegment, that can be inserted either in povray or luxrender projects. That RaySegment object is not linked to any of the FreeCAD objects, and can contain custom povray or luxrender code, that you might wish to insert into your raytracing project. You can also use it, for example, to output your FreeCAD objects a certain way, if you are not happy with the standard way. You can create and use it like this from the python console:
 myRaytracingProject = FreeCAD.ActiveDocument.PovProject
 myCustomRenderObject = FreeCAD.ActiveDocument.addObject("Raytracing::RaySegment","myRenderObject")
 myRaytracingProject.addObject(myCustomRenderObject)
 myCustomRenderObject.Result = "// Hello from python!"
Liens
POVRay
- http://www.spiritone.com/~english/cyclopedia/
- http://www.povray.org/
- http://en.wikipedia.org/wiki/POV-Ray
Luxrender
Autres moteurs de rendu libres (pour implémentation à venir) :
Actuellement, il y a un nouvel atelier de Rendu en développement à l'appui de plusieurs back-ends comme moteur de rendu de Lux Renderer et Yafaray. Des informations pour l'utilisation de la version en développement peuvent être consultées ici Render_project
Regardez ici pour l'état de développement du Module restituer Raytracing_project
Templates
FreeCAD est livré avec une paire de modèles par défaut pour povray et luxrender, mais vous pouvez facilement créer votre propre modèle. Tout ce que vous devez faire est de créer un fichier de scène pour le moteur de rendu donné, puis avec un éditeur de texte, modifiez le manuellement pour insérer une balise spéciale que FreeCAD reconnaîtra et où il insérera son contenu (données de caméra et objets)
Povray
Povray scene files (with extension .pov) can be created manually with a text editor (povray is made primarily to be used as a scripting language), but also with a wide range of 3D applications, such as blender. On the povray website you can find further information and a list of applications able to produce .pov files.
When you have a .pov file ready, you need to open it with a text editor, and do two operations:
- Strip out the camera information, because FreeCAD will place its own camera data. To do so, locate a text block like this: camera { ... }, which describes the camera parameters, and delete it (or put "//" in front of each line to comment them out).
- Insert the following line somewhere: //RaytracingContent. This is where FreeCAD will insert its contents (camera and objects data). You can, for example, put this line at the very end of the file.
Note that FreeCAD will also add some declarations, that you can use in your template, after the //RaytracingContent tag. These are:
- cam_location: the location of the camera
- cam_look_at: the location of the target point of the camera
- cam_sky: the up vector of the camera.
- cam_angle: the angle of the camera
If you want, for example, to place a lamp above the camera, you can use this:
 light_source {
  cam_location + cam_angle * 100
  color rgb <10, 10, 10>
 }
Luxrender
Luxrender scene files (with extension.lxs) can either be single files, or a master .lxs file that includes world definition (.lxw), material definition (.lxm) and geometry definition (.lxo) files. You can work with both styles, but it is also easy to transform a group of 4 files in a single .lxs file, by copying the contents of each .lxw, .lxm and .lxo file and pasting it at the point where that file is inserted in the master .lxs file.
Luxrender scene files are hard to produce by hand, but are easy to produce with many 3D applications such as blender. On the luxrender website, you'll find more information and plugins for the main 3D applications out there.
If you will work with separated .lxw, .lxm and .lxo files, beware that the final .lxs exported by FreeCAD might be at a different location than the template file, and therefore these files might not be found by Luxrender at render time. In this case you should or copy these files to the location of your final file, or edit their paths in the exported .lxs file.
If you are exporting a scene file from blender, and wish to merge everything into one single file, you will need to perform one step before exporting: By default, the luxrender exporter in blender exports all mesh geometry as separate .ply files, instead of placing the mesh geometry directly inside the .lxo file. To change that behaviour, you need to select each of your meshes in blender, go to the "mesh" tab and set the option "export as" to "luxrender mesh" for each one of them.
After you have your scene file ready, to turn it into a FreeCAD template, you need to perform the following steps:
- Locate the camera position, a single line that begins with LookAt, and delete it (or place a "#" at the beginning of the line to comment it out)
- At that place, insert the following line: #RaytracingCamera
- At a desired point (for example just after the end of the materials definition, before the geometry information, or at the very end, just before the final WorldEnd line, insert the following line: #RaytracingContent. That is where FreeCAD will insert its own objects.
Note that in luxrender, the objects stored in a scene file can define transformation matrixes, that perform location, rotation or scaling operations. These matrixes can stack and affect everything that come after them, so, by placing your #RaytracingContent tag at the end of the file, you might see your FreeCAD objects affected by a transformation matrix placed earlier in the template. To make sure that this doesn't happen, place your #RaytracingContent tag before any other geometry object present in the template. FreeCAD itself won't define any of those transformation matrixes.

