PartDesign AdditiveTorus/pl: Difference between revisions
(Created page with "==Użycie==") |
(Created page with "# Naciśnij przycisk {{Button|24px '''Addytywny torus'''}}. '''Uwaga''': Addytywny torus jest częścią menu narzędzi o nazwie '''Utwórz bryłę pierwotną do dodania'''. Po uruchomieniu programu FreeCAD, Addytywny prostopadłościan wyświetlany jest na pasku narzędzi domyślnie. Aby przejść do funkcji Torus, kliknij strzałkę w dół na widocznej ikonce i wybierz z menu opcję Addytywny walec. # Ustaw parametry bryły i P...") |
||
| Line 29: | Line 29: | ||
==Użycie== |
==Użycie== |
||
# |
# Naciśnij przycisk {{Button|[[Image:PartDesign AdditiveTorus.svg|24px]] '''Addytywny torus'''}}. '''Uwaga''': Addytywny torus jest częścią menu narzędzi o nazwie '''Utwórz bryłę pierwotną do dodania'''. Po uruchomieniu programu FreeCAD, Addytywny prostopadłościan wyświetlany jest na pasku narzędzi domyślnie. Aby przejść do funkcji Torus, kliknij strzałkę w dół na widocznej ikonce i wybierz z menu opcję Addytywny walec. |
||
# |
# Ustaw parametry bryły i [[Part_EditAttachment/pl|dołączenia]]. |
||
# |
# Kliknij {{Button|OK}}. |
||
# Pod aktywnym obiektem Zawartość pojawi się element Torus. |
|||
# A Torus feature appears under the active Body. |
|||
= |
<span id="Options"></span> |
||
==Opcje== |
|||
The Torus can be edited after its creation in two ways: |
The Torus can be edited after its creation in two ways: |
||
Revision as of 07:51, 17 June 2023
|
|
| Lokalizacja w menu |
|---|
| Projekt Części → Utwórz cechę przez dodanie → Addytywny torus |
| Środowisko pracy |
| Projekt Części |
| Domyślny skrót |
| brak |
| Wprowadzono w wersji |
| 0.17 |
| Zobacz także |
| Komponent bryła pierwotna do dodania, Subtraktywny torus |
Opis
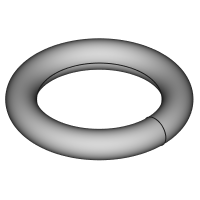
Wstawia pierwotny torus do aktywnej Zawartości jako pierwszy element lub łączy go z istniejącymi elementami.
Użycie
- Naciśnij przycisk
Addytywny torus. Uwaga: Addytywny torus jest częścią menu narzędzi o nazwie Utwórz bryłę pierwotną do dodania. Po uruchomieniu programu FreeCAD, Addytywny prostopadłościan wyświetlany jest na pasku narzędzi domyślnie. Aby przejść do funkcji Torus, kliknij strzałkę w dół na widocznej ikonce i wybierz z menu opcję Addytywny walec.
- Ustaw parametry bryły i dołączenia.
- Kliknij OK.
- Pod aktywnym obiektem Zawartość pojawi się element Torus.
Opcje
The Torus can be edited after its creation in two ways:
- Double-clicking it in the Model tree, or by right-clicking and selecting Edit primitive in the contextual menu; this brings up the Primitive parameters.
- Via the Property editor.
Properties
- DANEAttachment: defines the attachment mode as well as the Attachment Offset. See Part EditAttachment.
- DANELabel: Label given to the Torus object. Change to suit your needs.
- DANERadius1: Radius of the imaginary orbit around which the circular cross-section revolves. (The distance between the center of the torus and the center of the revolving cross section)
- DANERadius2: Radius of the circular cross-section defining the form of the torus.
- DANEAngle1: (labelled V parameter in the Primitive parameters) lower truncation of the torus, parallel to the circular cross section (-180 degrees in a full torus). A bug in the sources causes unexpected results at changing Angle1.
- DANEAngle2: (unlabelled in the Primitive parameters) upper truncation of the ellipsoid, parallel to the circular cross section (180 degrees in a full torus). A bug in the sources causes unexpected results at changing Angle2.
- DANEAngle3: (labelled U parameter in the Primitive parameters) angle of rotation of the circular cross section (360 degrees in a full torus).
- Narzędzia struktury: Część, Grupa
- Narzędzia wspomagające: Utwórz zawartość, Nowy szkic, Edycja szkicu, Mapuj szkic na ścianę
- Narzędzia do modelowania
- Narzędzia do ustalania położenia punktów odniesienia: Utwórz punkt odniesienia, Utwórz linię odniesienia, Utwórz płaszczyznę odniesienia, Układ współrzędnych, Łącznik kształtu, Łącznik kształtów podrzędnych, Utwórz klon
- Narzędzia addytywne: Wyciągnięcie, Wyciągnij przez obrót, Wyciągnięcie przez profile, Wyciągnięcie po ścieżce, Addytywna helisa, Addytywny sześcian, Addytywny walec,Addytywna sfera, Addytywny stożek, Addytywna elipsoida, Addytywny torus, Addytywny graniastosłup, Addytywny klin
- Narzędzia subtraktywne: Kieszeń, Otwór, Rowek, Subtraktywne wyciągnięcie przez profile, Subtraktywne wyciągnięcie po ścieżce, Subtraktywna helisa, Subtraktywny sześcian, Subtraktywny walec, Subtraktywna sfera, Subtraktywny stożek, Subtraktywna elipsoida, Subtraktywny torus,Subtraktywny graniastosłup, Subtraktywny klin
- Narzędzia do transformacji: Odbicie lustrzane, Szyk liniowy, Szyk kołowy, Transformacja wielokrotna, Skaluj
- Narzędzia ulepszające: Zaokrąglenie, Fazka, Pochylenie ścian, Grubość
- Funkcje logiczne Funkcje logiczne
- Dodatki: Przenieś, Koło łańcuchowe, Koło zębate ewolwentowe, Kreator projektowania wału
- Narzędzia menu kontekstowego: Ustaw czubek, Przenieś cechę, Przenieś cechę w drzewie, Wygląd zewnętrzny, Ustaw kolor
- Jak zacząć
- Instalacja: Pobieranie programu, Windows, Linux, Mac, Dodatkowych komponentów, Docker, AppImage, Ubuntu Snap
- Podstawy: Informacje na temat FreeCAD, Interfejs użytkownika, Profil nawigacji myszką, Metody wyboru, Nazwa obiektu, Edytor ustawień, Środowiska pracy, Struktura dokumentu, Właściwości, Pomóż w rozwoju FreeCAD, Dotacje
- Pomoc: Poradniki, Wideo poradniki
- Środowiska pracy: Strona Startowa, Architektura, Assembly, CAM, Rysunek Roboczy, MES, Inspekcja, Siatka, OpenSCAD, Część, Projekt Części, Punkty, Inżynieria Wsteczna, Robot, Szkicownik, Arkusz Kalkulacyjny, Powierzchnia 3D, Rysunek Techniczny, Test Framework
