CAM Walkthrough for the Impatient
Here is a demonstration showing the creation of a Path WB Job from a 3D Model, generating G-Code for a target CNC mill using its specialized G-Code dialect.
The 3D Model
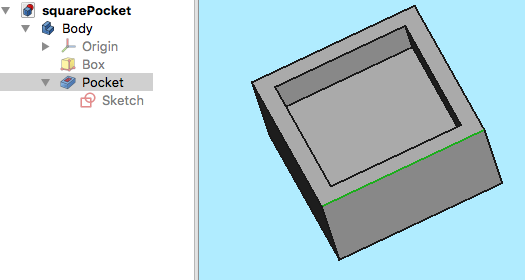
The Project begins with a simple FreeCAD model: a cube with a rectangular pocket,
created in the Part Design including a Body, a Box with a Pocket, based on a Sketch oriented in the XY plane.
With the 3D Model completed, the Path Workbench is selected.
The Job
The ![]() Job is created.
Job is created.
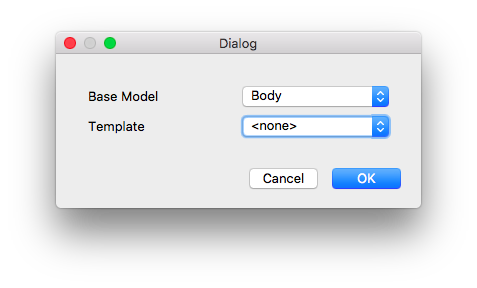
In the Job creation dialog click OK to accept the Body as the Base Model, with no Template.
Job Setup
The Job Edit window opens in the Task window, and the model view Window shows the Stock as a wire frame cube surrounding the Base Body. The Setup Tab is selected.
Output
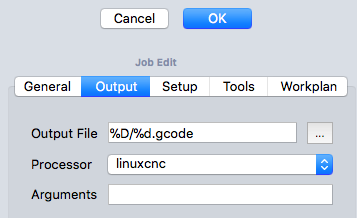
The Output tab defines the output file path, name, and extension, and the Postprocessor. For advanced users, Post Processor Arguments can be defined—the mouse over hints show common arguments.
Job Tools
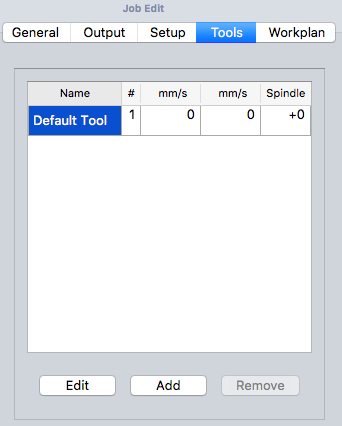
The Tools tab allows importing Tool-Controllers from the Tools defined tool in the Tool Manager—the Add button opens the Tool Manager window. Tools can be defined, and Tool-Controllers created throughout creation of the Path Job.
Job Workplan
The Workplan tab begins empty, and is populated by the sequence of Job Operations, Partial Path Commands, and Path Dressups. The sequence of these items is ordered here.
The Tool Library
Tool attributes are entered, or imported, and stored in the Tool Library. Tool-Controllers are Tooltable created from this window.
The Tool Controller
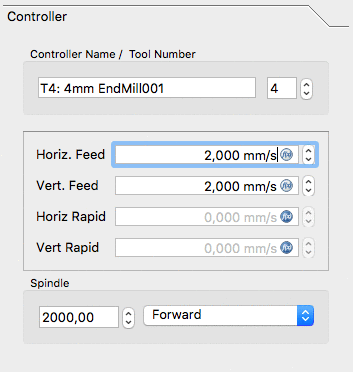
The job is configured for Horizontal and Vertical Feed rates of 2mm/s and a Spindle speed of 2000 rpm.
Note that Tool-Controllers use a Tool definition—and the SetupSheet for default Rapids Feed rates—as inputs. Double-clicking the Tool-Controller and finalizing settings such as:
- Horizontal and Vertical Feed and Rapid Feed rates.
- Spindle Speed and CW or CCW rotation.
- The Tool Index.
- The Tool-Controller unique name.
The Tool-Controller contains Feeds and Speeds for Tool attributes imported from the definitions in the Tool Library.
A single Tool definition may be used to define multiple Tool-Controllers, configured at different Feeds, Speed, and Rotation, within a Path Job, accommodating roughing and finish passes.
File:Path-ToolCreateController.png
Don't forget to click the "Create Tool Controller(s)" button.
The default Tool-Controller may be modified, left unused, or deleted.
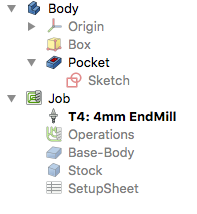
The tree is shown once the Path Job is unfolded:
The Path Operations
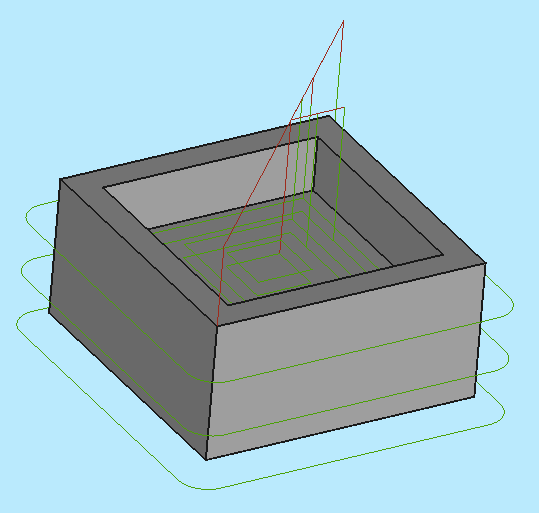
Two operations are selected to generate milling paths for this Path Job. The Contour operation creates a path around the box and the Pocket operation creates a path for the inner pocket.
For now we will keep it simple. The ![]() Contour button opens the Contour panel. After confirming with OK using the default values, see the green path around the object is visible.
Contour button opens the Contour panel. After confirming with OK using the default values, see the green path around the object is visible.
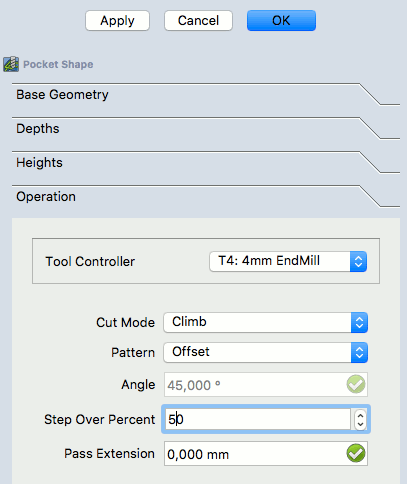
Selecting the bottom of the pocket and then the ![]() Pocket button opens the Pocket Shape window. The Base Geometry, Depths, and Heights are not modified, and the Operation subpanel is selected, allowing the Step Over Percent is set at 50.
Pocket button opens the Pocket Shape window. The Base Geometry, Depths, and Heights are not modified, and the Operation subpanel is selected, allowing the Step Over Percent is set at 50.
The pattern is changed to "Offset" and the Job Operation is confirmed for the pocket configuration with OK.
The result is a model with two paths:
Verifying Paths
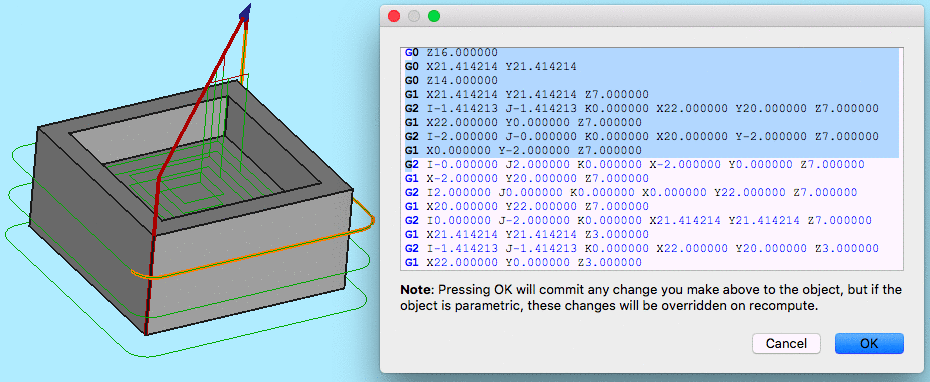
There are two ways to verify the created paths. The G-Code can be inspected, including highlighting the corresponding path segments. The milling process of the Path Job can also be simulated to demonstrate the idealized tool paths, required for the Tool geometries to mill the Stock.
To inspect the G-Code use the ![]() tool. Selecting the corresponding G-Code lines within the G-Code Inspection window highlights individual path segments.
tool. Selecting the corresponding G-Code lines within the G-Code Inspection window highlights individual path segments.
To start the simulation use the ![]() Path Simulator tool.
Path Simulator tool.
Postprocess the Job
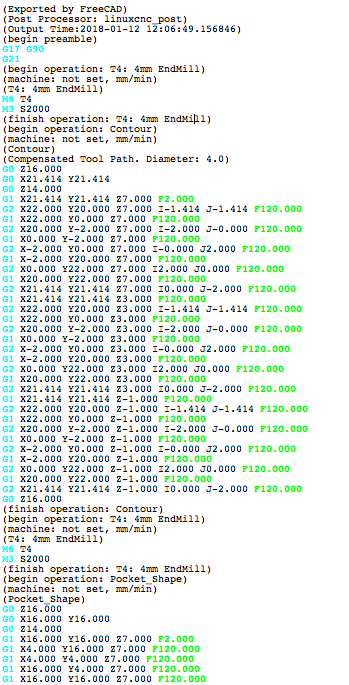
The final step to have G-Code for the target mill is to postprocess the Job. This outputs the G-Codes to a file that can be uploaded to the target CNC machine controller. To invoke the Postprocessor:
